By using this website, you agree to our use of cookies (needed to provide our website’s features) and our Terms of Use.
By: Andrew Forrest - June 2026
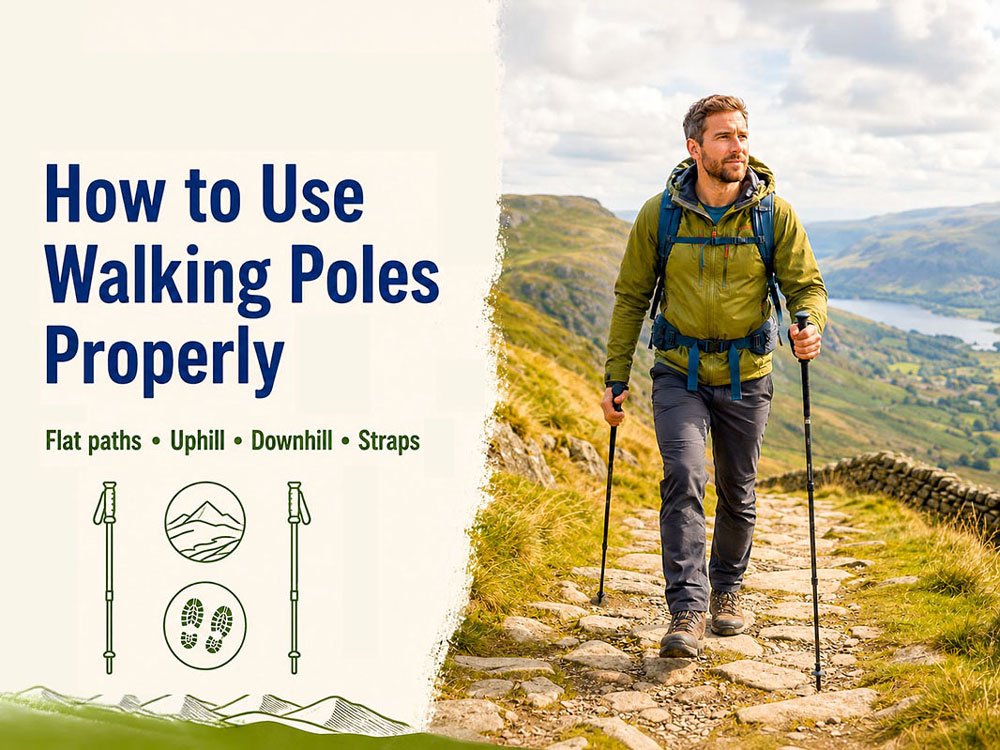
Learn how to use walking poles on flat paths, uphill and downhill, set the right length, use straps safely, and avoid common trekking pole mistakes.
This page contains affiliate links. As an Amazon Associate, we earn from qualifying Amazon purchases at no additional cost to you. We may also earn commissions from other retailers, again at no additional cost to you.
Walking poles are simple bits of kit, but they are surprisingly easy to use badly. Too long, and they push your shoulders up. Too short, and you hunch forward. Planted too far ahead, they can break your stride. Held too tightly, they tire your hands before they help your legs.
When used well, walking poles can improve rhythm, balance and control on rough ground. They are especially useful on steep UK descents, muddy paths, rocky steps, long backpacking days and the tired end-of-walk miles. The key is not to lean your full body weight onto them, but to use them as light, repeatable support.
Health & Wellness Disclaimer
The information in this article is intended for general education, to build walking confidence and outdoor wellbeing. It is designed to help walkers use walking poles more safely and effectively on flat paths, as well as on climbs and descents.
Walking poles can affect balance, posture, effort levels, and the distribution of load through your wrists, shoulders, hips, knees and ankles. If you have any medical condition affecting your joints, balance, circulation, sensation, mobility or bone health - including arthritis, osteoporosis, diabetes, neuropathy, dizziness, a history of falls, or ongoing knee, hip, ankle or back pain - or if you are recovering from injury or surgery, speak to your GP, physiotherapist, podiatrist or healthcare professional before relying on walking poles for support or pain management.
If you are new to hillwalking, returning to exercise after a long break, increasing your walking distance, or tackling steeper terrain, build up gradually and choose routes that match your current fitness, confidence, and mobility.
This article is for general educational purposes only and should not be taken as medical advice, diagnosis or a substitute for professional healthcare. If you experience severe pain, sudden weakness, chest pain, shortness of breath, dizziness, numbness, a fall injury or any other serious symptoms, stop walking and seek appropriate medical help. For personalised advice, always consult a qualified healthcare professional.
Walking poles work best when set to the right length, planted lightly beside or slightly ahead of you, and used to support rhythm and balance rather than to bear your full weight. On flat paths, use an opposite arm/opposite leg rhythm. Uphill, shorten the poles slightly and push down and back. Downhill, lengthen them slightly, plant them ahead of each step, keep your knees soft, and shorten your stride.
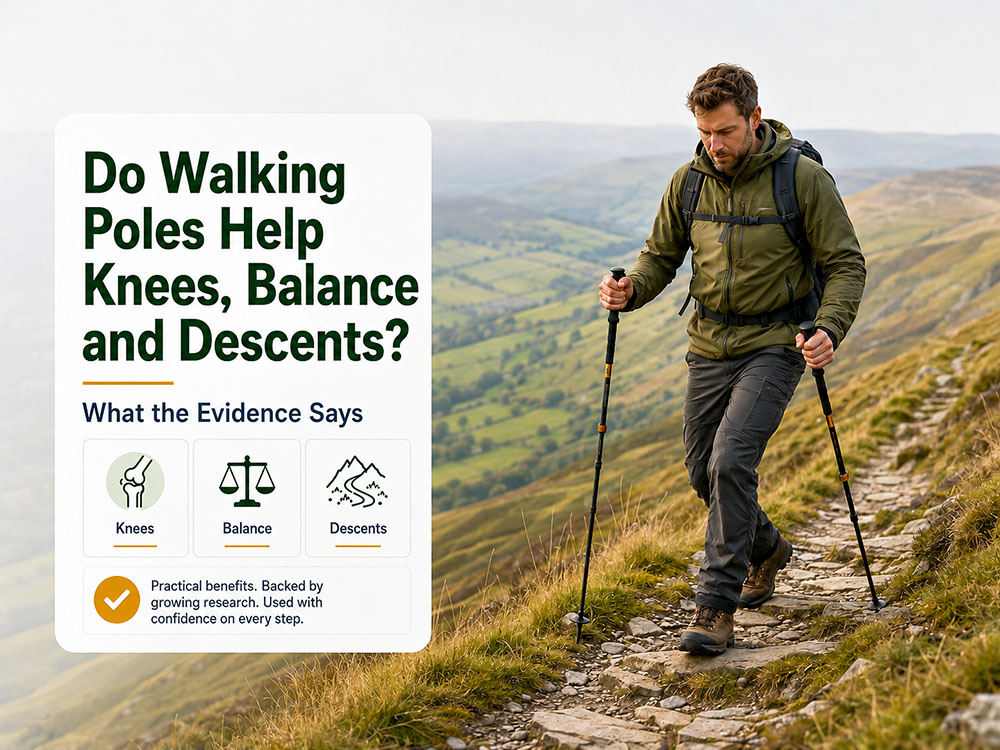
On descents, good technique matters. In a study of downhill walking, using hiking poles reduced tibiofemoral knee forces, the forces passing through the main knee joint where the thigh bone meets the shin bone by roughly 12-25%. It also reduced knee flexion moments, the turning forces involved as the knee bends, by about 15-20% per step.[3] That does not mean poles completely remove knee strain, but it shows why controlled pole placement can make a real difference on long descents.
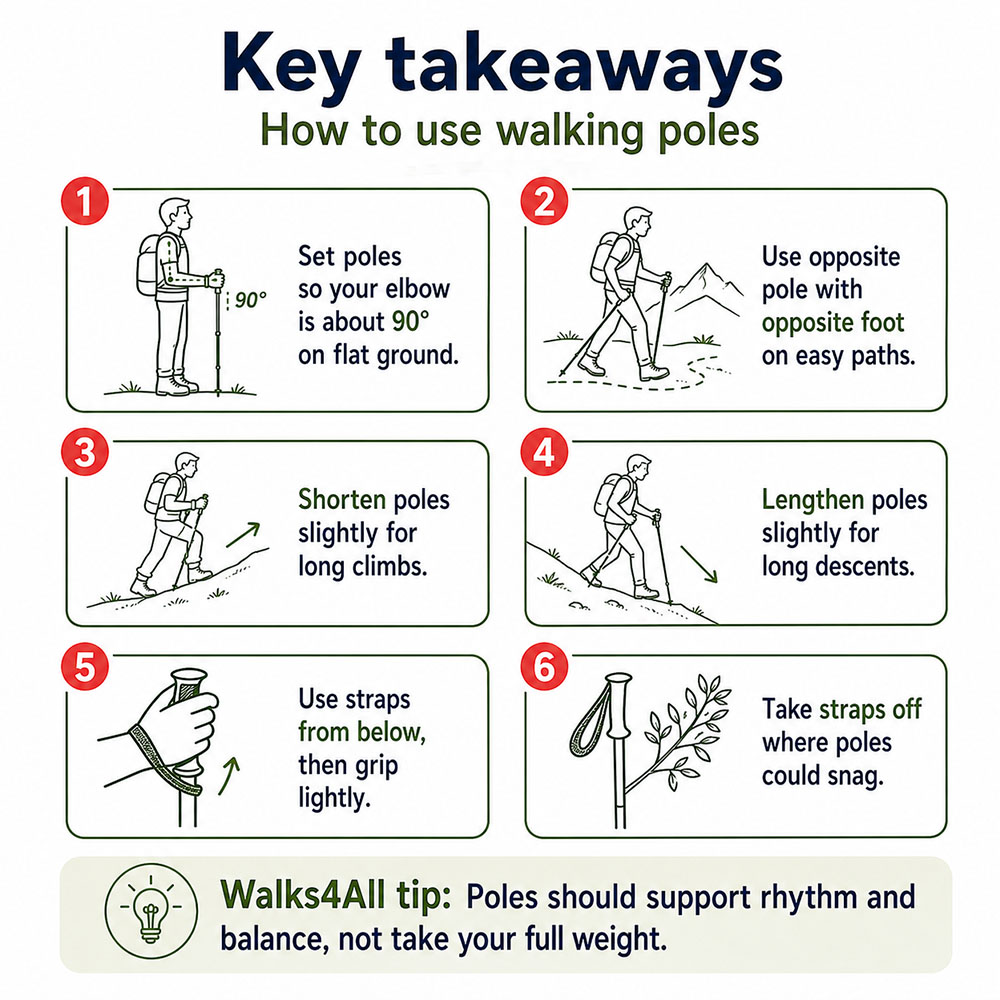
The main technique reminders: set the poles to about a 90-degree elbow, adjust for gradients, and remove straps where the poles could snag.
The best evidence supports a balanced message: poles can reduce some lower-body loading, especially on descents and when carrying a pack, but they are not a magic knee-saver. A review of trekking pole research found that poles may reduce lower-extremity loading, but they can also increase cardiovascular demand because more upper-body muscle is engaged.[1]
A broader 2023 review of pole use across sports reached a similar conclusion: poles can shift some load away from the lower limbs and towards the upper body, while increasing overall metabolic stress. In plain English, poles may help your legs and stability, but your arms, shoulders and lungs may do more work.[2]
Downhill walking is where poles are often most useful. Biomechanical research on downhill walking has found that hiking poles can reduce knee joint forces during descent.[3] Another study examining downhill hiking with external loads found reductions in forces, moments, and power at the lower-limb joints when using poles.[4]
The evidence is more mixed for flat ground and, in some contexts, for knee osteoarthritis. One level-walking study found reductions in vertical ground reaction force and knee joint reaction force when using poles[7], but other research has found that Nordic walking does not always reduce knee loading on flat terrain.[12]
The evidence is also mixed in people with a bow-legged pattern of knee osteoarthritis, sometimes called varus gonarthrosis. This means the knee is affected by osteoarthritis and angles in a way that tends to put more load through the inner, or medial, side of the joint. In one study of people with this condition, walking with poles did not consistently reduce the knee adduction moment, a biomechanical measure often used to estimate loading through the inner knee. The authors suggested that differences in individual walking pole technique may help explain why results varied between people.[11]
The practical takeaway is simple: poles are most effective when you actually use them to share the load and stabilise movement. Carrying them loosely behind you, stabbing them too far forward, or gripping them like ski handles removes much of the benefit.
| What the research found | Context | What it means for walkers |
| Around 12-25% lower knee tibiofemoral force and 15-20% lower knee flexion moment | Downhill walking with hiking poles[3] | Strong support for using poles carefully on long descents |
| Reduced forces, moments and power at the ankle, knee and hip | Downhill hiking with external loads[4] | Particularly relevant when descending with a pack |
| Less soreness at 24 and 48 hours, and lower creatine kinase at 24 hours | Mountain walking with poles[5] | Poles may help you feel less battered after long descents |
| Reduced markers of muscle and cartilage damage | Downhill treadmill walking with poles[6] | Useful evidence of descent-related muscle stress, though not a guarantee of joint protection |
| Reduced vertical ground-reaction force and knee joint reaction force | Level walking with poles[7] | Poles can affect loading on flat ground, but findings are not universal |
| No clear reduction in knee compression on level walking in healthy participants | Level walking study[12] | Do not assume poles always unload knees on easy terrain |
| Up to about 34% lower medial knee contact force with long, wide pole placement | Instrumented implant, single-subject study [9]Instrumented implant, single-subject study[9] | Interesting mechanistic evidence, but not an average result for all walkers |
| 27% lower medial knee contact force during a walking-pole gait | Instrumented implant, single-subject study[10] | Promising proof of concept, but should be treated cautiously |
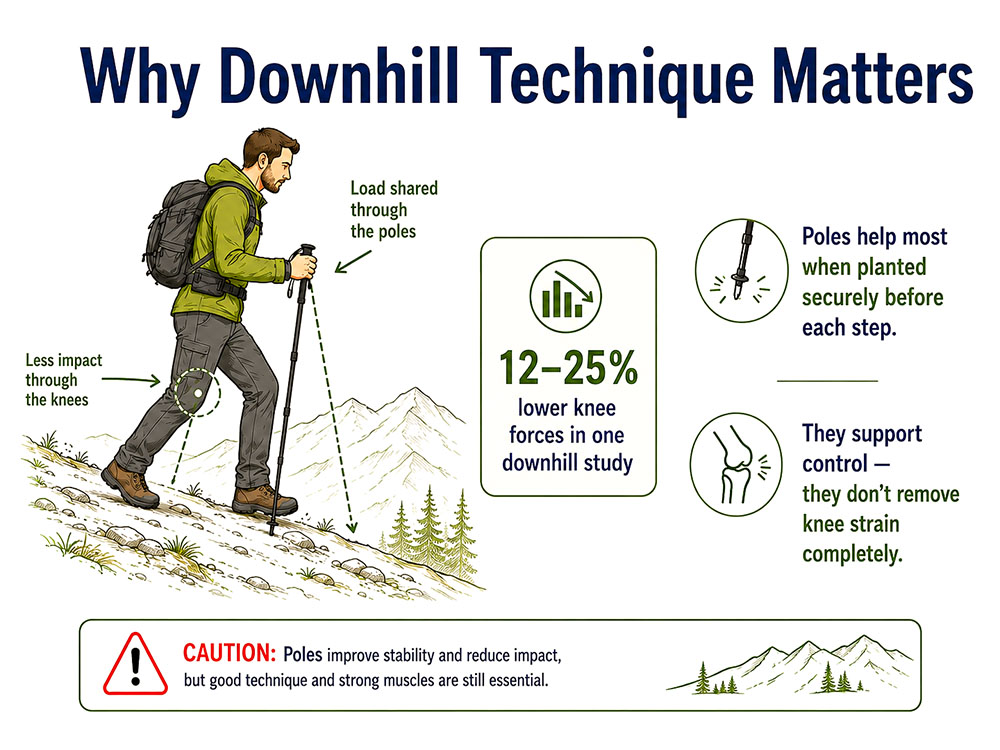
Good downhill technique can help share load through the poles, but poles support control rather than completely removing knee strain.
Start on flat ground. Stand upright with your shoulders relaxed, your elbows close to your sides, and the pole tips on the ground near your feet. Adjust each pole until your elbow forms roughly a right angle.
That gives you a neutral starting point for pavements, forest tracks, moorland paths, and gentle inclines.
Before you set off, check the following four things:
A good starting length is just a starting length. On UK hill routes, you may shorten or lengthen your poles several times as the ground changes.
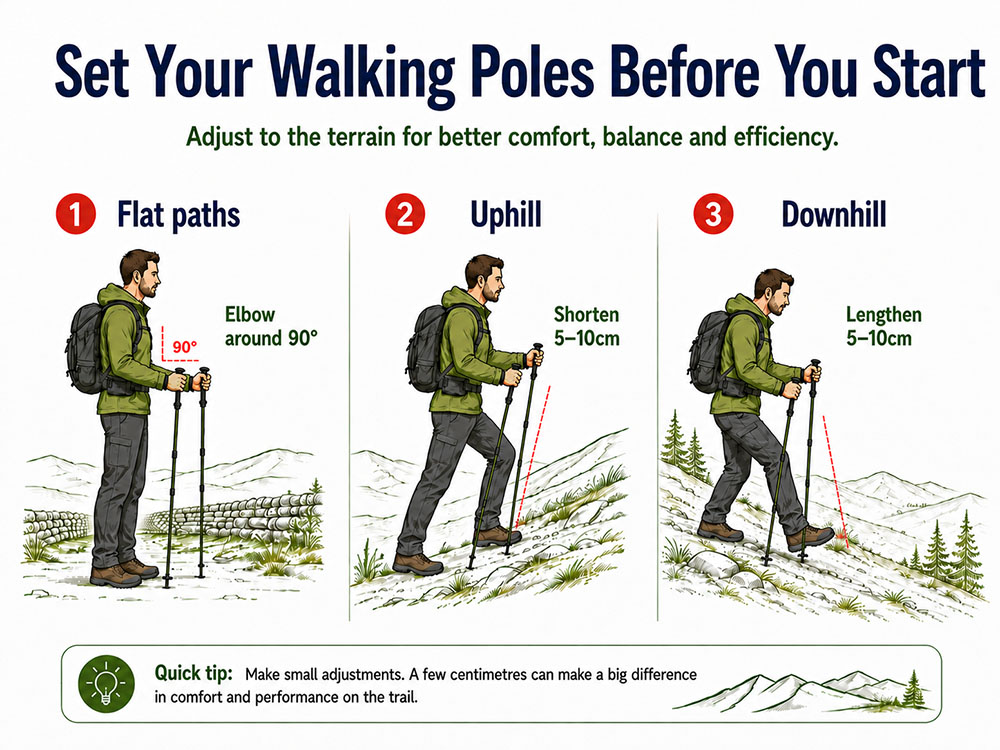
Start with a neutral flat-ground pole length, then shorten for sustained climbs and lengthen slightly for descents.
On flat or gently rolling paths, the easiest walking-pole technique is the natural opposite-side rhythm:
Left pole moves with right foot. The right pole moves with the left foot.
This mirrors your normal arm swing. The pole tip should usually land close to your side or just behind the leading foot, not far out in front like a crutch. Think of the pole as helping you glide forward, not as a stopper.
Use this sequence:
Keep your elbows soft, shoulders low, and hands relaxed. A light grip is sufficient. The strap should help you apply pressure through the heel of your hand without squeezing the handle all day.
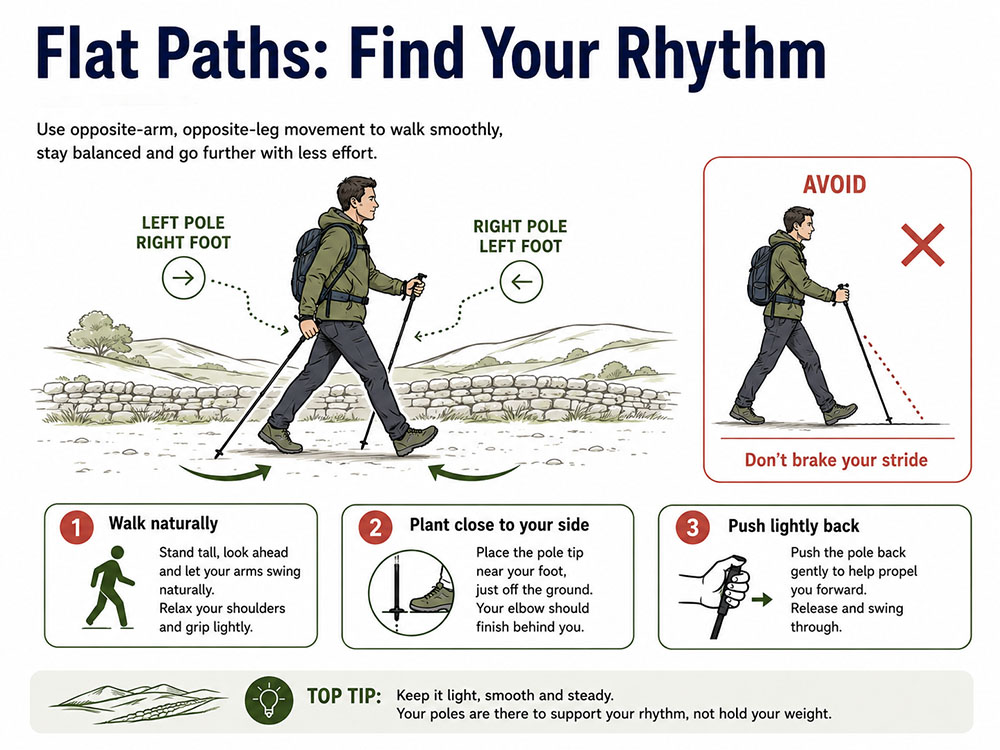
On easy paths, keep pole tips close to the body and use the opposite pole with the opposite foot to maintain rhythm.
On easy paths, aim to plant each tip roughly level with your opposite foot, or just behind it. If the pole lands too far ahead, it acts as a brake. If it lands too far behind, it becomes more of a token gesture than useful support.
On rougher ground, exact rhythm matters less. Prioritise secure placement. A careful pole plant on a wet rock, in a muddy rut, or on loose stone is better than a perfect rhythm with a slipping tip.
When the path climbs for more than a few minutes, shorten your poles by about 5-10 cm. This keeps your shoulders relaxed and gives you a better angle to push down and back.
On uphill ground, your aim is not to pull yourself up by your arms. That gets tiring quickly. Instead, use the poles to add rhythm and share the effort with your upper body.
Research on uphill backpacking found that hiking poles helped redistribute effort away from the lower limbs, reducing leg muscle activity and perceived exertion, although heart rate was slightly higher.[8] That aligns with the practical feel of using poles uphill: your legs may feel less isolated, but your whole body is doing more of the work.
Use short, steady steps. Plant the pole slightly ahead of or beside your foot, then push down through the strap as you step up. Keep your hands low enough that your shoulders do not rise towards your ears.
For moderate climbs, maintain the normal opposite-pole/opposite-foot rhythm.
For steep steps, rock staircases, or boggy ledges, use a double-pole plant:
This is useful on Lake District stone-pitched paths, Snowdonia steps, Peak District gritstone edges, Scottish bealach climbs, and any route where the ground rises in uneven chunks rather than a smooth slope.
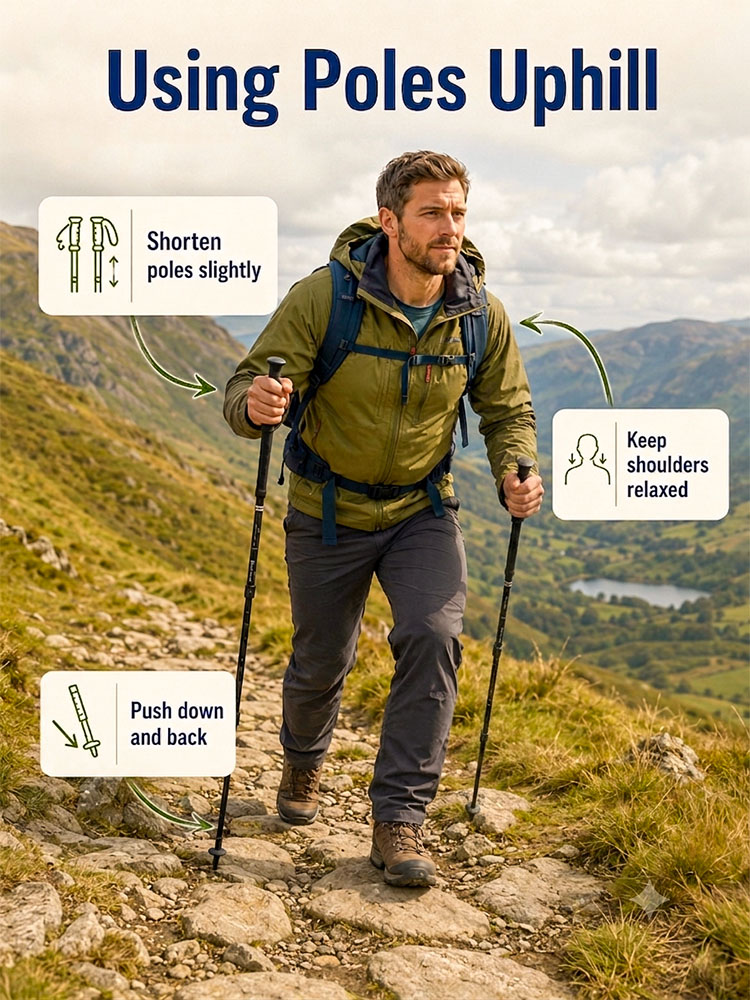
For climbs, shorten the poles slightly and push down and back without raising your shoulders.
If the climb is brief, you do not always need to adjust the pole length. Many walking poles have extended foam grips below the handle. On a short uphill pitch, take your hands out of the straps and hold lower down the grip instead. This gives you a shorter effective pole length without stopping to adjust the locks.
Using walking poles downhill is where good technique matters most. Descents are when tired legs, wet rock, loose gravel and heavy packs combine. Poles can help, but only if they are placed securely before you load them.
For longer descents, lengthen your poles by about 5-10 cm from your flat-ground setting. This helps you stay upright and makes it easier to plant the poles slightly ahead of you.
Biomechanics research supports the idea that poles can reduce knee and lower-limb loading during downhill walking, but the benefit depends on using them with control rather than simply carrying them.[3] [4]
Use this pattern:
On gentle descents, use the standard opposite-side rhythm.
On steep, rocky or muddy descents, move more deliberately. Plant both poles ahead, then step down between them. This gives you three or four points of contact and helps slow your descent.
Do not jab poles too far down the hill. If the pole is too far ahead, it can slip, bend or pull you forward. Keep the pole angle comfortable and your weight mostly over your feet.
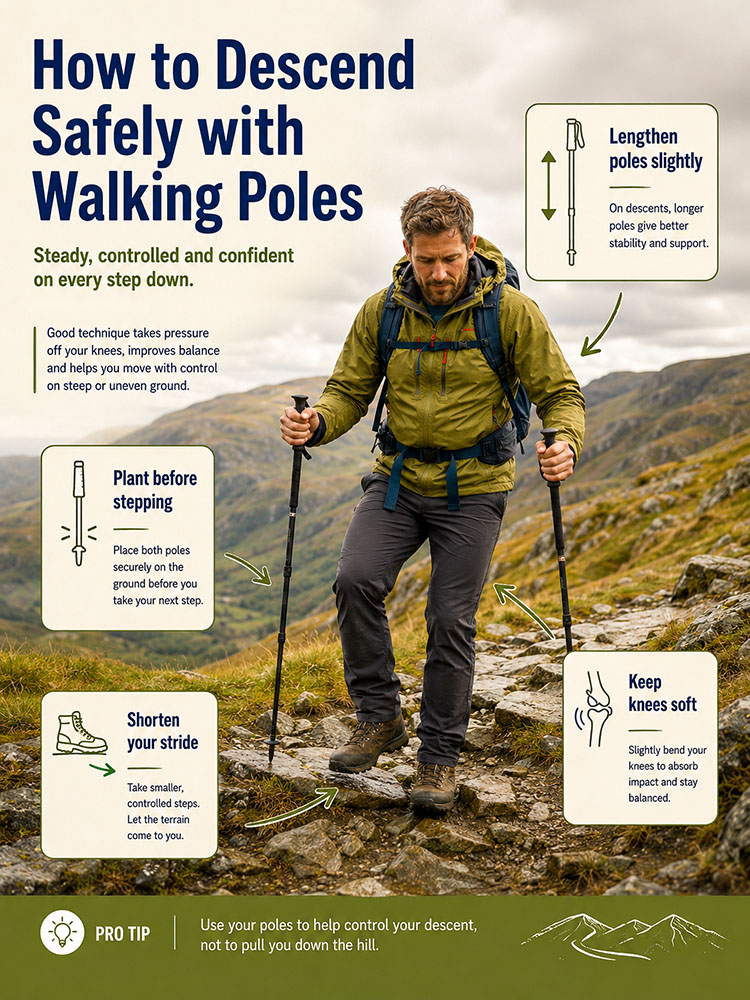
On descents, plant poles securely before each step, keep your knees soft and take shorter, controlled steps.
The biggest mistake is leaning back. It may feel cautious, but it can make your feet slide out. Keep your centre of mass over your feet, soften your knees and look a few steps ahead rather than staring at your boots.
On long descents, shorter steps matter as much as the poles themselves. Descending subjects the legs to repeated braking forces, and pole use is most helpful when paired with controlled foot placement, bent knees and a steady pace.[1] [3] [4]
This is one of the most useful benefits for regular hillwalkers. Poles may not make a big mountain day effortless, but they can reduce how battered your legs feel afterwards.
In a mountain-walking study on Snowdon, walkers using trekking poles experienced less delayed-onset muscle soreness at 24 and 48 hours. They also had lower creatine kinase levels at 24 hours, suggesting less exercise-related muscle damage and better preservation of muscle strength after the walk.[5]
Another study on downhill walking found that poles reduced markers of muscle and cartilage damage during a treadmill descent.[6]
That does not mean poles completely prevent soreness. Long descents still require eccentric muscle work in your quads and calves. However, it is good evidence for the practical value of using poles properly on long downhill routes.
Walking pole straps are not just there to stop you from dropping your poles. Used correctly, they let you push through the heel of your hand without squeezing the grip all day long.
The correct method is:
The strap should support the heel of your hand as you press down and back. If your fingers are doing all the work, the strap is likely too loose, too tight, or being used incorrectly.
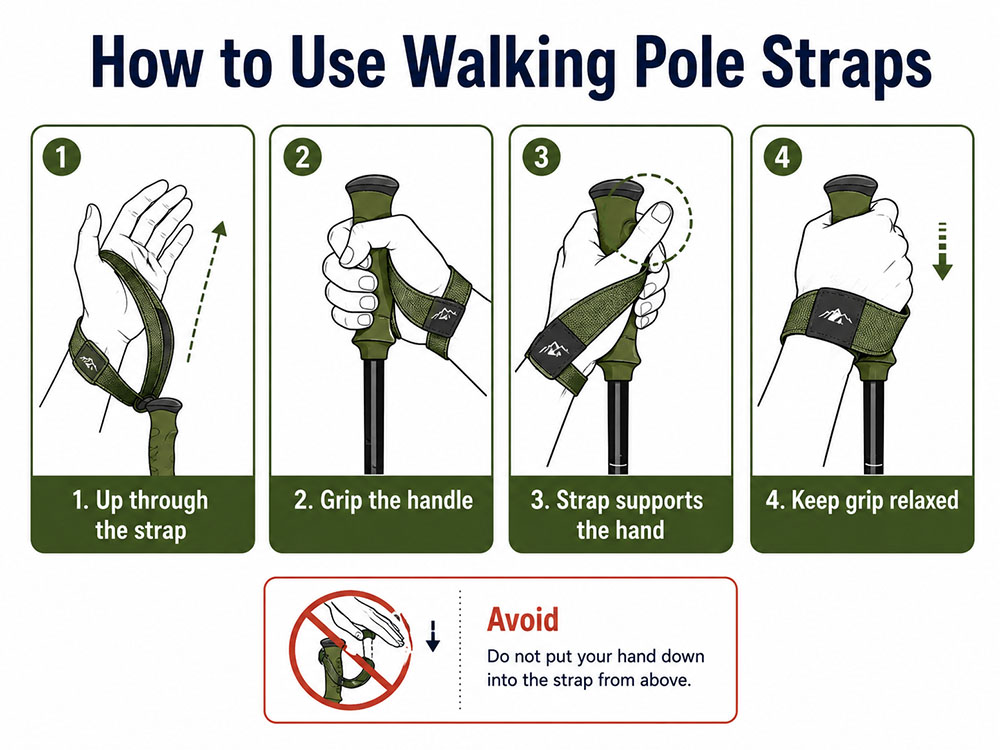
Use straps from below so the strap supports the heel of the hand, rather than forcing a tight grip all day.
The strap should be snug enough to support your hand when you press down, but not so tight that it restricts movement or circulation. You should be able to release your grip briefly without the pole dropping away, yet you should not feel trapped.
Gloves can make walking pole straps feel tighter, especially in winter. If you are wearing thick gloves or mittens, loosen the straps so the webbing sits comfortably around your hand without pinching or forcing your grip. You should still be able to quickly remove your hand from the strap if the pole snags, slips, or wedges.
If you are using poles for several hours and your hands start to feel sore, thin walking gloves or liner gloves can help reduce friction on the grips and straps. They are not essential for everyone, but they can be useful if you develop hot spots, blisters or pressure points on long walks.
Avoid sore hands by gripping harder. A relaxed grip, correctly adjusted straps and occasional hand movement are usually more important than wearing thicker gloves.
Take your hands out of the straps when a pole could pose a hazard. This includes scrambling sections, river crossings, steep rocky descents, boardwalk gaps, boulder fields, narrow stiles, ladders, or any terrain where a pole could wedge, snag or pull your wrist during a slip or fall.
Poles can slip between rocks, jam in gaps or catch on roots. If your hand is trapped in the strap when that happens, the pole can pull your wrist, throw off your balance or slow your reaction. On snaggy or technical ground, it is often safer to hold the grip without putting your hand through the strap.
Use this as a quick reference:
| Terrain | Pole adjustment | Why it helps |
| Flat paths and tracks | Elbow around 90 degrees | Neutral rhythm and relaxed shoulders |
| Long uphill sections | Shorten by about 5-10cm | Better push angle and less shoulder lift |
| Very steep uphill steps | Shorten more or hold lower grip | Easier step-up support |
| Long downhill sections | Lengthen by about 5-10cm | More upright posture and better reach |
| Traversing a slope | Uphill pole shorter, downhill pole longer | Keeps shoulders level |
| Short mixed undulations | Keep neutral length | Avoid constant faffing |
| Pavement or hard tracks | Consider rubber caps | Quieter, less scraping, better on some hard surfaces |
| Mud, grass, snow or loose ground | Use exposed tips and suitable baskets | Better bite and less sinking |
On mixed UK terrain, you do not need to adjust your poles every few minutes. If a climb or descent is short, keep your neutral length and use the lower grip or change your hand position. Adjust the actual pole length when the gradient lasts long enough to make the change worthwhile.
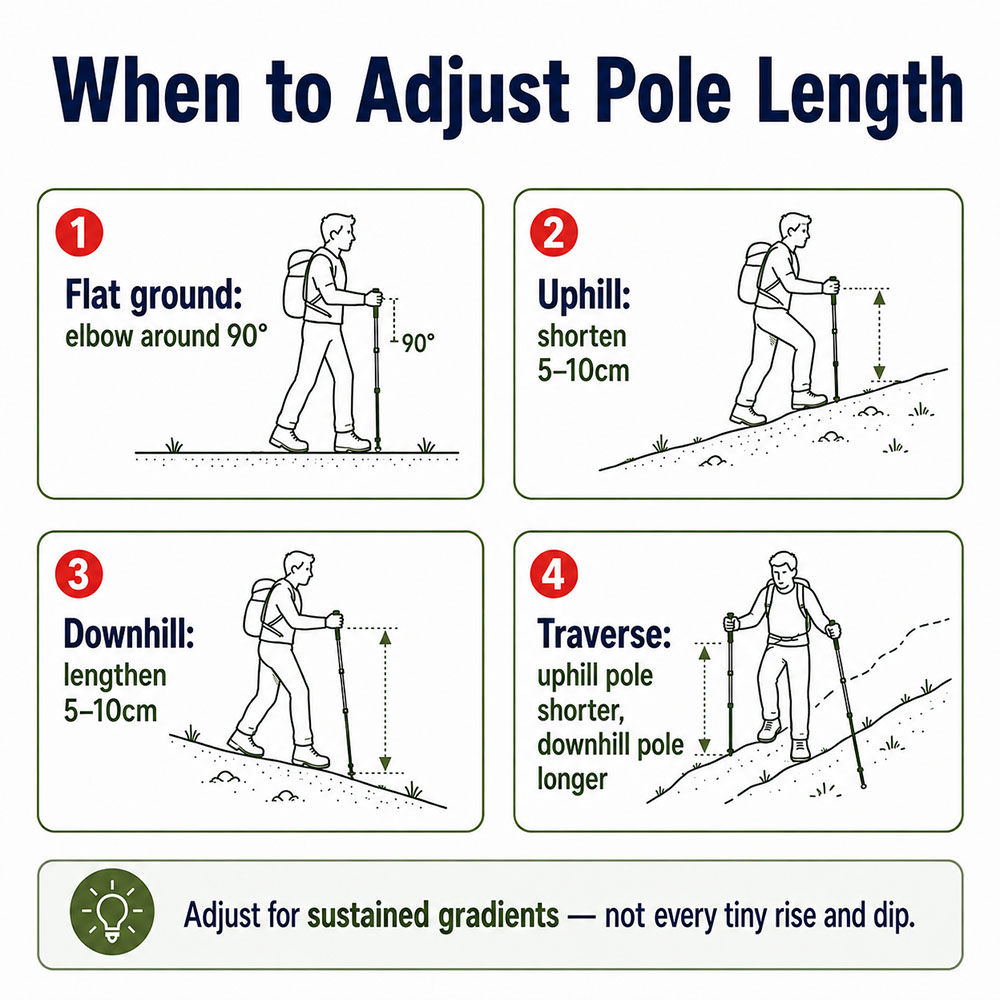
Small pole-length changes can help on sustained gradients, but you do not need to adjust for every short rise or dip.
Two poles are best for most hillwalking. They give you a balanced rhythm, distribute the load across both sides of the body and offer better stability on descents, in mud and on rocky paths.
One pole can still be useful. It is better than nothing for balance, light support, dog walking, or narrow paths, and when you want one hand free. It can also serve as a walking stick on gentle terrain.
A review of trekking pole research found evidence that pole use can improve balance in some loaded and unloaded walking conditions, although the exact benefit depends on terrain, load, user experience and technique.[1]
As a practical rule:
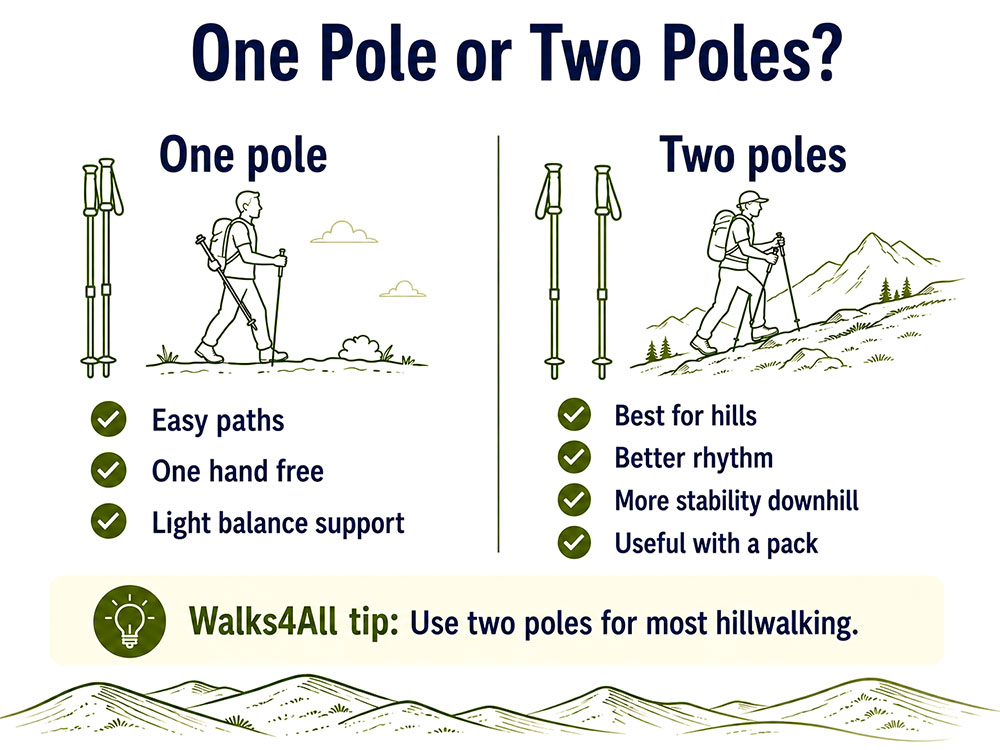
Two poles give the best balance and rhythm for most hillwalking; one pole can still help on easier paths.
Walking poles are useful, but they are not always the right tool. Sometimes they get in the way.
Do not rely on poles when you need both hands for scrambling, ladders, stiles, steep rocky steps, or exposed moves. Stow them before the ground becomes awkward, not halfway through the awkward section.
Be cautious with straps on river crossings, boulder fields, boggy holes, tree roots, boardwalk gaps and rocky descents. If a pole becomes trapped while your hand is locked in the strap, it can pull your wrist or prevent you from reacting quickly.
Poles can also be more trouble than they are worth on smooth pavements, narrow, busy paths, very overgrown trails, or routes where you are constantly opening gates. On these sections, carry them, shorten them, or put them away.
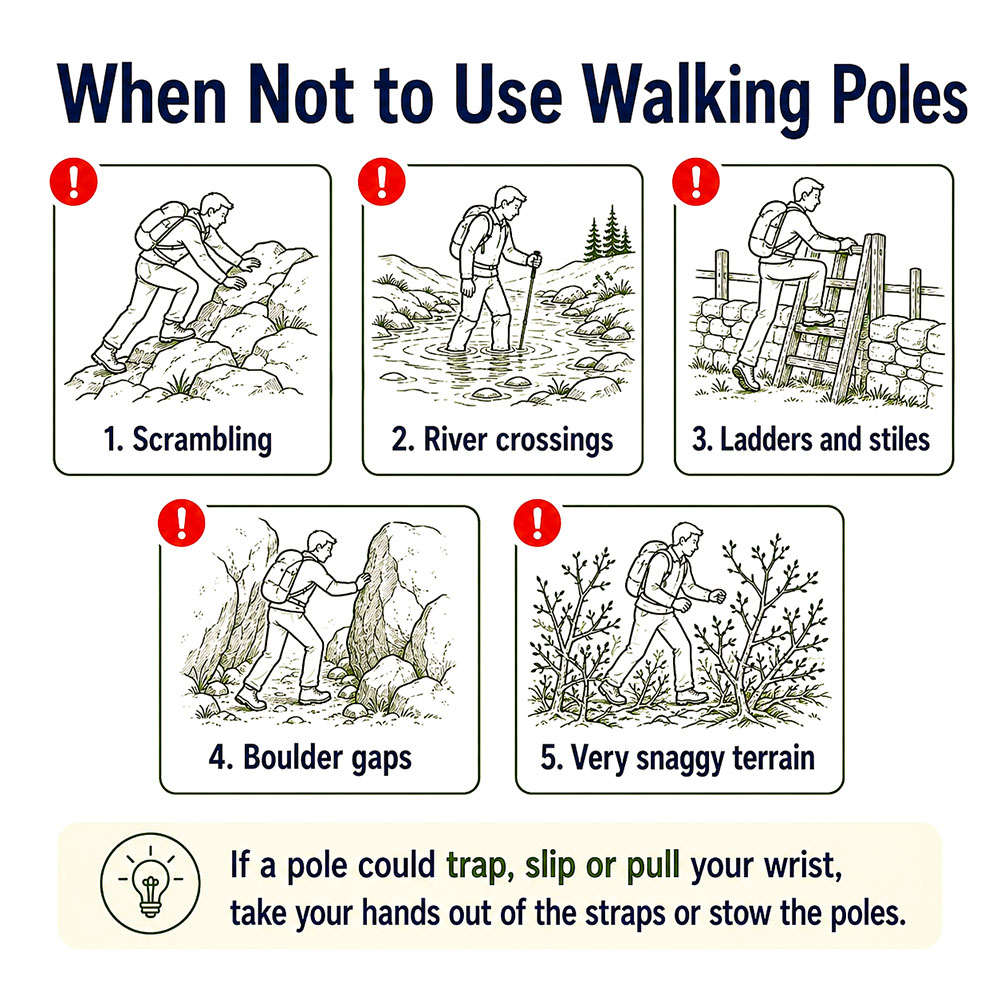
Stow poles or remove your hands from straps where poles could trap, slip, pull your wrist or block hand use.
This article focuses on walking and hiking techniques, but some fell runners, trail runners, and fastpackers also use poles. The basic principles still apply: secure pole plants, relaxed shoulders, proper strap use, and terrain-aware placement. However, the technique changes because running has a faster cadence, shorter ground contact time, and more rapid shifts in balance.
In trail running, poles are usually most useful on steep climbs, long mountain ascents, power-hiking sections and technical ultra-distance routes where fatigue builds over time. A study of trail running found that pole use altered foot-ground kinetics across uphill, level and downhill sections, supporting the idea that running with poles is not merely a walking technique done faster.[13]
Running poles are often shorter, lighter, and more frequently foldable than standard walking poles, but there are various differences between fixed and adjustable hiking poles. Runners also tend to use shorter poles, make more aggressive uphill pushes, and transition faster between carrying, planting, and stowing the poles. A broader review of pole use in sport notes that pole length, technique, stability, and power transfer all influence the usefulness of poles.[2]
For most hillwalkers, there is no need to copy running technique. If you are walking, prioritise stability, rhythm and control. If you are running, practise using poles separately before taking them into a race or a technical fell route.
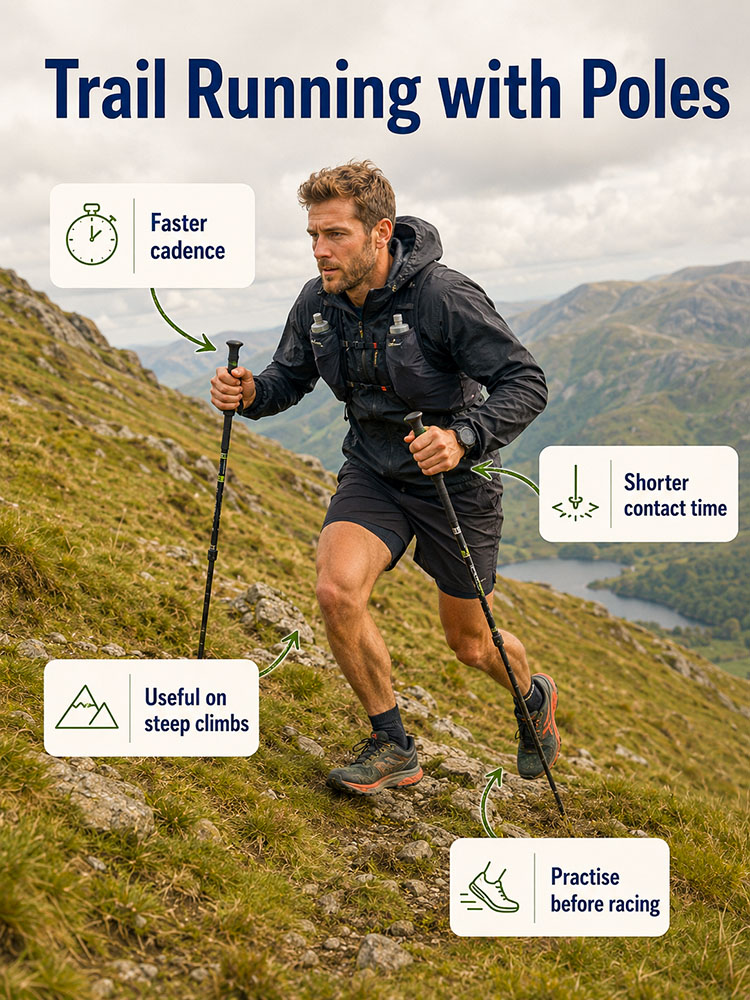
Running with poles uses quicker plants and shorter contact time than walking, so practise before racing or fastpacking.
If your shoulders rise, your poles are probably too long. This is common on climbs. Shorten them until your shoulders relax.
A pole planted too far ahead slows you down. On the flat, place the tip close to your body and push gently backwards.
Your hands should not do all the work. Use the straps correctly and keep your fingers relaxed.
Walking poles are support tools, not handrails. If you fully commit your weight to a pole and it slips, you may be pulled along.
Neutral length works for mixed ground, but sustained climbs and descents are easier with minor length adjustments.
Putting your hand down through the strap from above feels intuitive, but it prevents the strap from supporting your hand properly. Come up through the strap from below.
If a pole could become wedged in rock, roots, boardwalk gaps, or deep heather, remove your hand from the strap.
This is annoying and unsafe for walkers behind you. Keep your tips low, close and controlled.
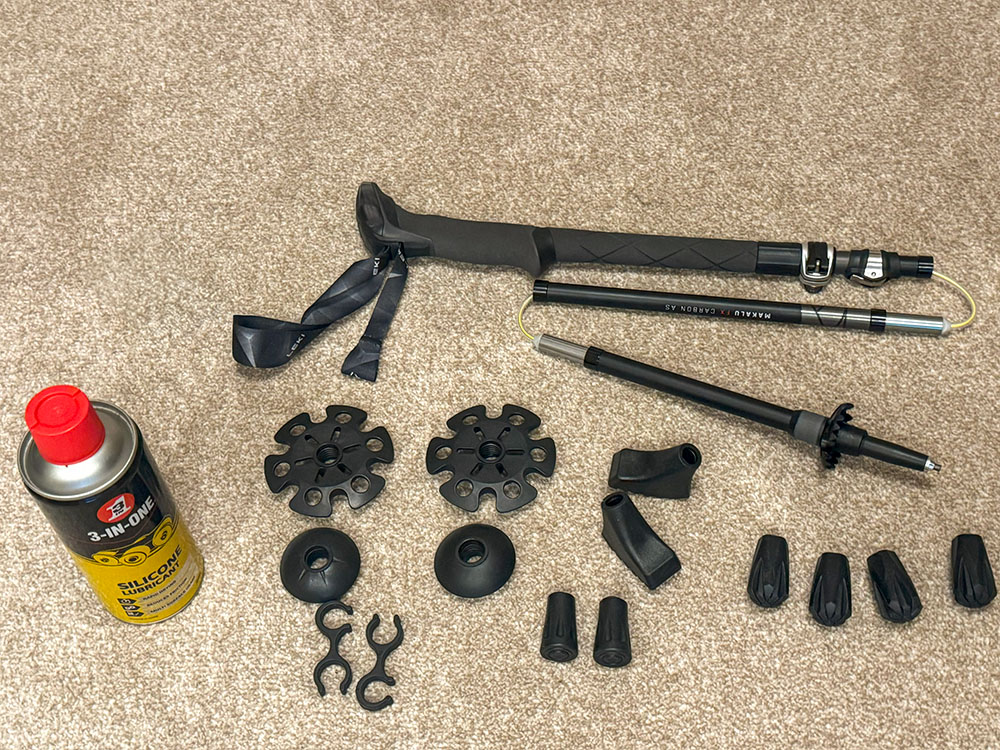
Rubber caps are useful on tarmac, hard tracks and sensitive surfaces, but they can reduce grip on mud, grass, snow and some wet rock. Match tips to the terrain.
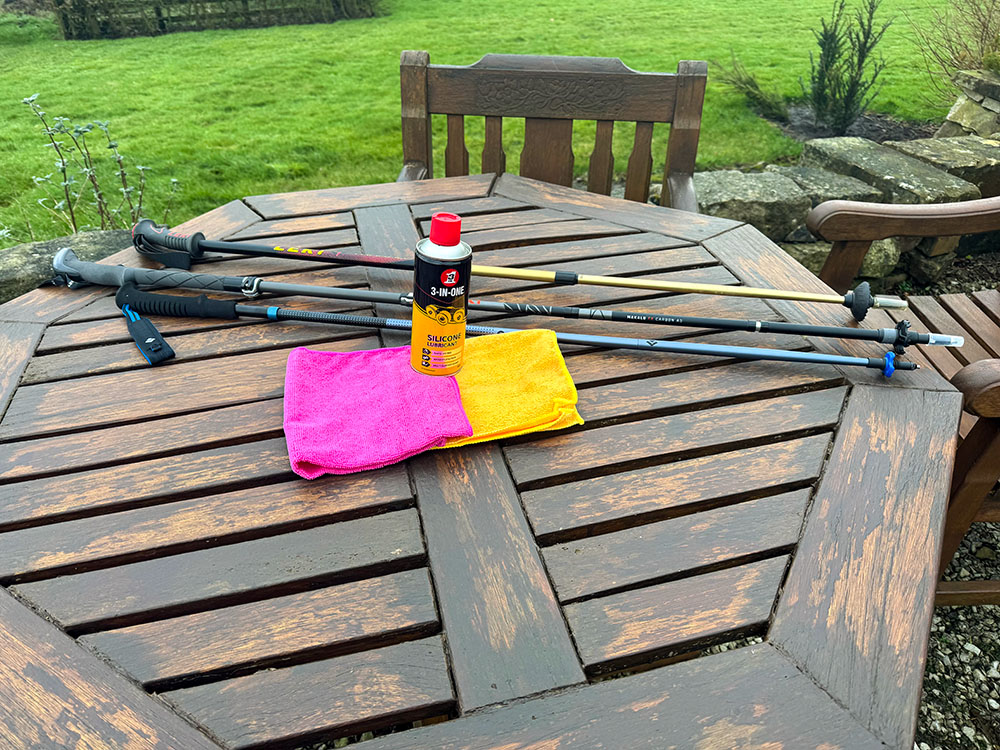
Mud and grit can jam locks and scratch pole sections. After wet or muddy routes, clean and dry pole sections before storing them, as you need to maintain your poles to keep them in top condition. You can get a range of different baskets/ends for hiking poles.
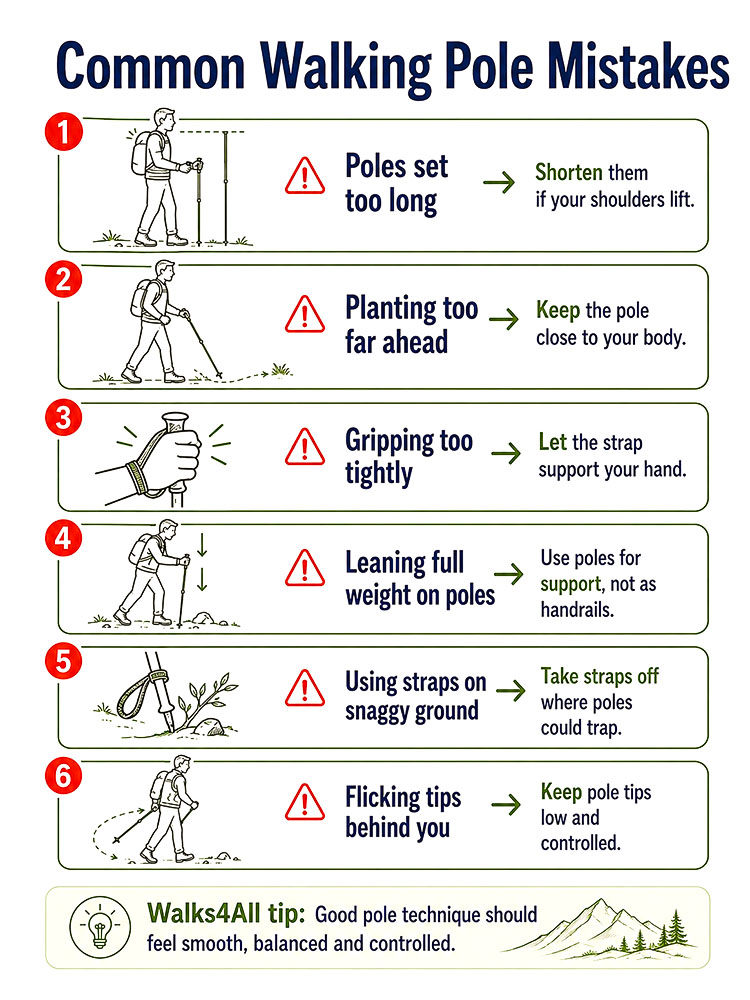
Most pole problems come from poor setup, overreaching, gripping too tightly or leaving straps on where poles could catch.
A clean, dry set of poles is easier to adjust and less likely to seize when you next use them. This matters most after muddy winter routes, coastal paths, boggy moorland and grit-heavy tracks.
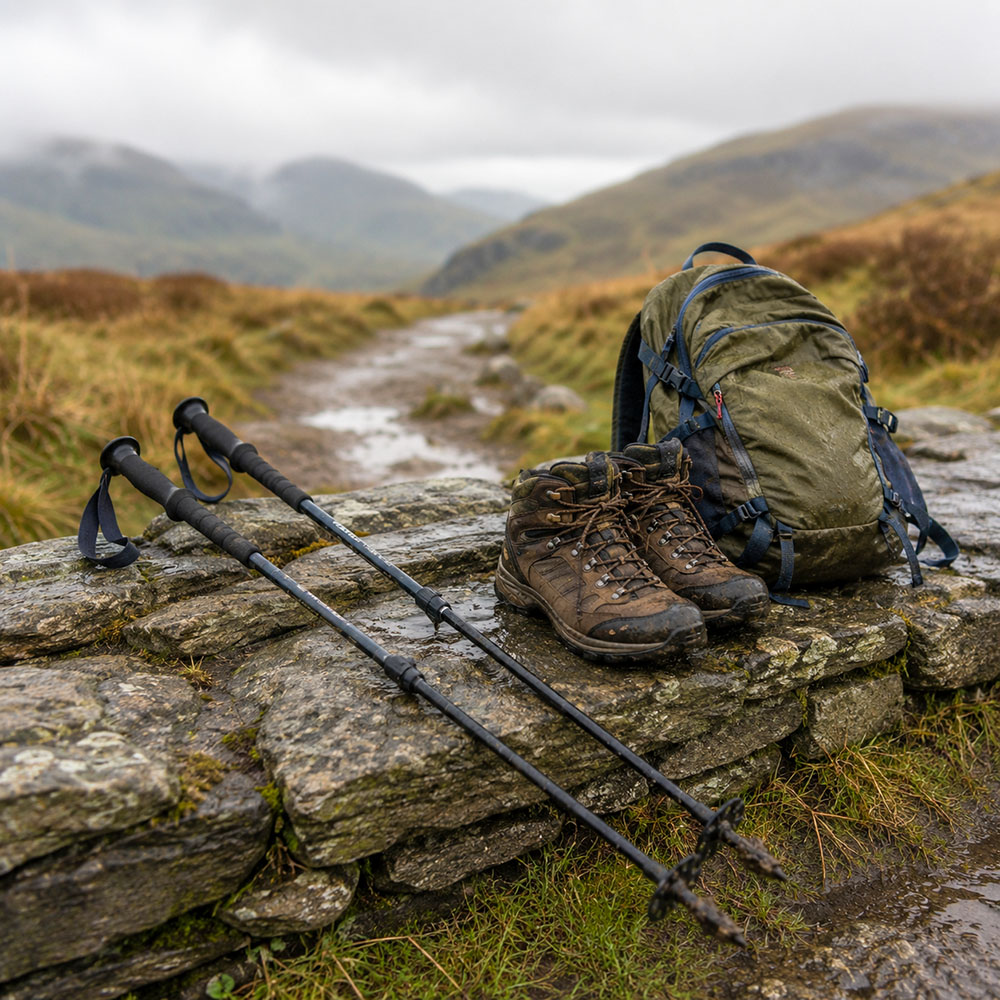
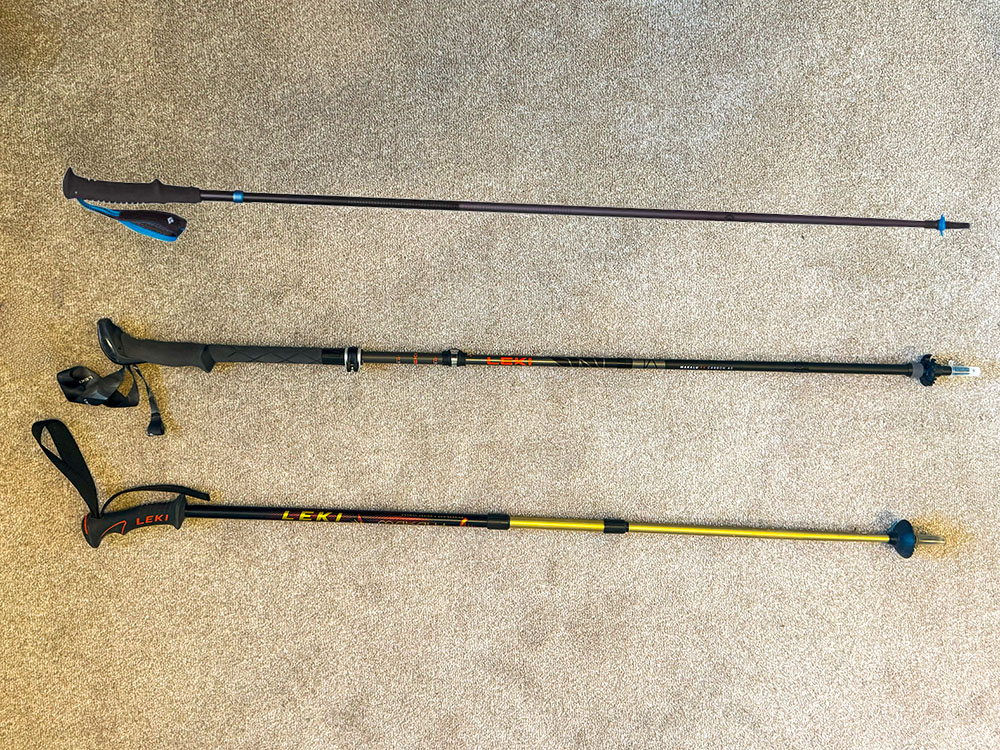
A real-use style gear image for maintenance and field experience, showing poles after wet, muddy UK hill conditions.
Walking poles make you wider, pointier and noisier on the trail. A little awareness goes a long way.
Keep pole tips low when people are close behind. Do not swing them backwards at shin height. When someone is overtaking, bring the poles in, pause your swing, or plant both poles until they have passed.
On narrow paths, avoid cutting into vegetation beside the trail. In England and Wales, official countryside access guidance asks visitors to share space, follow local signs, stick to marked paths unless wider access is available, and avoid causing damage or disturbance to nature.[14]
In Scotland, the official outdoor access guidance is based on respecting other people, caring for the environment, and taking responsibility for your own actions.[15]
Use rubber caps where they make sense: pavements, village lanes, boardwalks, visitor-centre paths and sensitive stone surfaces. Remove them when you need the metal tip to bite safely into mud, grass or rough trail.
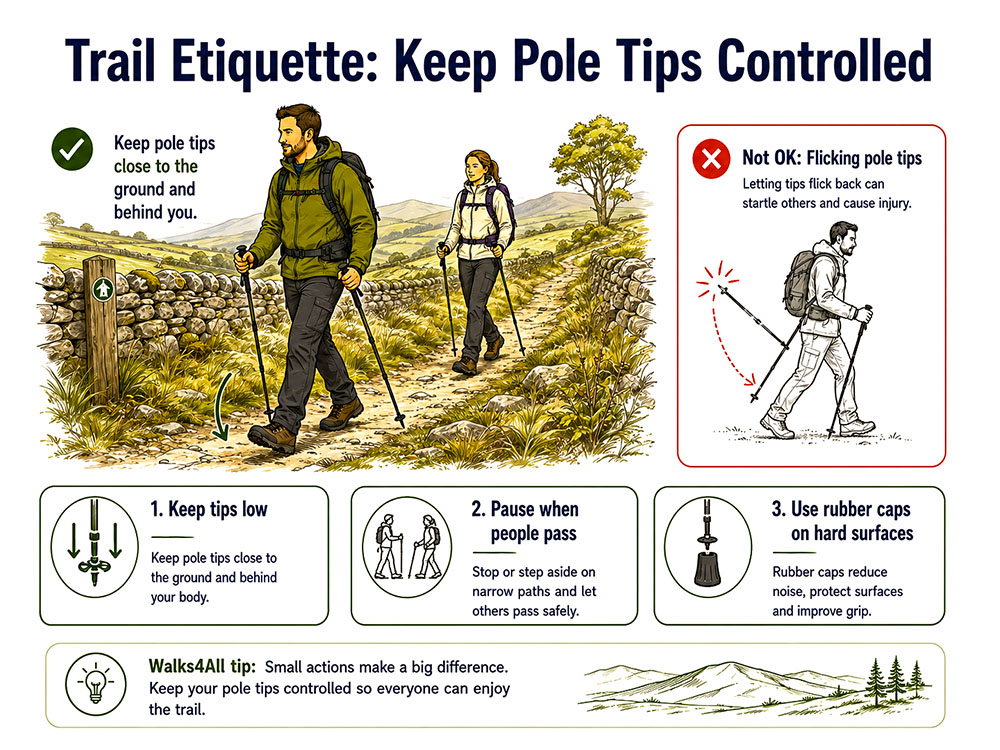
Keep pole tips low and controlled around other walkers, especially on narrow paths and when people pass.
Try this on an easy route before taking poles into the hills.
Walk for five minutes with the poles in your hands, barely touching the ground. Let your arms swing naturally.
Then begin touching each pole with the opposite foot. Do not push yet. Just find the rhythm.
Next, apply light pressure through the strap as the pole moves behind you. Keep your grip loose.
Finally, practise a short descent. Lengthen the poles slightly, plant them ahead of you, bend your knees and take smaller steps.
By the end, the poles should feel like part of your walking rhythm, not separate sticks you are trying to place.
Walking poles should make your walking smoother, not more complicated. Start with the 90-degree elbow setup, keep your grip relaxed, use the straps correctly, and adjust the length only when the terrain justifies it.
On the flat, use rhythm. Uphill, shorten and push down and back. Downhill, lengthen slightly, plant firmly and take shorter steps.
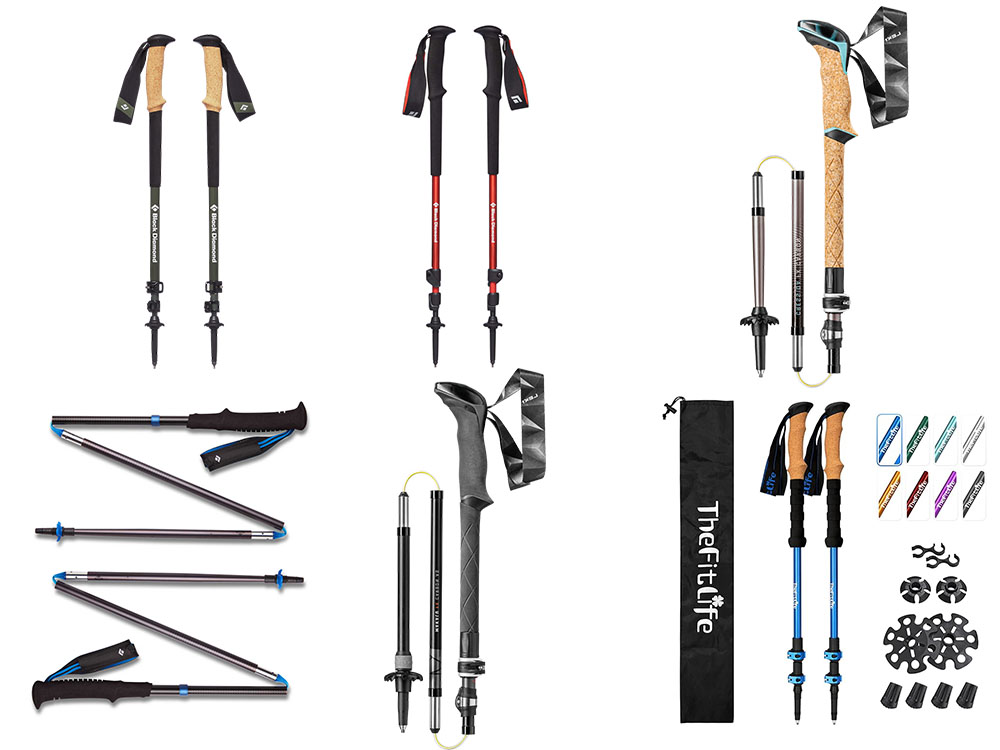
Good technique matters more than expensive poles. If you are still choosing a pair, start with our guide to the best walking poles for UK hills.
For most hillwalking purposes, yes. 'Walking poles', 'trekking poles', and 'hiking poles' are usually used to describe the same adjustable poles used on trails and in the mountains. Nordic walking poles are slightly different because they are designed for a more fitness-focused technique, with specific straps and a stronger push-off.
On flat ground, set them so your elbow is bent at about 90 degrees, with the pole tip on the ground near your foot. Shorten them for long climbs and lengthen them for long descents.
Put your hand through the strap from below, then lower it onto the grip. The strap should sit between your thumb and index finger and support the heel of your hand.
When used properly, they can help reduce lower-limb loading, especially on descents, but they do not eliminate knee strain entirely. In one study of downhill walking, poles reduced knee tibiofemoral forces by roughly 12-25%.[3] The greatest benefit comes from combining poles with short steps, soft knees, secure foot placement and controlled speed.
They may help. In a Snowdon mountain-walking study, the pole group had less soreness at 24 and 48 hours and lower creatine kinase levels at 24 hours, suggesting less exercise-induced muscle injury after the walk.[5]
Use two poles for most hillwalking, especially on steep descents, rough ground, and backpacking trips. Use one pole on easy paths or when you want one hand free.
On flat paths, plant the pole close to your body, roughly level with or just behind the opposite foot. Avoid reaching far ahead unless you need extra stability.
Yes, for sustained descents. Slightly lengthening the poles helps you plant them ahead without bending too far forward. Do not make them so long that your shoulders rise or the tips land too far down the slope.
Yes. Shorter poles give a better push angle and prevent your shoulders from rising. For short climbs, you can often just hold lower on the grip rather than adjusting the locks.
Use rubber tips on pavements, roads, boardwalks and some sensitive hard surfaces. Remove them on mud, wet grass, snow or loose trail, where the metal tip gives a safer bite.
Yes, if they are used incorrectly. Common problems include wrist strain from trapped straps, slipping pole tips, shoulder tension from poles set too long, and annoying or injuring other walkers by flicking pole tips behind you.
Yes, for many walkers. They are most useful on descents, muddy paths, rocky steps, stream crossings, long-distance routes and backpacking trips. They are less useful when you need both hands free, such as on scrambling terrain.
You do not have to wear gloves with walking poles, but they can help if the grips or straps rub your hands during long walks. In winter, loosen adjustable straps to accommodate thicker gloves or mittens, and make sure you can still take your hands out quickly on steep, rocky, or snaggy ground.
June 2026