By using this website, you agree to our use of cookies (needed to provide our website’s features) and our Terms of Use.
By: Andrew Forrest - October 2026
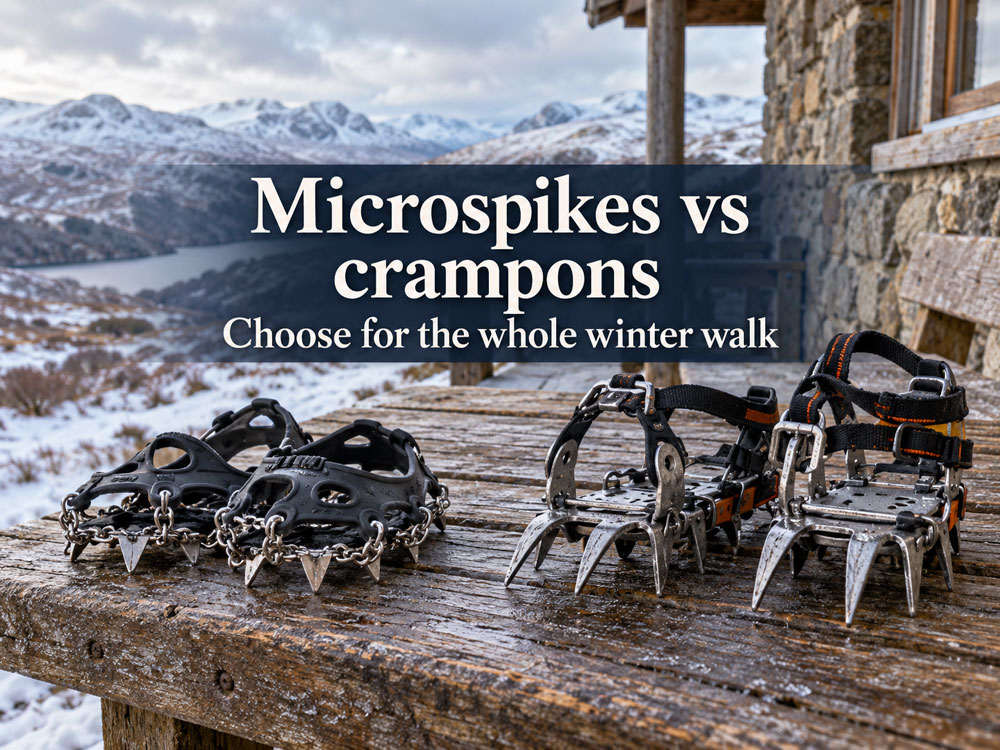
Compare microspikes and crampons for UK winter walks. Understand boot fit, bindings, icy terrain and the skills you need before choosing your equipment.
This page contains affiliate links. As an Amazon Associate, we earn from qualifying Amazon purchases at no additional cost to you. We may also earn commissions from other retailers, again at no additional cost to you.
An icy woodland trail and a frozen mountain slope might both seem like situations that call for something sharp under your boots. However, they demand very different things from your gear. The challenge usually lies in the brief transition between easier sections, such as a frozen crossing, a sloping path, or the descent you will face afterwards.
Boot fit and winter skills matter as much as the equipment in your bag. The comparisons below help with that choice, but practical crampon and ice-axe techniques require hands-on instruction, and you must know how to use them.
Microspikes suit icy paths and tracks where the terrain and the consequences of slipping are within the device's limits. Mountaineering crampons are equipment for more demanding snow and ice terrain, and are used with compatible boots and appropriate winter skills. Neither makes an unsuitable route safe. Choose the equipment for the hardest unavoidable part of the walk, including the descent, and turn back if the conditions exceed your equipment or experience.[1] [2]
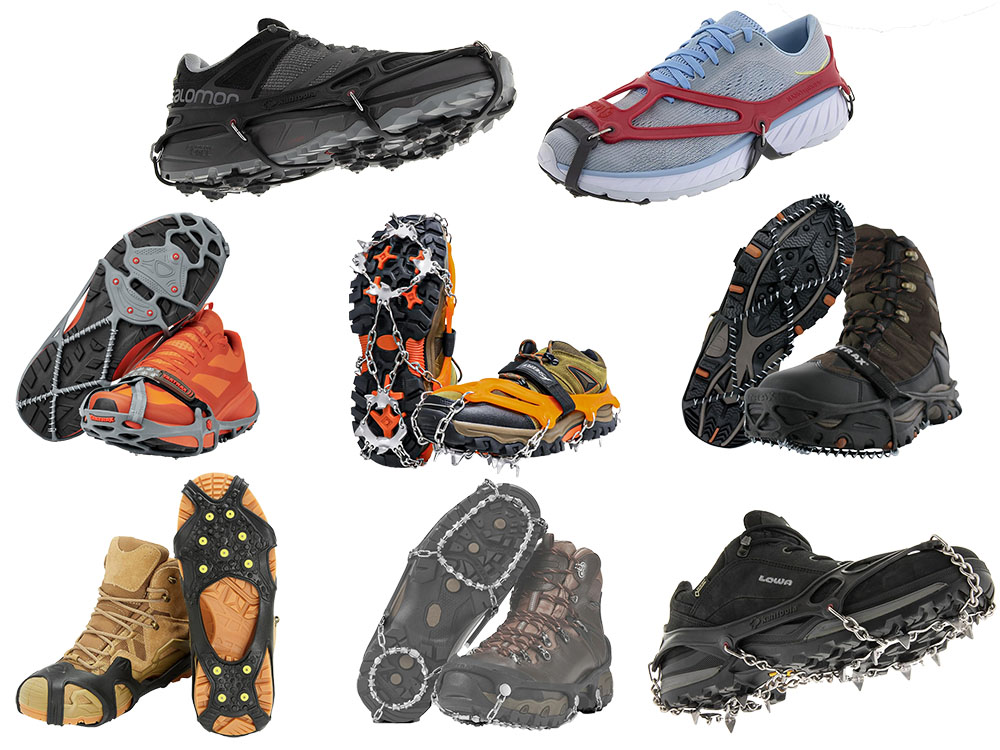
Microspikes usually combine a stretchy harness, chains and short metal points beneath the sole. Mountaineering crampons have a more robust frame, longer points and bindings that secure the device to a compatible boot. The difference is in construction and intended use, not just the number of spikes.[1] [3]
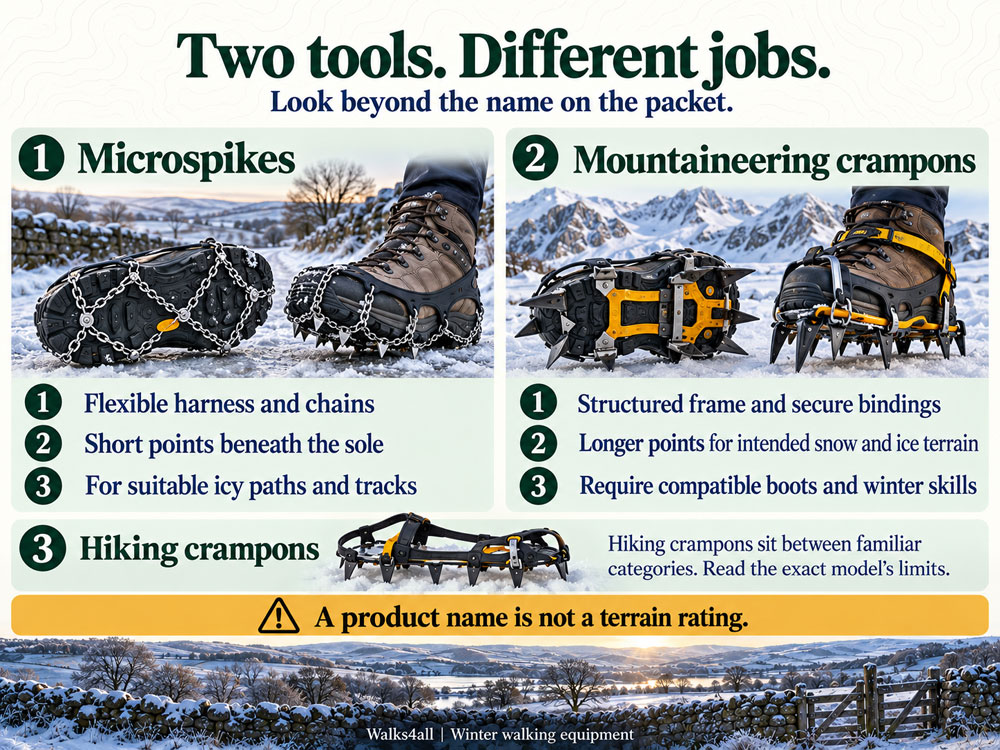
Flexible chain microspikes use short points; mountaineering crampons have a more structured frame and longer points. Product names alone do not establish suitability.
| Feature | Microspikes | Mountaineering crampons |
| Construction | Usually short points on chains with a flexible harness | Structured frame, longer points and dedicated bindings |
| Typical role | Suitable for icy paths and tracks within the model's limits | Intended winter mountain terrain, with appropriate skills |
| Footwear | Many models fit flexible footwear; exact sizing matters | Boot stiffness, shape and binding compatibility matter |
| Learning needed | Correct fitting, surface judgement and awareness of limits | Practical winter footwork and associated mountain skills |
| Main limitation | Not a substitute for mountaineering crampons | Not a substitute for training or sound route choice |
Ice grippers is a broad term covering several designs, including studs, coils and chain devices. Shop listings sometimes use microspikes and crampons loosely. Read the manufacturer's instructions rather than assuming two similarly named products do the same job.
Hiking crampons complicate the tidy two-category comparison. For example, Kahtoola's KTS uses a flexible linking system designed for flexible footwear, but its instructions exclude technical climbing and situations that risk serious injury. This is not a reason to treat every flexible boot as suitable for every crampon.[4]
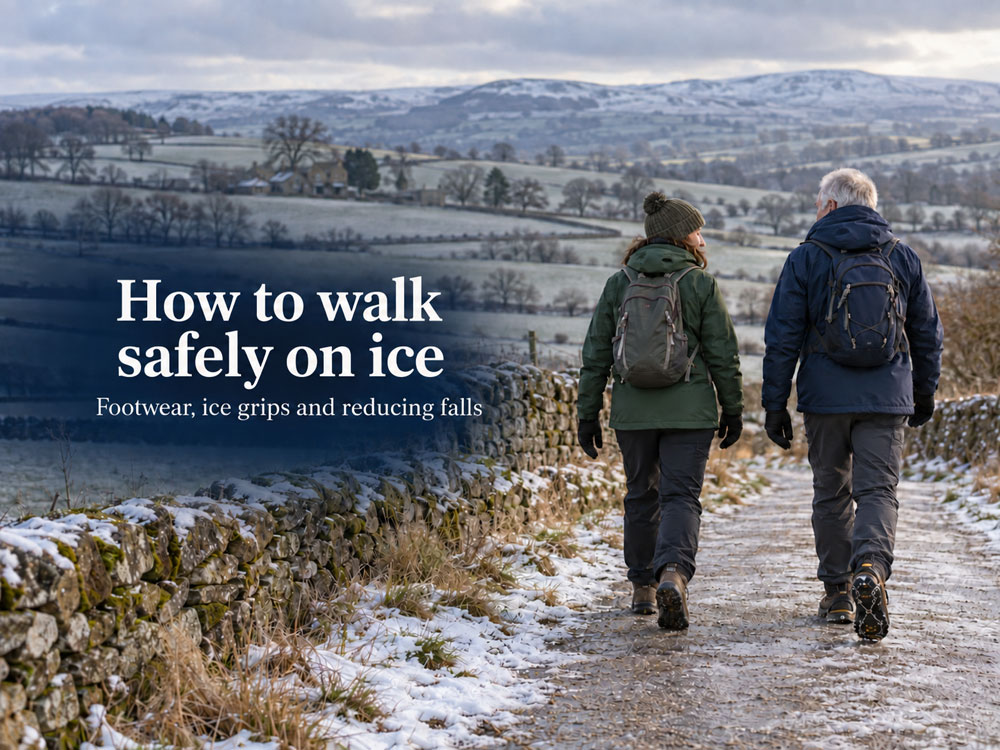
Start with the ground and consider what would happen if you lost your footing. Mountaineering Scotland distinguishes relatively gentle paths and tracks from terrain where a slip could become a serious slide or fall. The route category matters less than its condition on the day.[1] [5] You need to be able to walk safely on ice to avoid slips and falls.
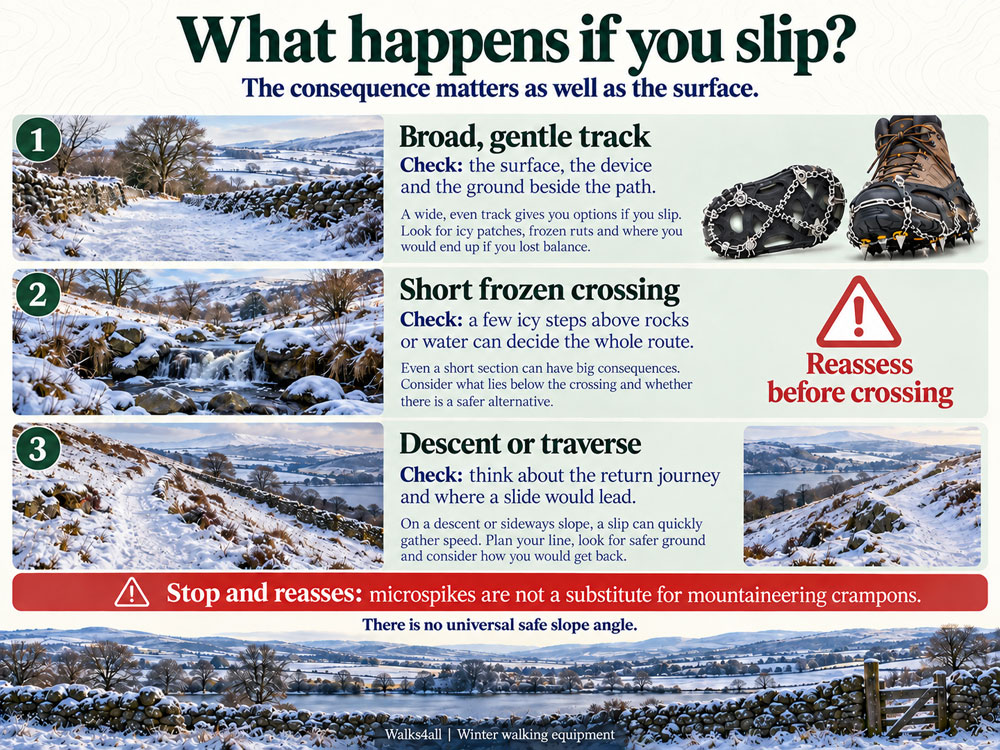
Assess where a slip could take you, including a descent or short crossing. No universal slope angle makes microspikes suitable.
A broad track with occasional ice is a different proposition from a narrow, frozen path above a rocky stream. Both may appear in a guidebook as walks. Neither the word 'walking' nor a popular route name tells you which equipment is sufficient.
Consider an otherwise straightforward walk with a brief frozen section above rocks. The length of that section does not reduce the consequences of falling. Our approach is to let the most demanding, unavoidable ground dictate the plan, rather than judging the day by its easiest miles.
That may mean suitable mountain equipment and skills. It may also mean choosing another route. Carrying crampons as an emergency upgrade isn't practical if your boots cannot hold them or you have never learnt to walk in them.
A traverse means moving across a slope rather than directly up or down it. Think about the footing you will need there and on the descent before committing to the ascent. Climbing a section does not determine whether you can return comfortably in different conditions.
Mountain Training's 2025 guidance stresses microspikes' limitations when you can't maintain secure whole-sole contact, as well as the consequences of slipping. Short points and a flexible harness have limits that confidence alone cannot overcome.[2]
No universal angle makes microspikes suitable. Surface hardness, nearby hazards, travel direction, device design, and your skills all affect the decision. A modest slope can still lead into rocks, water or a drop. Avoid treating a suggested angle from a general guide as permission to cross a particular slope.
Microspikes often fit a wider range of footwear than mountaineering crampons, but the size printed on the box is only a starting point. Boot shape and bulk matter. For example, Kahtoola advises considering the actual footwear when choosing the size of its MICROspikes.[6]
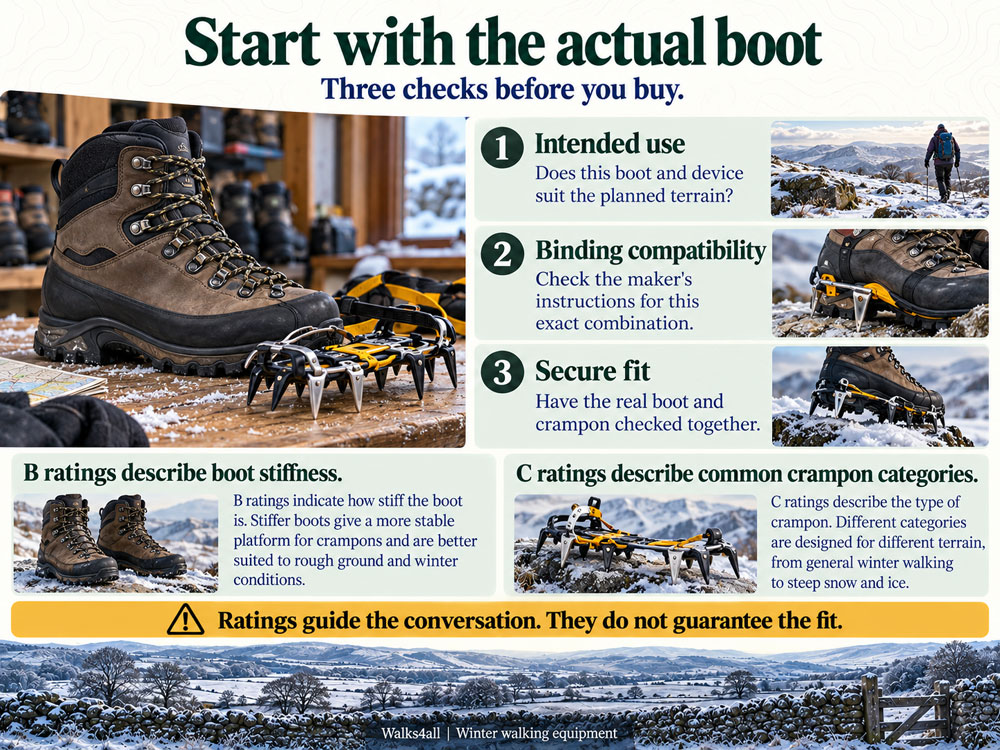
Boot stiffness, binding compatibility and a secure fit all matter. B and C ratings are a starting point, not proof that a particular combination fits.
For crampons, ask three questions: is the boot intended for the activity, is the binding compatible with it, and does this particular combination fit securely? Take your boots to a knowledgeable retailer. A model recommendation is much more useful when someone can inspect the actual pairing.
These are commonly used UK boot categories, that broadly indicate increasing stiffness and winter suitability. They are for shopping guidance, not a promise that any named crampon will fit.[7]
| Boot category | Plain-English meaning | What to check |
| B0 | Flexible walking footwear, generally outside conventional mountaineering-crampon use | Do not assume a strap-on crampon makes it suitable |
| B1 | Semi-stiff boots for appropriate winter walking | Intended terrain and a compatible flexible crampon |
| B2 | Stiffer mountain boots, usually with a heel attachment ledge | The maker's binding guidance and the actual fit |
| B3 | Rigid technical mountain boots | Intended activity, binding type and boot shape |
Some specialist devices are explicitly designed for flexible footwear. Follow that model's instructions and terrain restrictions; do not extend an exception to other crampons.
In the usual UK shorthand, C1 denotes flexible walking crampons, C2 more substantial articulated crampons, and C3 rigid technical crampons. Articulated means that sections are joined to allow some movement. These categories are commonly discussed alongside B-rated boots, but modern binding options and manufacturer-specific designs make a simple compatibility grid incomplete.[3] [8]
The useful question in the shop is: 'Will this exact crampon, with this binding and linking bar (the piece joining the front and rear), fit my boots securely for the terrain I intend to use it on?' Take the pair you plan to wear this winter.
A binding attaches the crampon to the boot. Strap-on, hybrid and step-in are common attachment arrangements. They do not, by themselves, indicate how demanding a route the equipment can handle.[8]
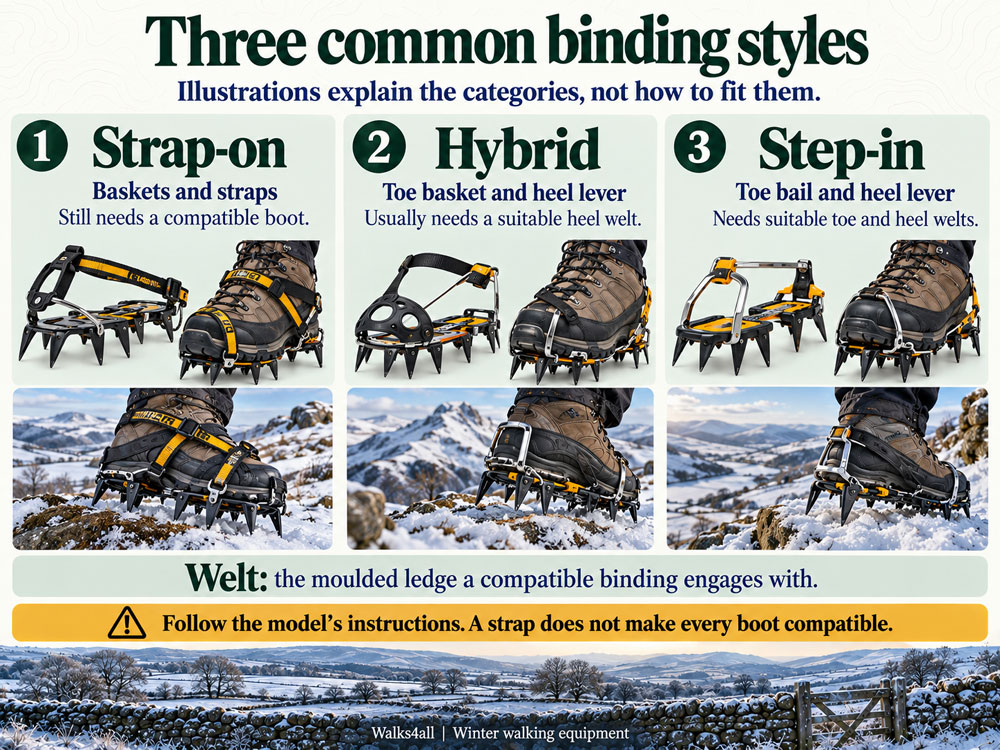
Strap-on, hybrid and step-in bindings secure crampons differently. The boot features and manufacturer-approved combination determine compatibility.
These typically use baskets or cradles at the toe and heel, secured with straps. They do not require the same toe and heel attachment ledges as a step-in system. They still require a boot of suitable shape and stiffness, and a secure fit. Straps are not a workaround for an incompatible boot.
Often called semi-automatic, these commonly combine a front basket with a rear lever that engages a suitable heel welt. A welt is the moulded ledge on the boot that the matching binding holds. Having a heel welt is only one part of compatibility.
Often called automatic, these commonly combine a metal toe bail with a heel lever. The bail is the wire component that engages the front of a compatible boot. Suitable toe and heel welts, the correct shape, and the manufacturer's approved combination all matter.[8]
Loose snow can hide a harder surface beneath. Short microspike points may not reach it. Snow can also accumulate beneath traction equipment, eventually covering the points, a problem often called snowballing. These are distinct problems, even though both can leave you with less grip than expected.[2]
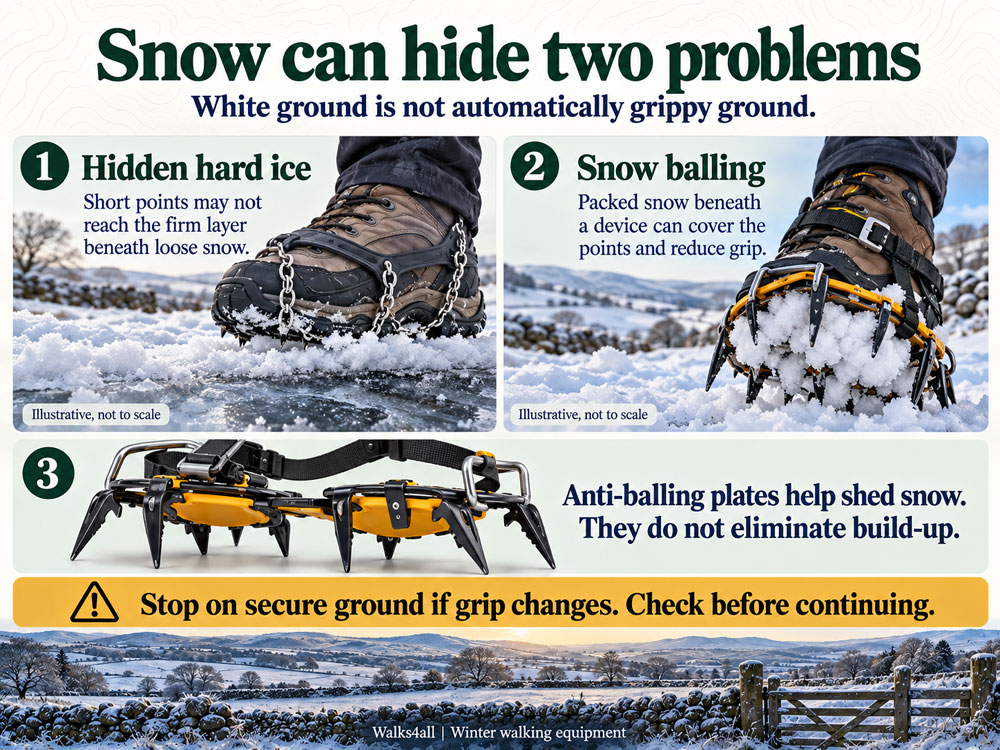
Snow packed beneath a device can cover its points. Anti-balling plates help reduce build-up but do not remove the need to check.
Anti-balling plates are plastic or rubber components fitted beneath many crampons to help shed accumulated snow. They reduce build-up, but they do not guarantee it won't occur. Petzl's instructions still require attention to snow collecting under the crampons.[9]
If the feel of the equipment changes, stop on secure ground and investigate. Do not rely on the sound of metal points or on the device having worked earlier. Conditions can vary across a single hillside.
Choose a secure place before the difficult ground begins. A comfortable spot to sit or stand makes it easier to check the equipment without balancing on one leg over a slippery section. Practise at home with the boots and gloves you will wear outside.[3] [4]
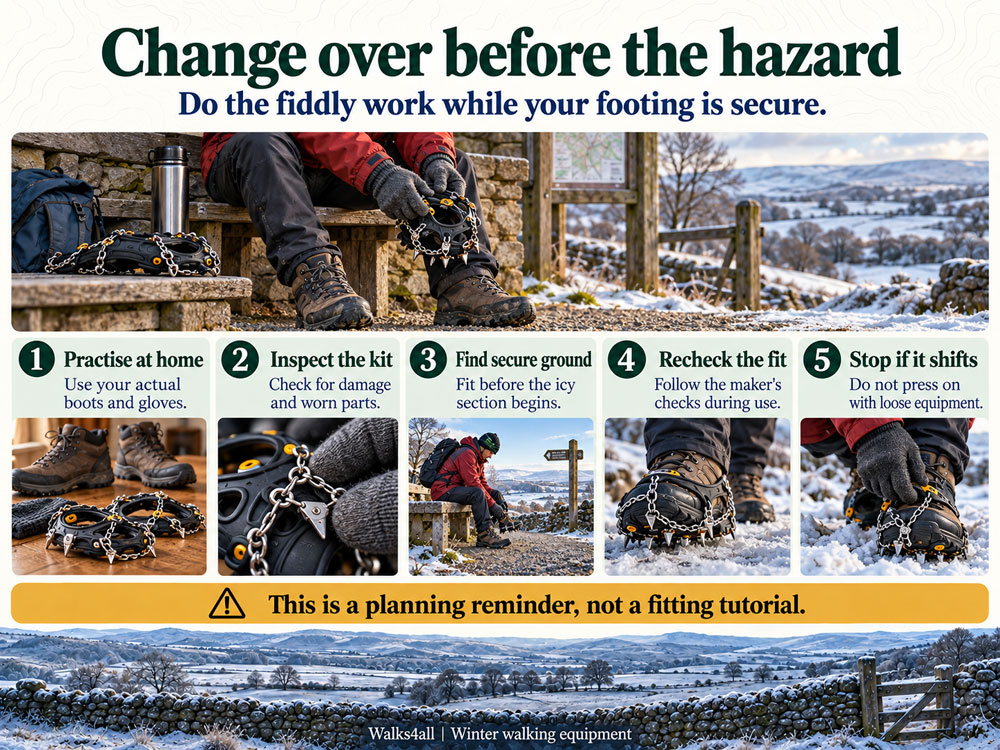
Practice fitting at home and change equipment on secure ground before reaching a hazardous section. Recheck the fit during the walk.
Follow the fitting instructions for the exact model. When using crampons, check the required orientation and adjustment, then confirm the boot is held securely. Recheck during use as directed. Petzl warns that wear can affect retention, so don't take last winter's satisfactory fit for granted.[9]
There is no single answer for every device and surface. Follow the model's guidance and judge the transition before you reach it. A mixed winter mountain route may include some rock, but that is different from walking around a café or driving with traction equipment.
Plan a secure location to remove or change equipment when required. Include the time this takes, especially in a group. A sheltered changeover spot is worth identifying while you still have a choice. If you take them off, put them safely away in your backpack.
For winter mountain routes requiring crampons, plan the skills and associated equipment together. An ice axe is a separate winter tool, used for more than just falls. The right type and its use depend on the activity. Mountaineering Scotland recommends practical instruction, including winter skills courses.[10]
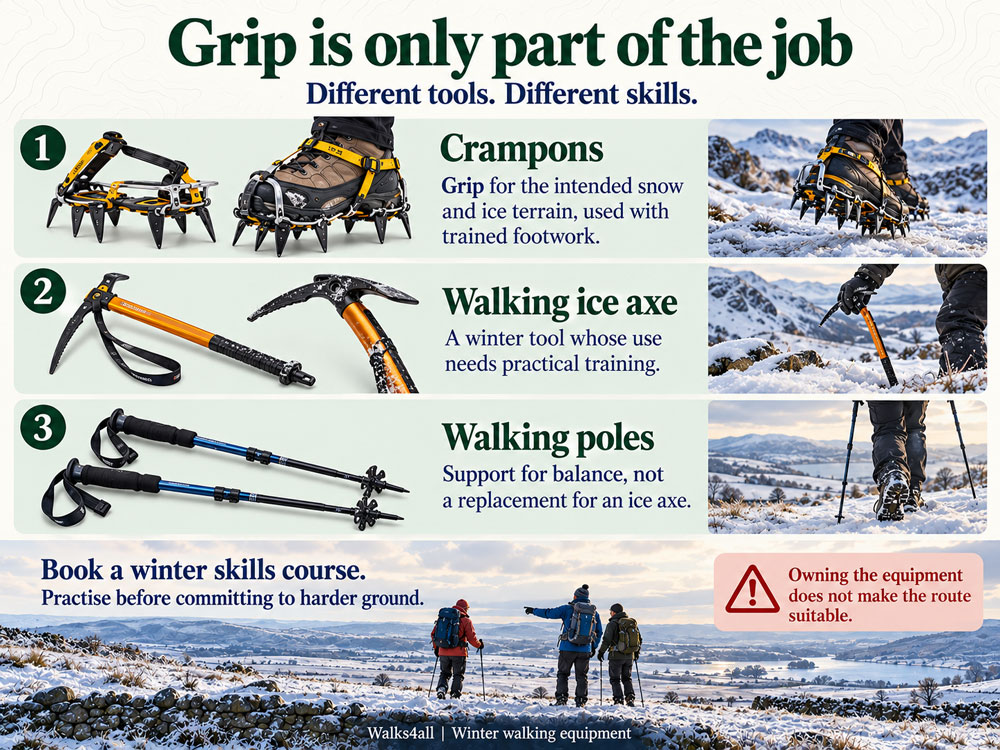
Crampons, an ice axe and walking poles have different roles. Learn winter footwork and axe use with a qualified instructor before committing to suitable mountain routes.
Walking poles can provide support for balance, but they are not a substitute for an ice axe on terrain where one is needed.[5] Our guide to walking poles, knees and balance covers their general walking role.
A course should help you connect equipment use with route choice, navigation and changing conditions. Ask what footwear and equipment are required, whether suitable kit can be hired, and what experience the day assumes. Learning to fit crampons is part of that preparation, not the whole of it.
Avoid treating an online diagram on stopping a slide as sufficient training. Preventing a slip and choosing suitable ground remain central to the day; carrying an axe does not guarantee you can stop every fall.
Once you know which equipment suits your intended walking, compare the models. Start with fit, permitted uses and materials, then consider weight, storage, maintenance and cost. Our best microspikes and ice grippers guide is the companion article for comparing path-walking options.
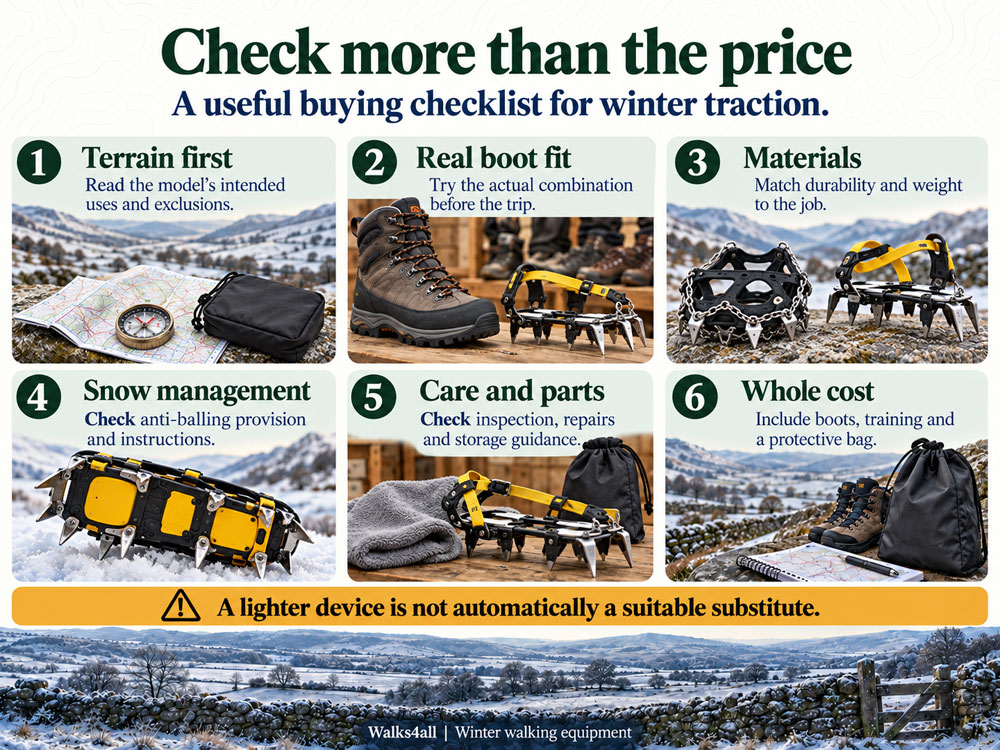
Compare intended use and fit before weight or price. Allow for compatible boots, training and a suitable protective bag where needed.
Microspikes are generally easier to pack than conventional steel mountaineering crampons, but category averages mask substantial differences. These are manufacturer-listed pair weights, checked in September 2026, not weights from a Walks4all test.
| Example | Version or size | Listed pair weight |
| Kahtoola MICROspikes | Current fourth-generation model, medium | 338 g |
| Kahtoola KTS hiking crampons | Small/medium | 656 g |
| Petzl VASAK steel crampons | FLEXLOCK, Petzl’s strap-on binding | 895 g |
The figures apply to these specific products, not interchangeable alternatives. Other sizes and bindings vary. The KTS has its own restrictions; the VASAK is a mountaineering product. Choose the category before trying to save a few grams.[6] [11] [12]
Material alone does not establish suitability. Petzl's range, for example, separates lightweight aluminium equipment for specific snow-travel uses from steel models for other applications. Check the actual route demands and product instructions before buying aluminium as a lightweight alternative.[13]
Similarly, a higher point count is not a simple performance score. Point position, shape, frame, binding and intended use should be part of the comparison. Buying based on the longest advertised spike can overlook the features that matter for your walk.
For a first winter-mountain purchase, allow for suitable boots, training, a protective carrying bag, and the crampons. If available, hiring through a course may help you understand your options before buying.
Inspect the equipment before each trip and follow the manufacturer's cleaning, drying and storage advice. Kahtoola advises cleaning MICROspikes with lukewarm water and letting them air-dry away from heat. Crampon instructions set out their own inspection and retirement criteria. Damaged straps, frames or links require proper attention; an improvised repair is not evidence that the equipment is fit to continue into serious terrain.[6] [9]
Our approach is to choose equipment for the part of the walk you cannot safely avoid, then check whether the whole group can manage it. This is an editorial planning checklist, not a technical terrain rating or a substitute for winter training.
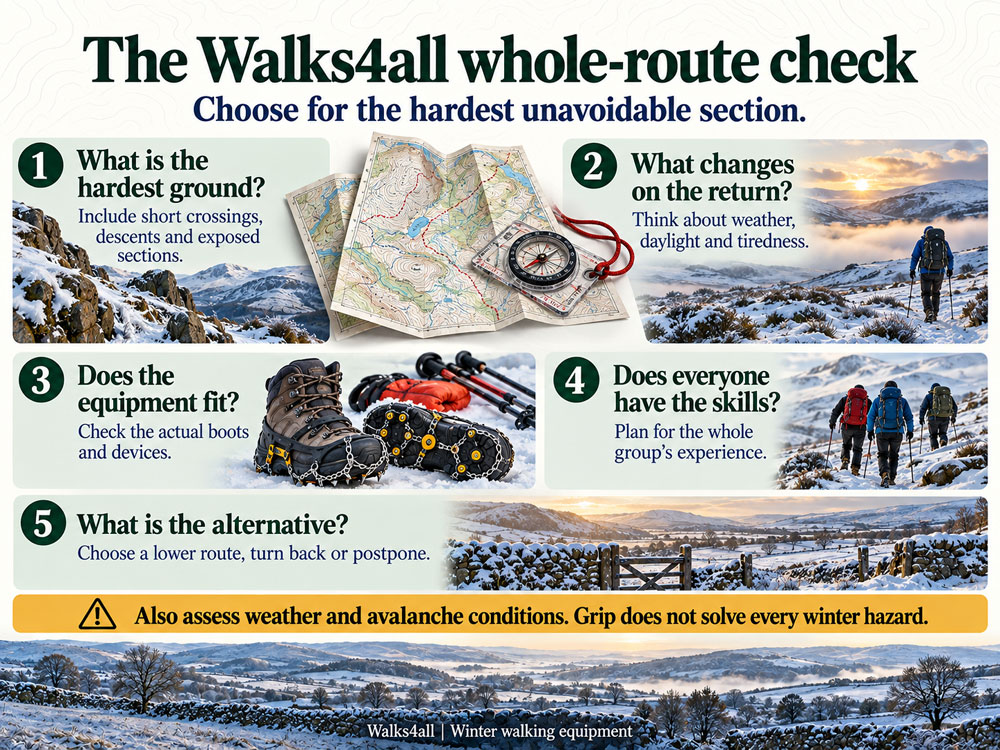
Choose equipment for the most demanding unavoidable section, assess the return journey and keep a realistic alternative. Turning back remains an option.
Mountaineering Scotland recommends researching the route, allowing for winter timings and keeping an alternative plan. The Scottish Avalanche Information Service's Be Avalanche Aware guidance also stresses gathering weather and snow information before leaving home. Crampons do not solve avalanche risk.[14] [15]
For the rest of your preparation, see our hiking safety tips. A suitable head torch belongs in the plan for short winter days, even when you expect to finish in daylight.
The most useful sources for this decision are equipment instructions and winter-mountain guidance. They address intended use, fit and the equipment's limits. They should not be presented as controlled trials proving that one category prevents a particular percentage of mountain accidents.
Mountaineering Scotland reports that its 2024 survey of more than 1,300 walkers, climbers and ski tourers found gaps in awareness of the differences between microspikes and crampons, particularly among less experienced participants. This supports the need for clearer explanations; it does not measure which device is safer on a given slope.[1]
Mountain Training's 2025 professional guidance provides useful detail on microspike limitations, including snow cover, snow balling and retention. Together with the manufacturers' instructions, it supports a cautious, terrain-specific choice. Evidence on ordinary winter pavement falls cannot settle the question of crossing hard snow above a mountain drop.[2]
Microspikes can be useful on icy paths. Mountaineering crampons meet different terrain demands, boot requirements, and skill levels. Start with the route and conditions, then check what the people in your group can use confidently.
The Walks4all takeaway is to think beyond the easy option. Check the awkward section, the descent, and your alternative before you set off. If the answer depends on equipment or skills you do not have, change the walk.
No. Microspikes usually have short points on chains and a stretchy harness. Mountaineering crampons have a more structured frame, longer points and bindings for compatible boots. Retail terminology varies, so read the exact product's intended use.
Yes, on suitable terrain within the equipment's limits, after learning to fit and check them properly. Easy fitting should not be confused with easy judgement. Beginners still need to recognise when the ground or the consequences of slipping exceed their experience.
Not as a general rule. Conventional mountaineering crampons require suitable boots and a secure, compatible binding. Some hiking crampons are designed for flexible footwear, but their instructions set different limits. Check the specific combination.
The mountain name alone isn't enough to decide. Route, snow and ice conditions, weather, the consequences of a slip, and your skills all matter. Do not assume that microspikes are sufficient just because the route is a popular summer walk.
No. Even a short section can have serious consequences if you slip. Microspikes are not a substitute for mountaineering crampons on terrain that requires them. If you lack the appropriate equipment and skills, choose another route or turn back before committing.
Sometimes a planned route may justify both, but carrying two devices is not automatically better. Decide what each would be used for, whether both fit your footwear, and where you could change safely. A simpler alternative route may be preferable.
No. Snowshoes spread your weight over a larger area to reduce sinking into the snow. Crampons provide pointed traction for their intended surfaces. Neither category replaces the other, simply because both are used in winter.[16]
No. Point count alone does not indicate fit, grip or intended use. Consider the complete design and the manufacturer's instructions. A device with more points is not automatically suitable for a harder route.
October 2026