By using this website, you agree to our use of cookies (needed to provide our website’s features) and our Terms of Use.
By: Andrew Forrest - Updated July 2026
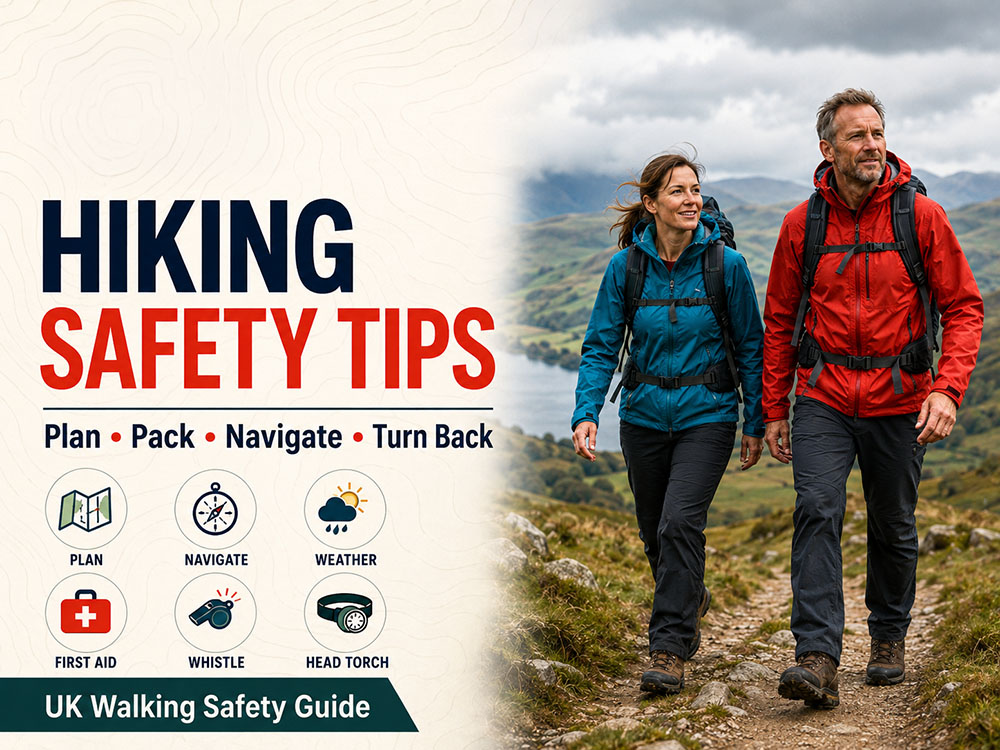
Plan safer hikes with 37 practical hiking safety tips covering route planning, weather, navigation, kit, emergencies, livestock, ticks, roads and when to turn back.
This page contains affiliate links. As an Amazon Associate, we earn from qualifying Amazon purchases at no additional cost to you. We may also earn commissions from other retailers, again at no additional cost to you.
The most important hiking safety tips are to choose a route that suits your ability, check the weather and local conditions, carry a proper navigation and emergency kit, tell someone where you are going, start early enough to make the most of daylight, keep eating and drinking, and turn back before a minor problem becomes serious.
A safe walk is not just about carrying the right gear. It is about planning well, making sensible decisions on the day, watching out for the people you are with, and knowing what to do if the weather changes, if someone is injured, if you lose the path, or if you need help.
Mountain Rescue data shows why preparation matters. In England and Wales, Mountain Rescue teams recorded 3,842 call-outs in 2024. The same data showed that 78% of call-outs occurred after midday, 23% were due to slips or trips, 17% involved missing people, and 8% involved people who reported themselves as lost.
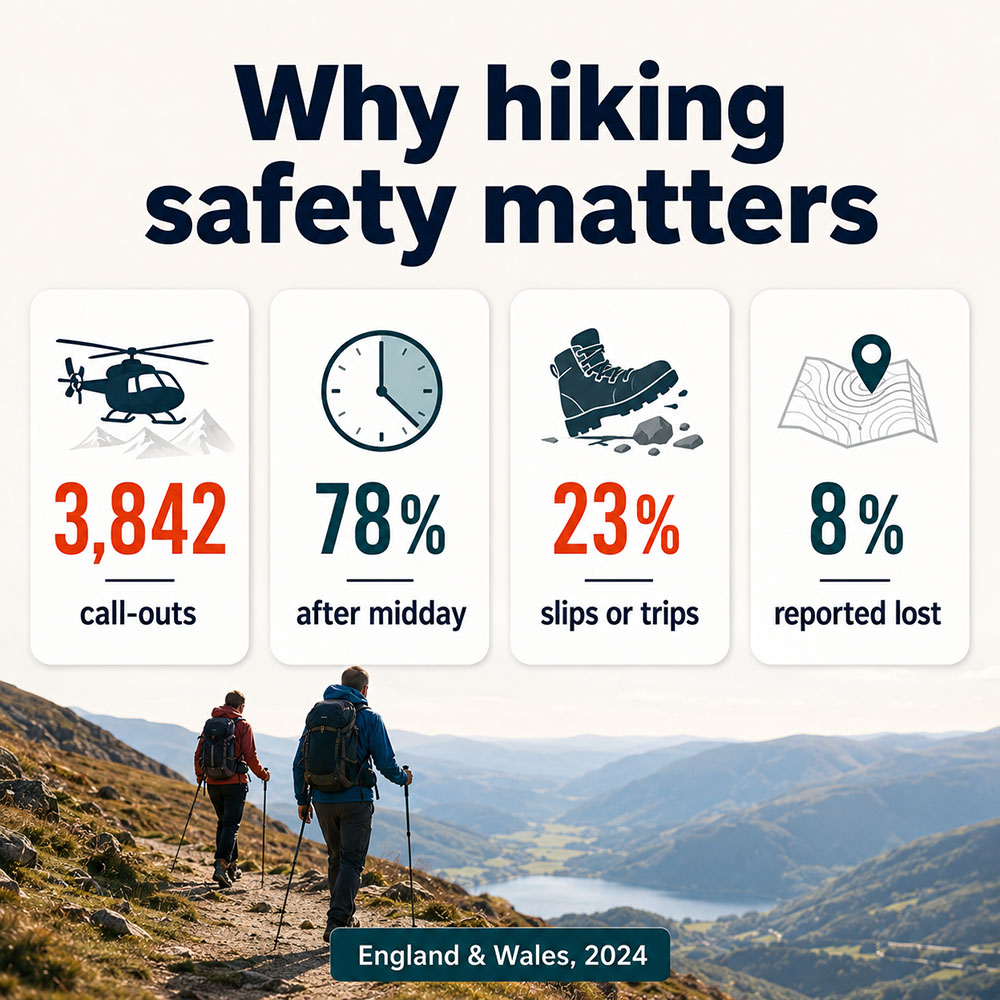
Recent Mountain Rescue data shows why route timing, descent safety, navigation and early decision-making matter on UK hikes.
This guide covers 37 practical hiking safety tips for UK walks, hill routes, coastal paths and longer day hikes.
Key takeaways
This guide was written drawing on Walks4all's walking experience, current UK hill-walking safety principles, and official guidance from Mountain Rescue, the Met Office, Ordnance Survey, the NHS, UKHSA, and national park safety resources.
This is general walking safety guidance and is not a substitute for formal navigation, first aid, winter skills, or mountain leadership training. Outdoor conditions change quickly, and you are responsible for judging whether a route is suitable for you and your group.
Before every walk, use the Walks4all SAFE WALK check. It is a quick way to ensure you have made the key safety decisions before you set off.
| SAFE WALK step | What to check |
| S - Suitable route | Are the distance, ascent and terrain suitable for everyone in the group? |
| A - Alert someone | Have you told someone your route, start point, finish point and expected return time? |
| F - Forecast and conditions | Have you checked the weather, wind, visibility, ground conditions, tides and river levels? |
| E - Essentials packed | Do you have waterproofs, warm layers, food, water, first aid, a head torch, a whistle and an emergency shelter? |
| W - Wayfinding ready | Do you have a map, a compass, offline route guidance, knowledge of how to use them, and enough phone battery? |
| A - Assess the group | Is everyone well, properly dressed, fed, hydrated and comfortable with the route? |
| L - Leave time | Have you allowed enough daylight and built in extra time for stops, slow sections, and mistakes? |
| K - Know when to turn back | Have you agreed on when you will change route, shorten the walk or call for help? |
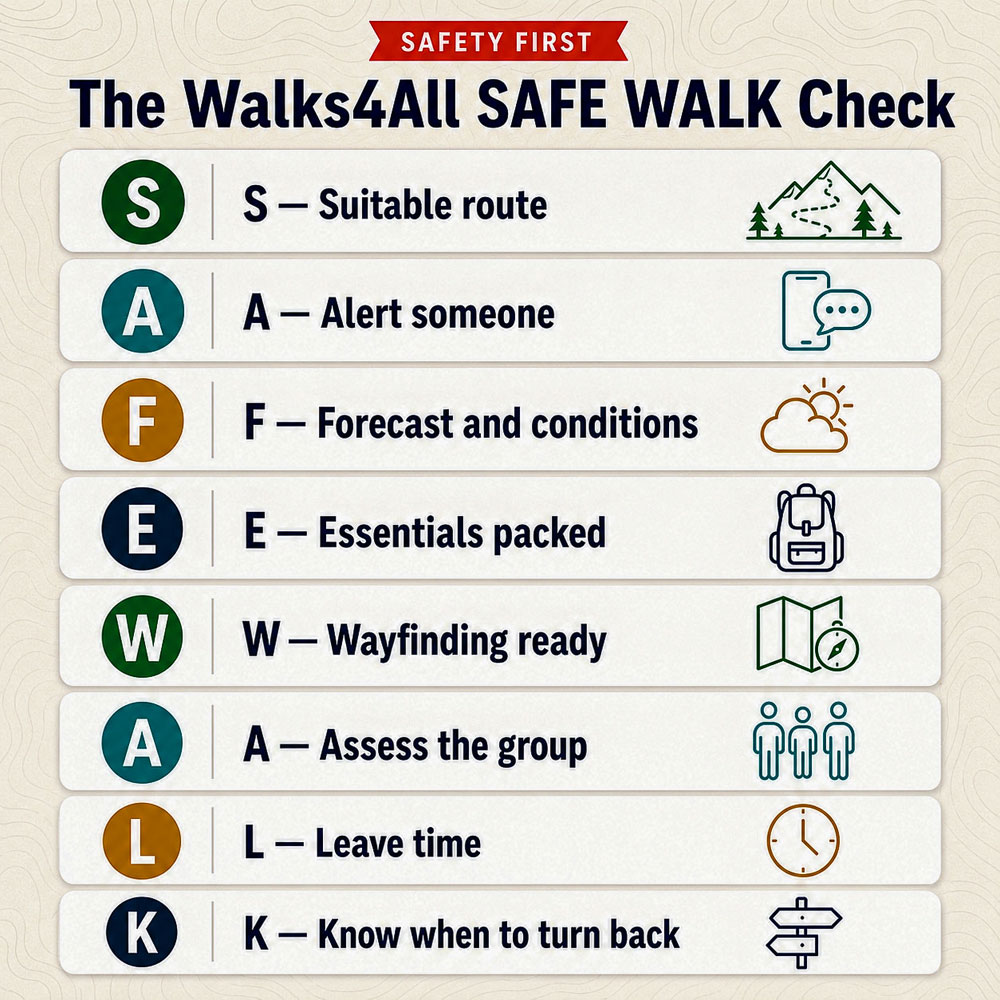
Use the SAFE WALK check before every walk to cover route choice, weather, kit, navigation, group condition, daylight and turn-back decisions.
The SAFE WALK check is deliberately simple. It gives walkers a repeatable routine for route suitability, weather, kit, navigation, group condition, daylight and turn-back decisions.
Use this quick checklist before leaving home, and keep using it as conditions change during the walk.
| Stage | Checks |
| Before you leave home | Choose a suitable route; check the distance, ascent, weather, daylight and local hazards; tell someone your plan; download offline maps; charge your phone and power bank; pack a safety kit; set a turn-back time. |
| On the walk | Start steadily; keep the group together; walk at the pace of the slowest person; eat and drink regularly; recheck the weather, visibility, daylight and energy levels. |
| In an emergency | Stop; keep the group together; shelter from wind and rain; find your location; call 999 or 112; ask for Police, then Mountain Rescue, or Coastguard on coastal routes. |
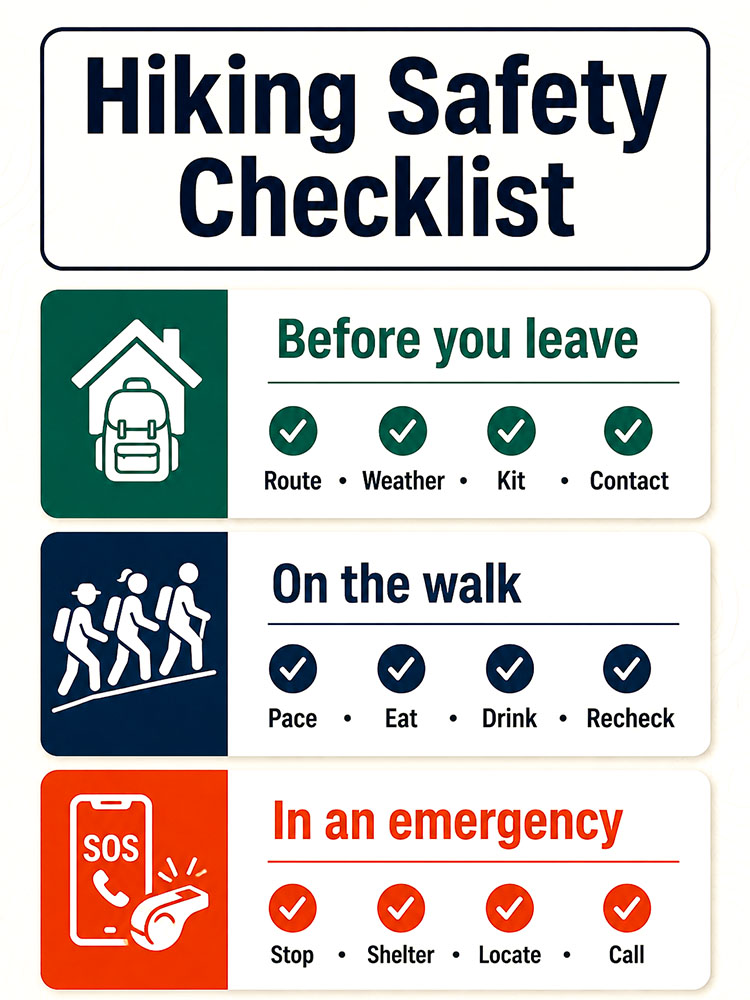
Check your route, weather, kit, group and emergency plan before leaving, then keep reassessing as you walk.
The full guide below explains each part of the checklist in greater detail.
The safest hiking route is one that suits your fitness, confidence, experience and the daylight window on the day. A route may look easy because the mileage is short, but hills, bogs, loose rock, poor visibility, steep descents or rough paths can make it much harder.
Before choosing a route, check the distance, total ascent, highest point, terrain, steepness, navigation difficulty, weather exposure, escape routes, public transport or parking, and whether the route is suitable for everyone in your group.
If you use a mapping app such as OS Maps, check the distance, total ascent and estimated time before you go. Over time, adjust the app's walking speed settings to match your pace. This gives you more realistic timings and makes it easier to plan daylight, breaks and turn-back points.
If you are new to walking, start with shorter, easier routes and build up gradually. Confidence grows much faster when you finish a walk feeling comfortable than when you finish cold, exhausted or anxious.
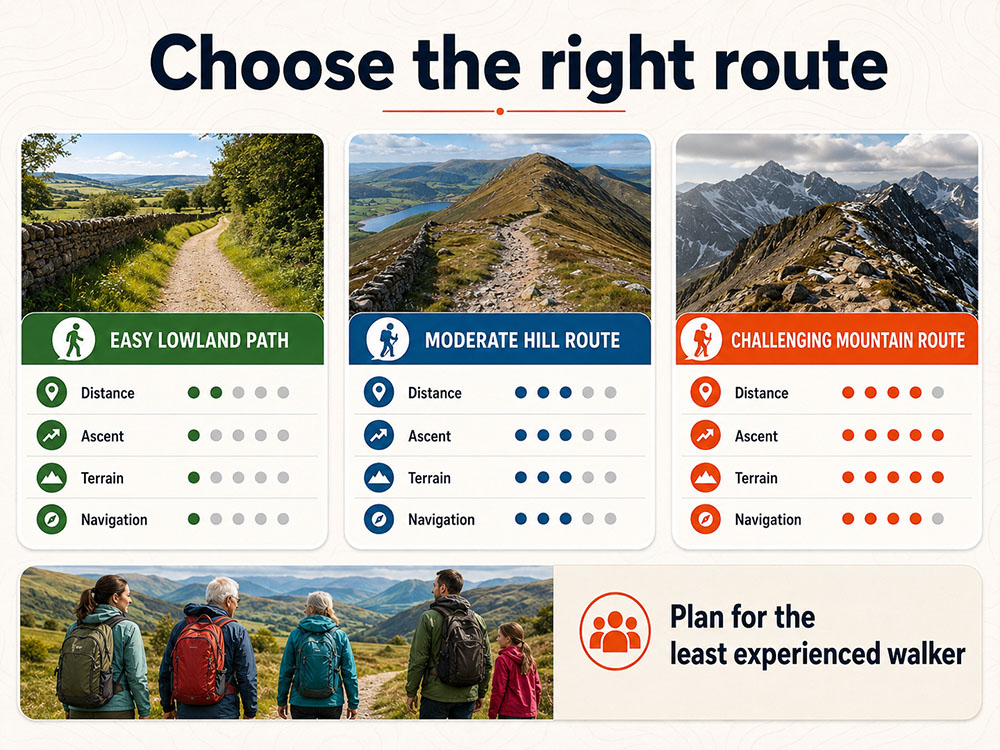
Choose a route that matches the least experienced person in the group, not the strongest walker.
A route should be chosen for the whole group, not just for the fittest or the person most keen to reach the summit.
A group walk should be planned around the person who will find it hardest, not the fastest walker. If one person struggles, the whole group slows down, and the safety margin shrinks.
Before you start, ask whether everyone has done this distance before, whether they are comfortable with the terrain, whether anyone dislikes heights, cattle or river crossings, whether anyone needs medication, and whether the route can be shortened if necessary.
A safe walking group stays together, communicates clearly, and avoids letting pride push the plan beyond the group's capacity.
Total ascent can significantly affect the difficulty of a walk. A route with 800 metres of ascent will usually feel much harder than a route of the same distance on flatter ground. Repeated climbs and descents can also be tiring, especially later in the day when legs are already heavy.
Use a detailed map or a route-planning app to check the total height climbed, steep sections, contour spacing, long descents, whether the hardest climb is near the start or the end, and whether there are easier escape routes.
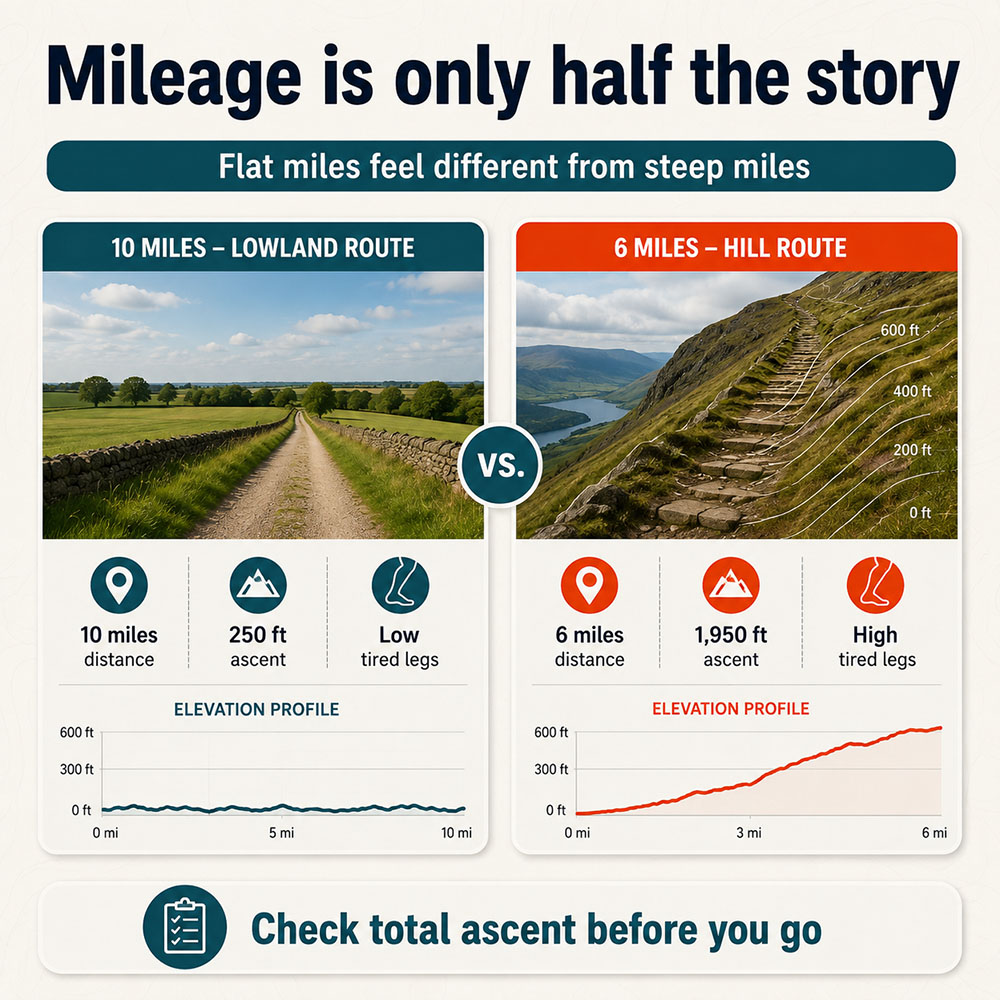
A short route with a steep ascent can be harder and riskier than a longer walk on flatter ground.
Close contour lines on an Ordnance Survey map indicate steeper ground. If you are not confident reading contours, practise on familiar routes before relying on them in poor visibility.
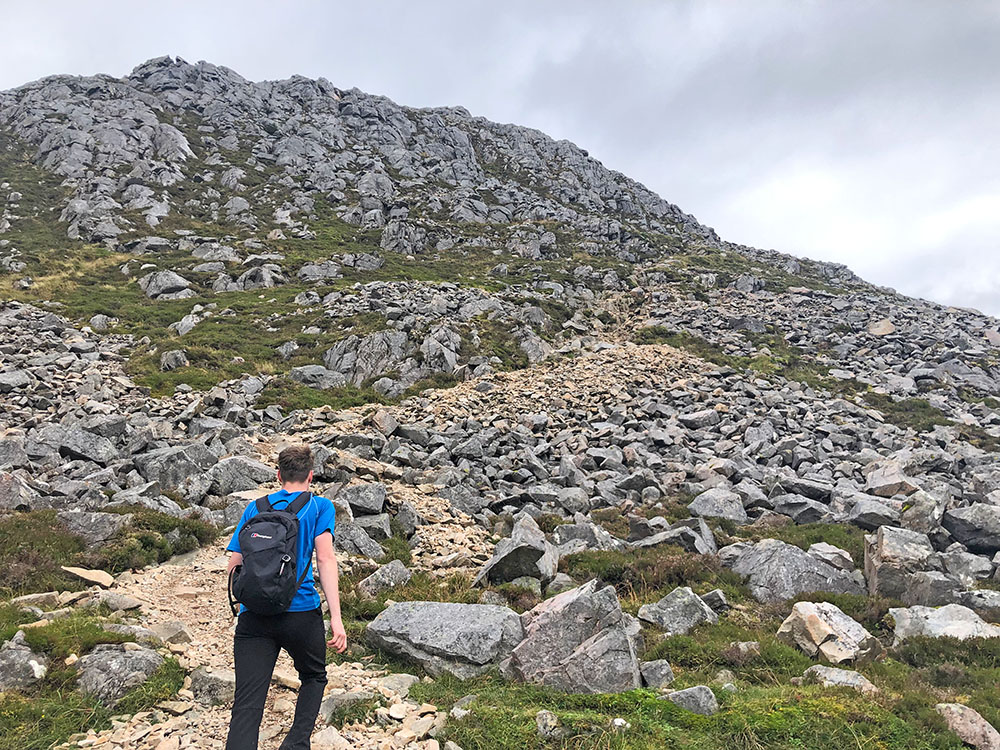
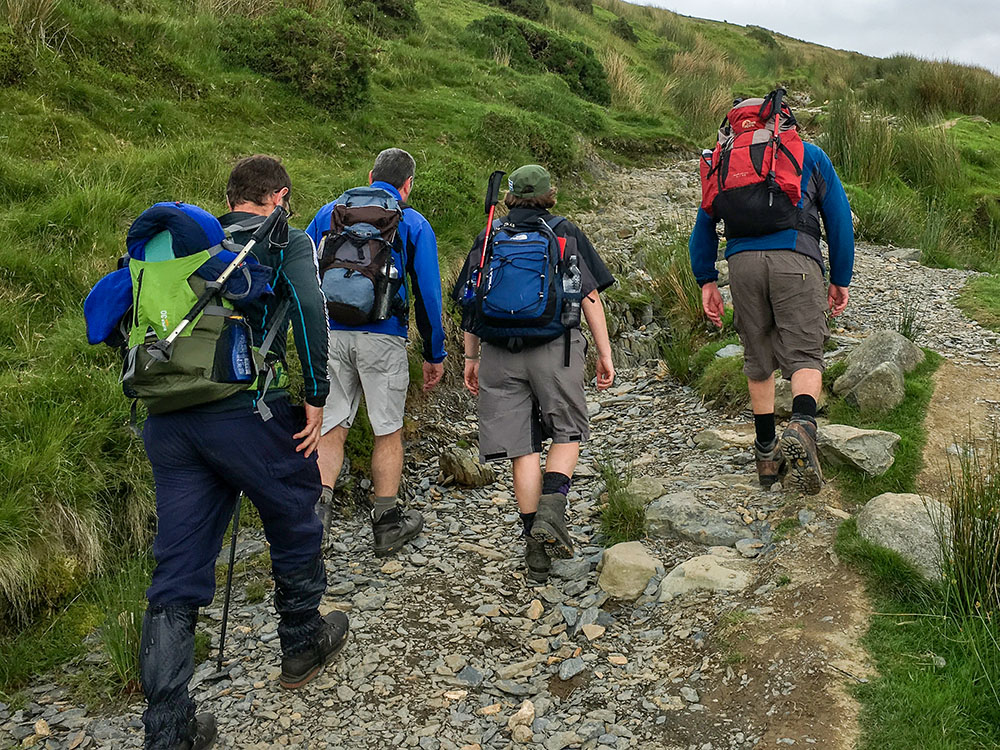
Real-world imagery shows how rough terrain can make a route more challenging than the mileage suggests.
Real rocky ground can feel very different from a neat route line on a screen. Rough terrain, loose stones and awkward steps can slow the group and increase the risk of slips, especially on the descent.
Do not rely on a single photo, a social media post or an app screenshot. A route can look straightforward online but feel very different in fog, wind, rain, snow, heat or poor light.
Before setting out, read a full route description, if available, and compare it with a suitable map. Check for path closures, diversions, storm damage, parking restrictions, transport times, river crossings, tidal sections, livestock, dog restrictions, exposed ridges, steep descents, boggy or eroded paths, and seasonal hazards.
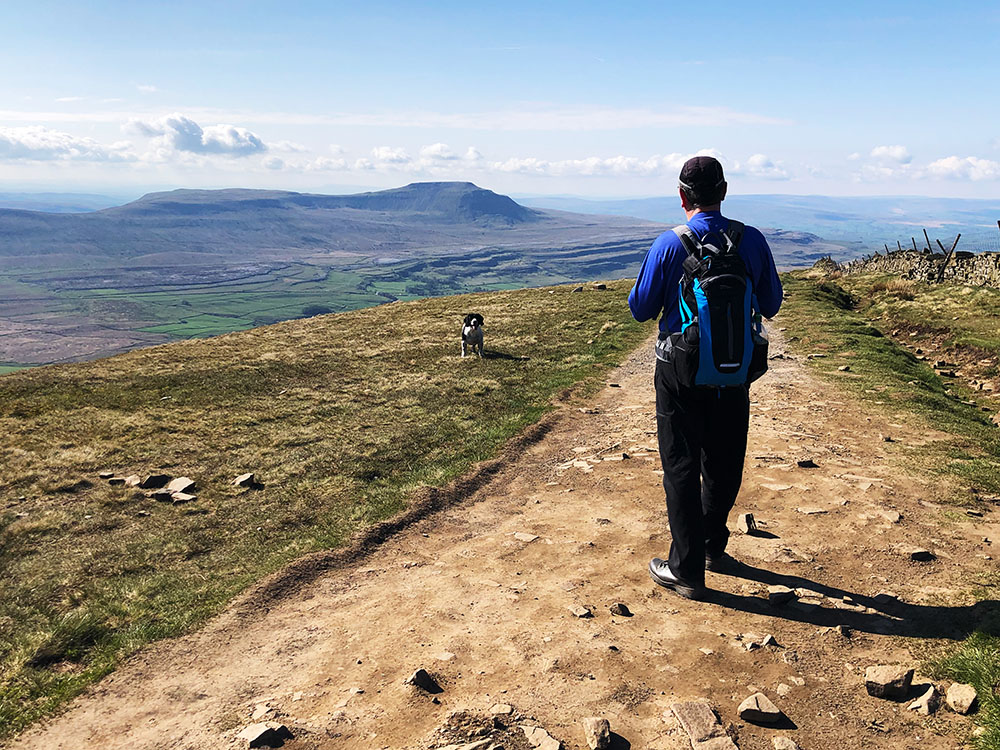
If you are walking a popular mountain route, do not assume popularity means safety. Busy paths can still have severe weather, difficult navigation, loose ground, steep drops or long descents. The Yorkshire Three Peaks walk is well signed and follows well-made footpaths, but people continually get lost, usually in poor visibility or late in the day, and have to call mountain rescue.
Checking the weather means more than glancing at a sun or rain symbol. For hill and mountain walks, check for rain, wind speed and gusts, temperature, wind chill, cloud base, visibility, thunderstorm risk, snow or ice risk, and how conditions change throughout the day.
For hill and mountain walks, look beyond the basic rain symbol. Mountain forecasts such as MWIS can help you check summit wind, how it may affect you, how wet it is likely to be, cloud on the hills, the chance of cloud-free summits, sunshine and air clarity, and temperature at height and the freezing level. These details can completely change whether a route is sensible on the day.
Use specialist forecasts such as the Met Office mountain weather forecast or the Mountain Weather Information Service. General town or village forecasts can be useful, but they may not reflect how the weather will feel on higher, windier or more exposed ground.
If the forecast is poor, or the weather turns for the worse while you are out, have a shorter, lower-level alternative walk ready. The higher mountains and ridges will still be there for a better day.
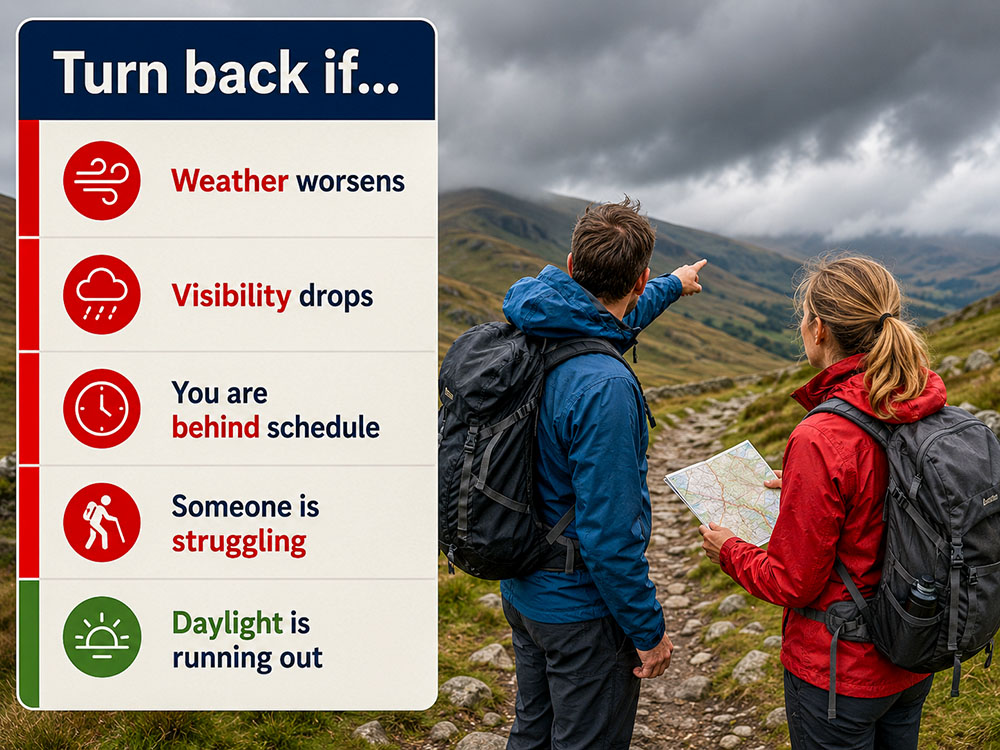
Set a turn-back time before the walk and change the route early if weather, visibility, timing or group energy worsens.
Weather decisions should be made early. It is easier to change plans near the car park or a safe junction than when you are high, wet, cold and behind schedule.
Good weather on the day does not always mean good walking conditions. A path can still be dangerous after heavy rain, snowmelt, storms, freezing temperatures or high winds. I recently went for a walk near Les Carroz in France. It was 25 degrees when I set off, but after climbing over 1,000 metres to about 2,200 metres, even though it had been very hot all week, there was still snow blocking my intended route.
Before you go, check local conditions for flooding, river levels, tides, snow and ice, boggy ground, landslips, fallen trees, cliff erosion, path closures, and wildfire risk in dry weather.
Coastal walks require particular care. Check tide times before walking across beaches, causeways, estuaries or rocky shorelines, and make sure you know your safe exit points and times.
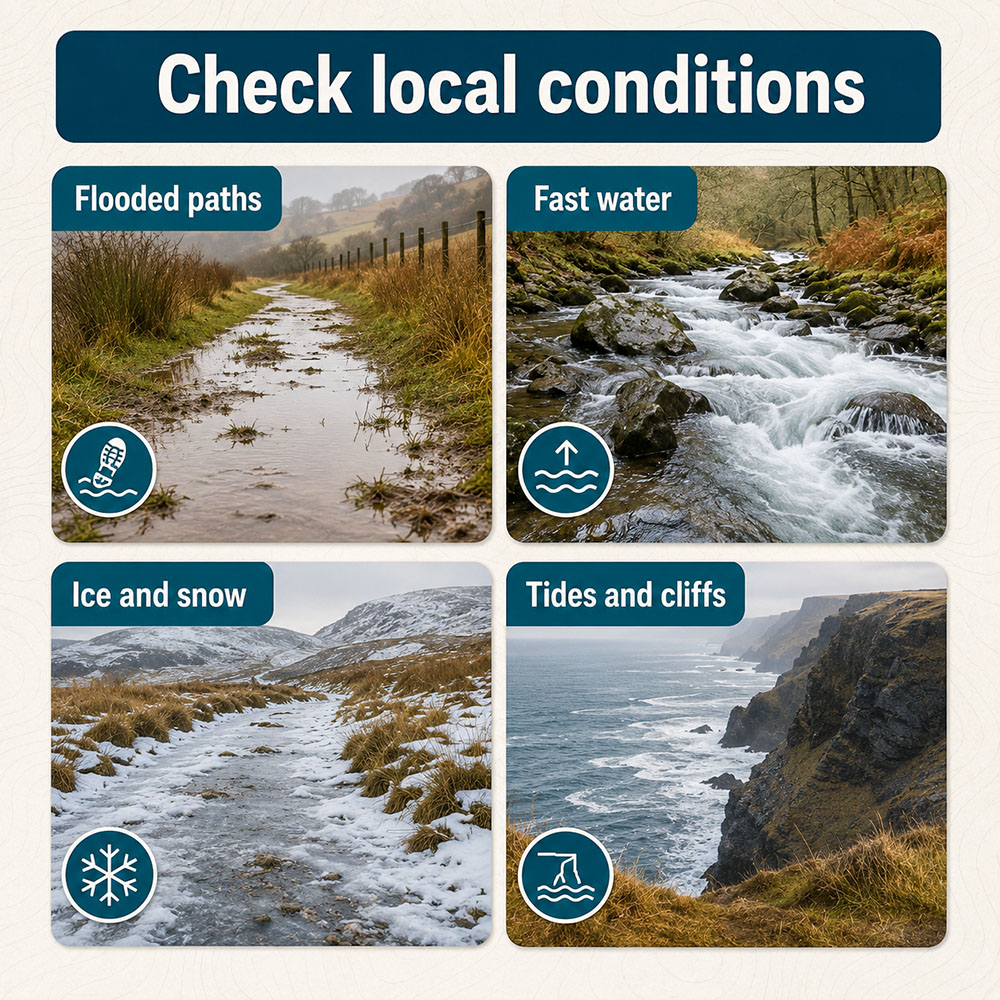
Good weather on the day does not always mean safe ground conditions. Check rivers, tides, ice, snow and path closures before setting off.
Local conditions often make the difference between a straightforward walk and a risky one. Treat river crossings, tide times and snow or ice reports as part of route planning, not as afterthoughts.
Running out of daylight is one of the easiest hiking problems to avoid. Before you leave, check the sunrise and sunset times, then work out how long the walk is likely to take, including breaks, navigation, photos, slower walkers, weather changes and mistakes.
Be especially careful in autumn and winter, in woodland and valleys, in poor weather, in fog, in remote terrain, and on routes with difficult descents. A route that feels simple at 11 am can feel very different at 4 pm in fading light, rain and tired legs.
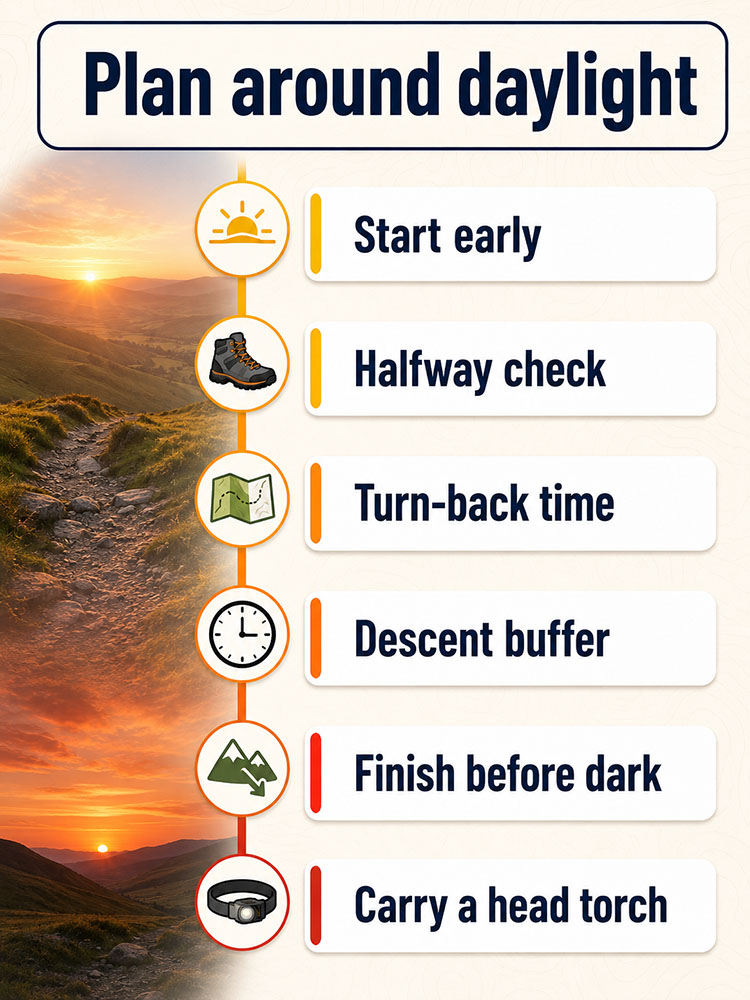
Build in daylight margin for breaks, navigation, slower walkers, weather changes and a safe descent.
Always carry a head torch, even if you expect to finish in daylight. Most delays seem manageable until the light starts to fade.
A turn-back time is the point at which you stop going further and either return, shorten the route, or take an escape route. Set it before the walk begins, not when you are tired, cold, wet or emotionally committed to reaching a summit.
| Turn back or change route if... | Why it matters |
| You are behind schedule before the halfway point | The second half often takes longer than expected. |
| Visibility drops | Navigation becomes harder, and mistakes become more likely. |
| Wind, rain, snow or heat is worse than forecast | Weather can quickly reduce your safety margin. |
| Someone is limping, shivering, unusually quiet or exhausted | Small problems can become serious if ignored. |
| You are approaching difficult ground late in the day | Tired walkers make more slips and poor decisions. |
| A river crossing looks deeper or faster than expected | Water is often more dangerous than it appears. |
| You are no longer sure where you are | Continuing blindly usually makes things worse. |
| The walk no longer feels controlled | Morale and judgement are part of safety. |
When planning the route, identify escape options before you set out. These might include a lower-level path, a shorter return route, a valley track, a bus stop, a road crossing or a safe descent that avoids exposed ground. Escape routes are much easier to choose calmly at home than in rain, wind or low cloud.
Turning back is not failure. It is sound judgement.
Always tell a reliable person where you are going, especially if you are walking alone, walking in remote areas or taking a longer hilly route.
Tell them your starting point, planned route, alternative routes, finishing point, expected start and finish times, latest check-in time, who is in the group, your car registration and parking location, and the phone numbers of the people in the group.
If you change your route, shorten your walk, take a different descent, or decide to stay out longer, update your emergency contact as soon as you can. A route plan is only useful if it still reflects where you are likely to be.
Do not just say, "I am going walking in the Lakes" or "I am doing Snowdon". That is not enough information to help anyone find you quickly.
A route card provides your emergency contact with the information they need if you are overdue. It can be a printed sheet, a note on your phone, an email or a message.
| Route card detail | Fill in before you go |
| Walk name | |
| Date | |
| Start point | |
| Parking location | |
| Vehicle registration | |
| Planned start time | |
| Planned finish time | |
| Latest check-in time | |
| Main route | |
| Alternative route | |
| Escape routes | |
| Key grid references | |
| People in the group | |
| Mobile numbers | |
| Medical notes | |
| Emergency contact | |
| What to do if overdue |
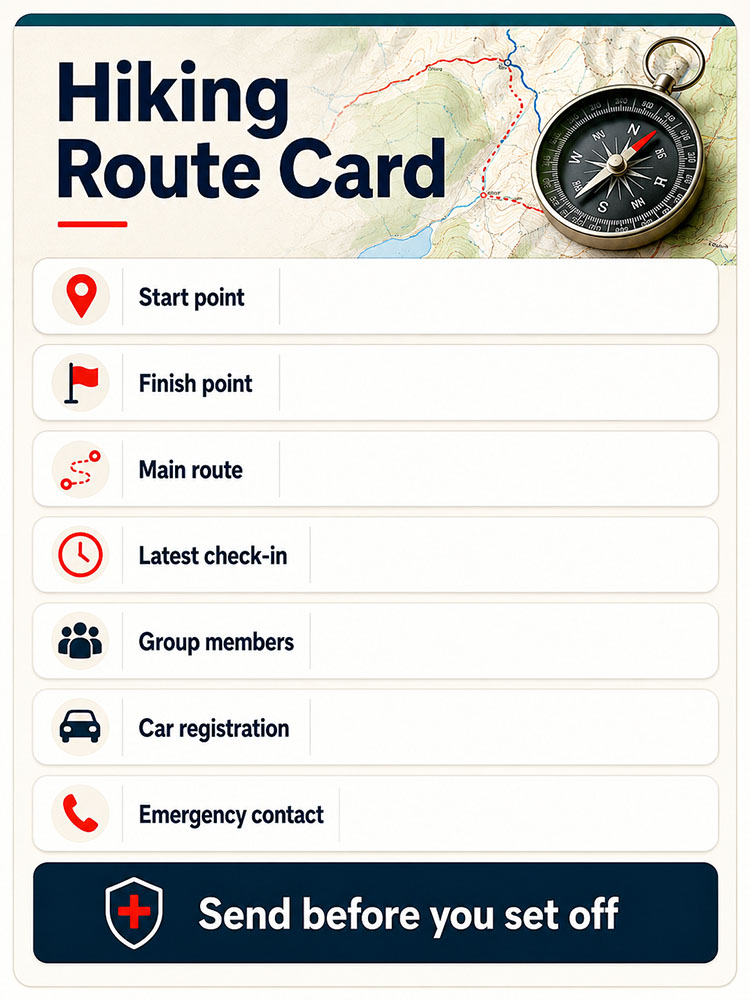
A route card gives your emergency contact useful information if you are overdue.
Before you leave, send the route card to someone reliable. Let them know when you are safely back.
A phone app is useful, but it should not be your only navigation method. Phones can run out of battery, lose signal, break, get wet, freeze, overheat or be dropped. GPS can also give you false confidence if you do not understand the terrain around you.
Carry a paper map, a compass, a phone with offline maps, a power bank, route notes, and either a waterproof map case or a laminated map if needed.
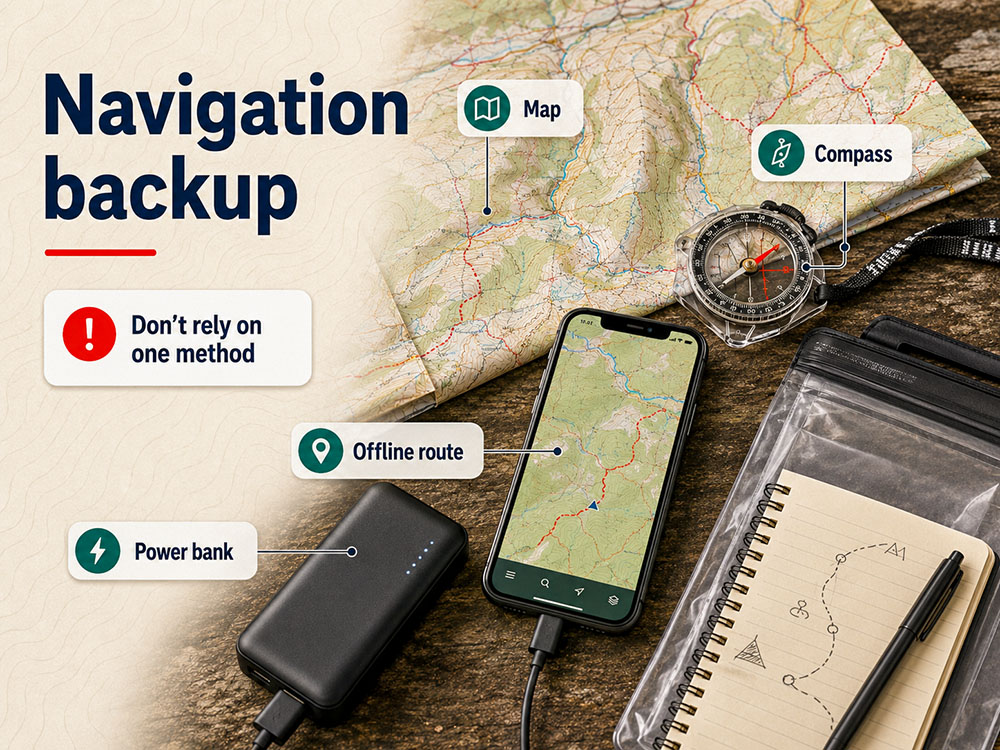
Use your phone as a useful tool, but back it up with a paper map, a compass, route notes, and a power bank.
For most UK hill walks, a 1:25,000 OS map provides useful detail for paths, contours, walls, streams and field boundaries. A laminated map or a clear waterproof map case is worth carrying in wet weather, as a soggy map is much harder to use when you need it most.
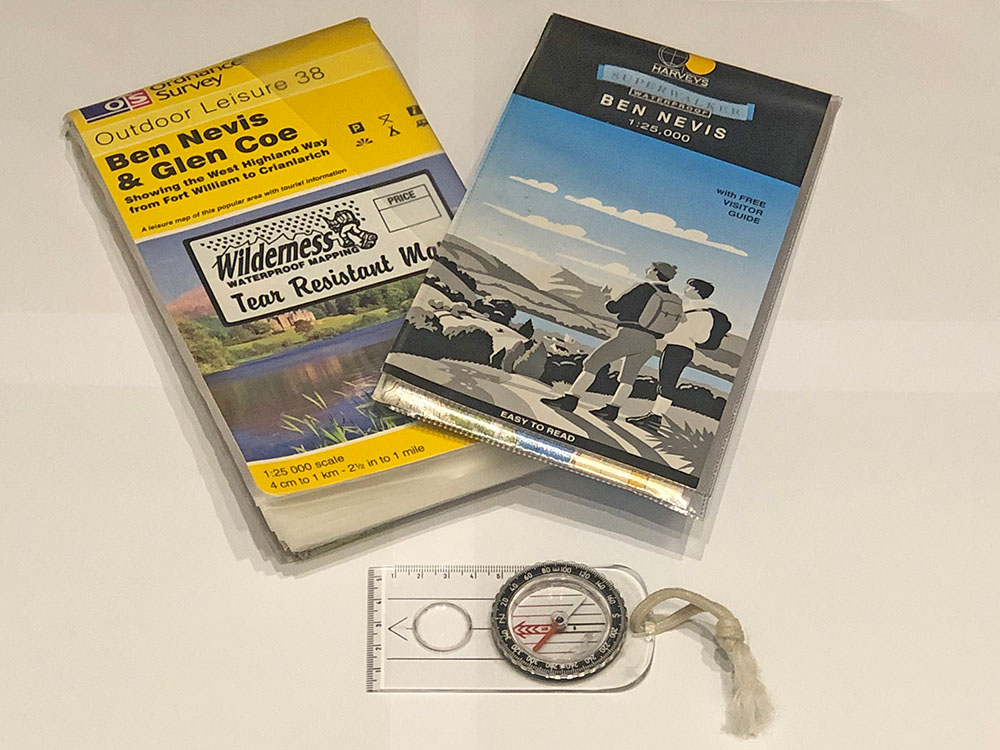
A detailed paper map and compass remain essential backups because they do not rely on battery, signal or a working screen.
A paper map cannot run out of battery power. A compass does not need a signal. But both are only useful if you know how to use them.
Carrying a map and compass is only useful if you can use them. Practise orientating the map, taking and following bearings, reading contour lines, estimating distance, using tick-off features, spotting handrails such as walls and streams, relocating when unsure, and finding a grid reference.
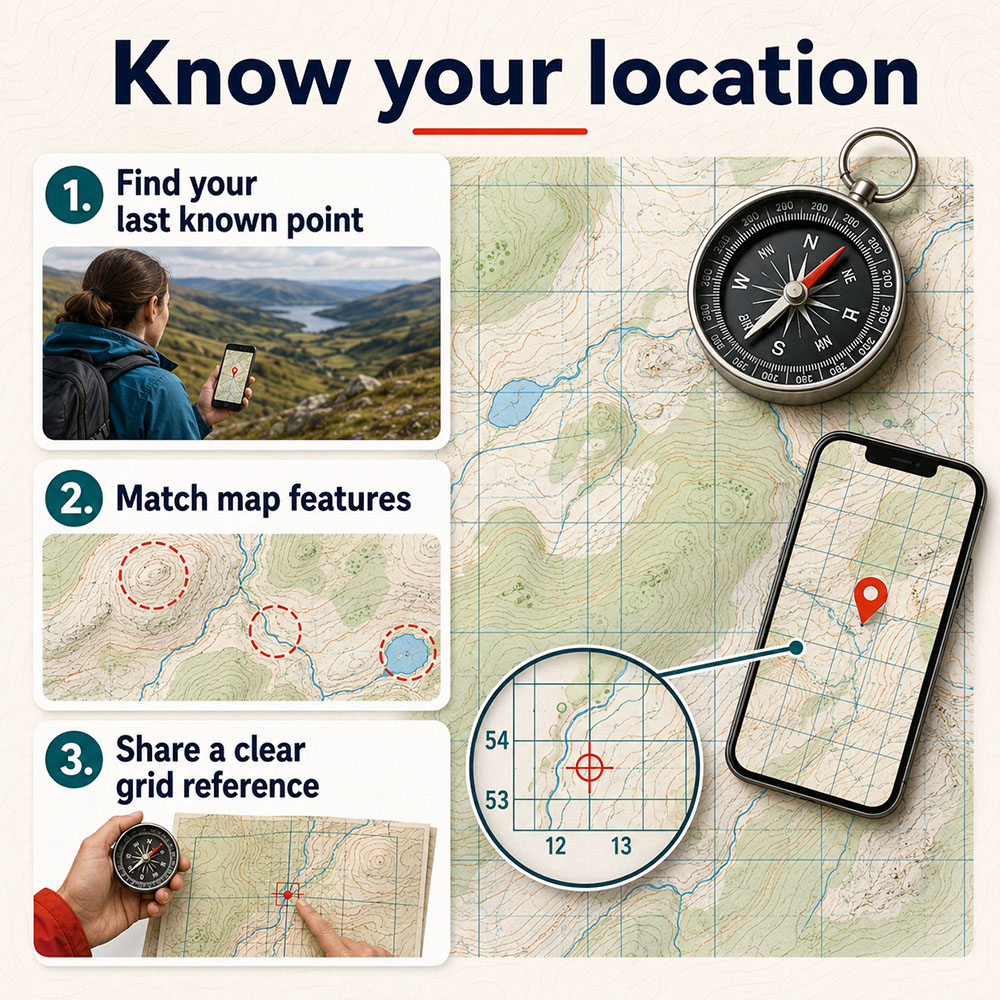
Practice location skills before you need them, including matching map features and sharing a clear grid reference.
In an emergency, a clear OS grid reference and a description of your surroundings can help rescuers. If you use a navigation app, learn how to display your grid reference in advance.
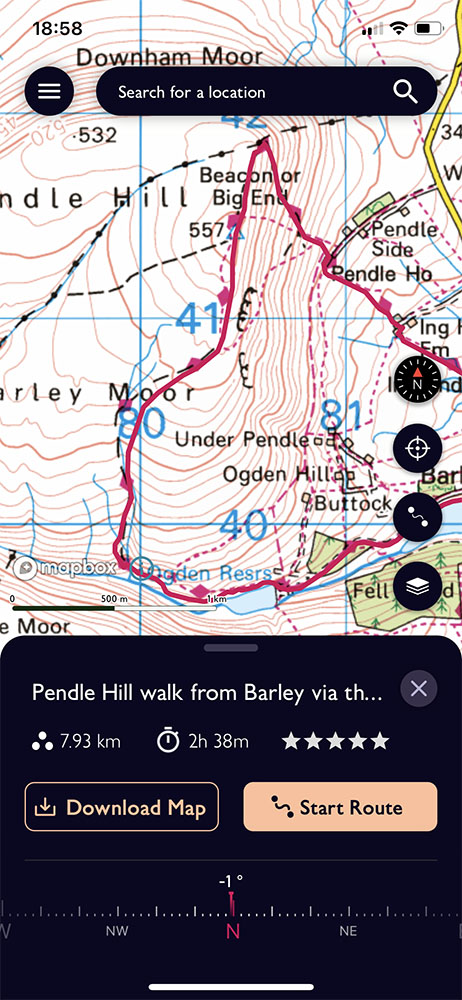
Mapping apps are useful for planning distance, ascent, timings and route progress, but should not be your only navigation method.
Mapping apps can help you plan distance, ascent and estimated time, but they should support your navigation skills rather than replace them.
Good hiking footwear should match the route, terrain and weather conditions. For dry, easy paths, lightweight walking shoes or trail shoes may be sufficient. For muddy, rocky, wet, steep or longer routes, walking shoes or boots with better grip and ankle support are usually safer.
Before a longer walk, check that the soles still have grip, the laces are secure, the shoes or boots are broken in, your socks are comfortable, there are no pressure points, and your feet remain secure on descents.
In winter, on hilly terrain, ordinary summer walking shoes may not be sufficient. Dedicated winter walking boots are warmer, have stiffer soles, provide more support on rough or frozen ground, and may be compatible with crampons. Only use crampons and ice axes if you have the right equipment and know how to use them.
Do not wear brand-new boots on a long walk. Test them on shorter routes first. Blisters, rubbing and sore toes can slow the whole group and turn an easy walk into a difficult one.
Layering helps you stay warm, dry and comfortable as conditions change. A simple walking clothing system might include a base layer, a fleece or mid-layer, a waterproof jacket, a spare warm layer, a hat and gloves, comfortable walking trousers or shorts, and walking socks.
Layers work because you can remove clothing while climbing and add it when stopping, descending, or walking into the wind. Avoid relying on a single thick layer. It can make you overheat while moving and leave you cold when you stop.
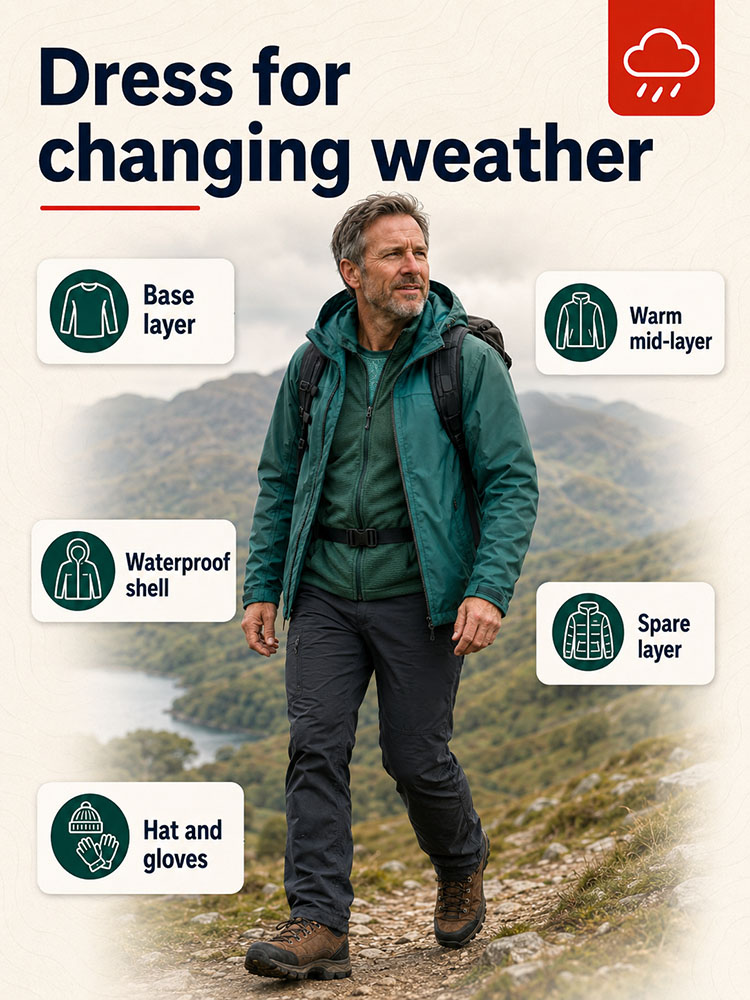
Layering helps you adjust to climbs, stops, wind, rain and changing UK hill weather.
Summits can be cold even in summer, so a warm layer, hat and gloves are worth carrying on hill days even when the valley feels mild.
A waterproof jacket is one of the most important items of walking kit in the UK. Weather can change quickly, especially in hilly, mountainous, moorland, and coastal areas. Rain combined with wind can chill you surprisingly fast.
A lightweight waterproof may be enough for short summer or low-level walks, but longer hill days and four-season walking require something more durable. Look for a jacket that is properly waterproof, not just water-resistant, and breathable enough to prevent you from getting soaked from sweat on the inside. The same principle applies to waterproof trousers.
For longer, higher, or more exposed walks, consider carrying a waterproof jacket, waterproof trousers, a warm hat, gloves, spare socks, a spare insulating layer, and a rucksack liner or dry bags.
Waterproof clothing is not only about comfort. It helps protect you from wind chill, cold rain and the early stages of hypothermia.
Your hiking safety kit should help you deal with a delay, a wrong turn, an injury, bad weather, or an unexpected nightfall.
For most day hikes, carry a map, compass, phone with offline maps, power bank, waterproof jacket, warm spare layer, food, water, first-aid kit, personal medication, head torch, whistle, emergency shelter or survival bag, sun protection, ID and emergency contact details, and small repair items or a multi-tool.
Do not pack more gear than you can safely carry for the whole day. There is always a balance between carrying enough for comfort and safety and keeping your rucksack light enough not to slow you down or make you unstable.
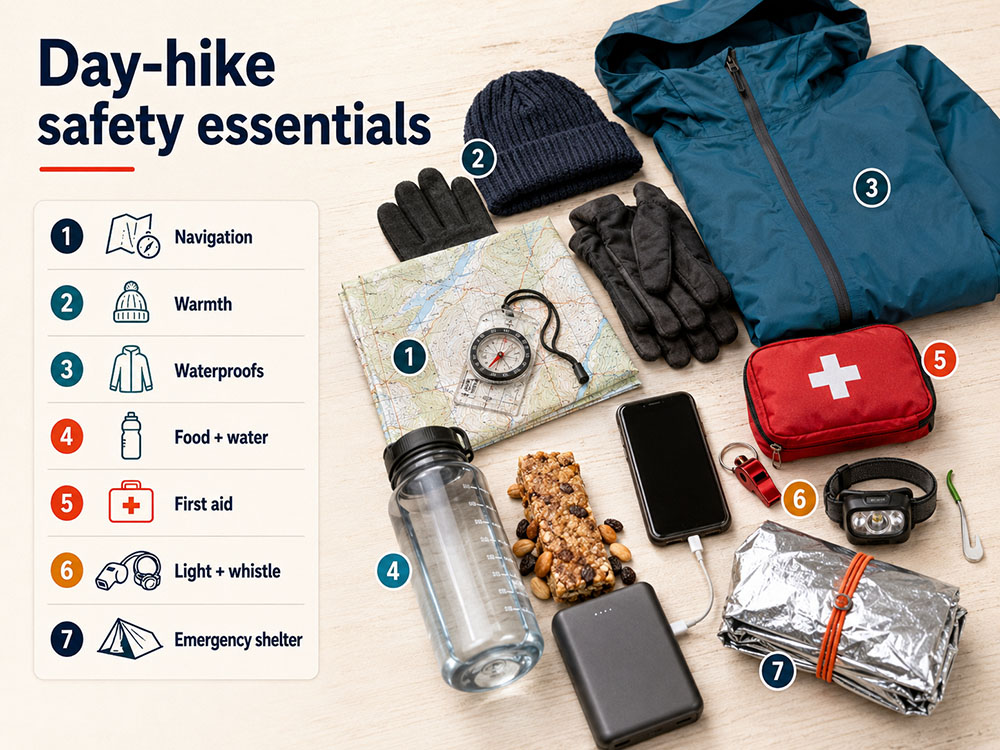
Your safety kit should help you cope with a delay, a wrong turn, an injury, bad weather, or unexpected darkness.
You may not use every item on every walk. That is the point. A safety kit is for the day when things do not go to plan.
A head torch is small, lightweight and one of the easiest safety items to carry. Do not rely on your phone torch. It drains your phone battery, is awkward to hold while walking, and leaves you without both hands free.
Carry a head torch on winter, autumn, hill, and woodland walks, long routes, late-afternoon starts, and any walk where a delay could leave you close to darkness.
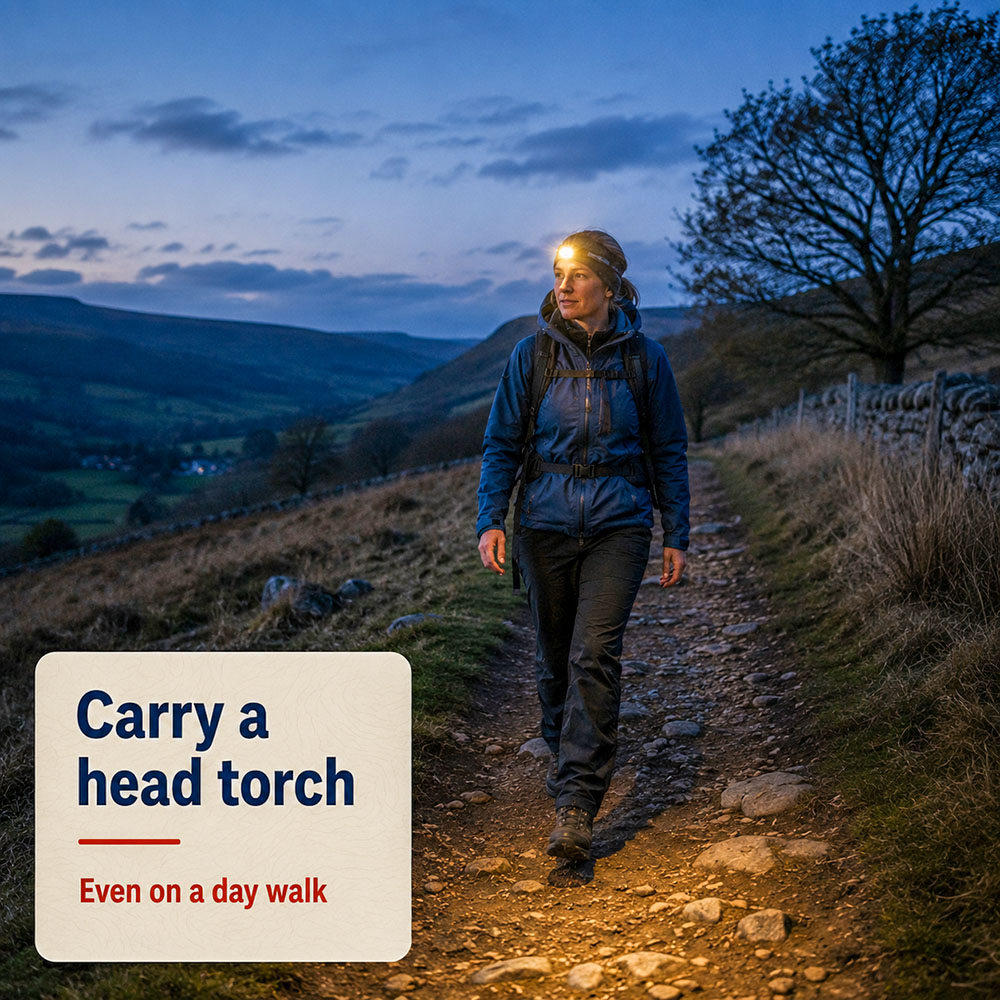
A head torch is safer than relying on your phone torch if a walk takes longer than expected.
Check the batteries before you go. If your head torch uses replaceable batteries, carry spares. If it is rechargeable, charge it before the walk. If you know you are going to be completing or starting some of the walk in the dark, practise walking in the dark on a hill and on paths you know very well first to get used to it. Things look very different in the dark.
A first-aid kit should cover common walking-related problems such as blisters, cuts, grazes, sprains and minor injuries.
A basic hiking first-aid kit may include plasters, blister treatment, sterile dressings, bandages, antiseptic wipes, medical tape, disposable gloves, pain relief medication, a tick remover, tweezers, and any personal medication.
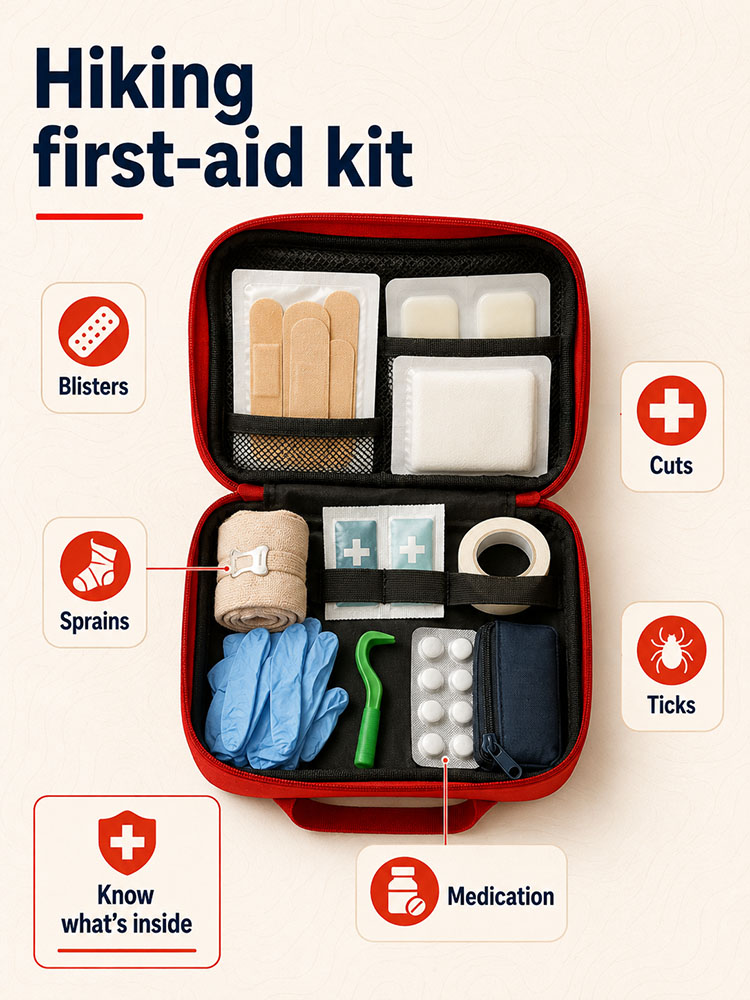
Carry a small first-aid kit and personal medication, and make sure someone knows where it is packed.
Also carry any medication you may need, such as inhalers, allergy medication, prescribed medication, or an EpiPen if prescribed to you. Everyone in the group should know who is carrying the group's first-aid kit and should also carry a cut-down version of the group kit themselves.
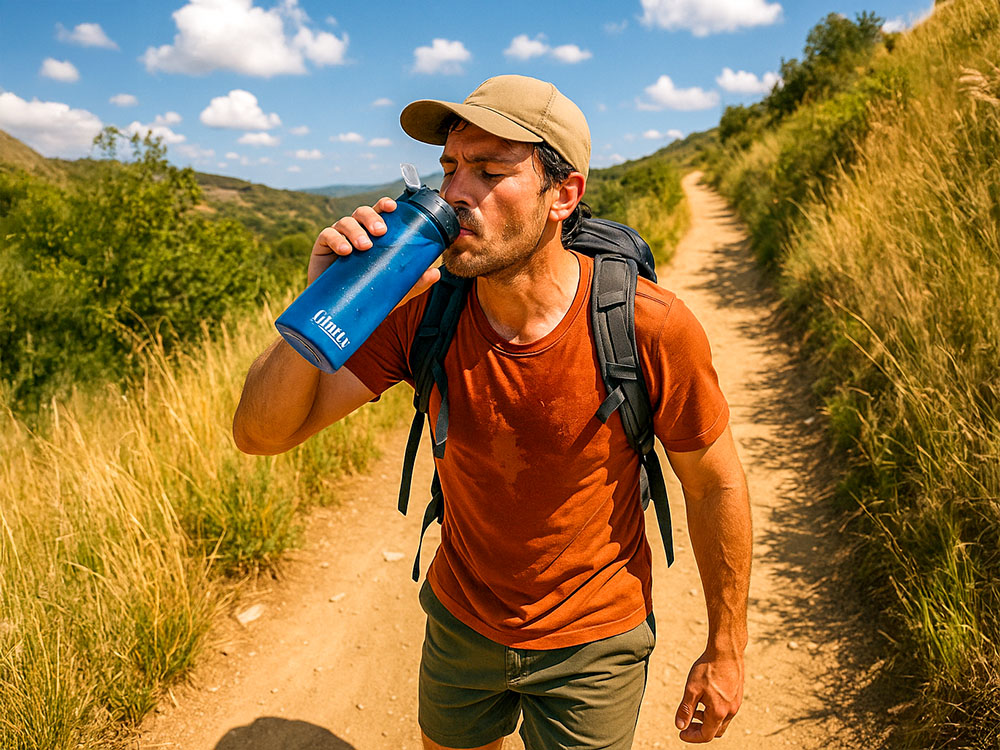
Eat and drink before you feel desperate. Low energy and dehydration can affect balance, concentration, mood, warmth and decision-making. On a walk, this can quickly become a safety issue.
Good hiking food is easy to eat, high-energy, packable, still edible in poor weather, and accessible without emptying your bag. Good options include sandwiches, flapjacks, oat bars, trail mix, nuts, dried fruit, chocolate and emergency sweets.
Carry more water in hot weather, either in water bottles or in a hydration bladder on exposed routes, on long climbs and where safe refill points are uncertain. If you plan to refill from natural water sources, carry a reliable filter or purification treatment and know how to use it.
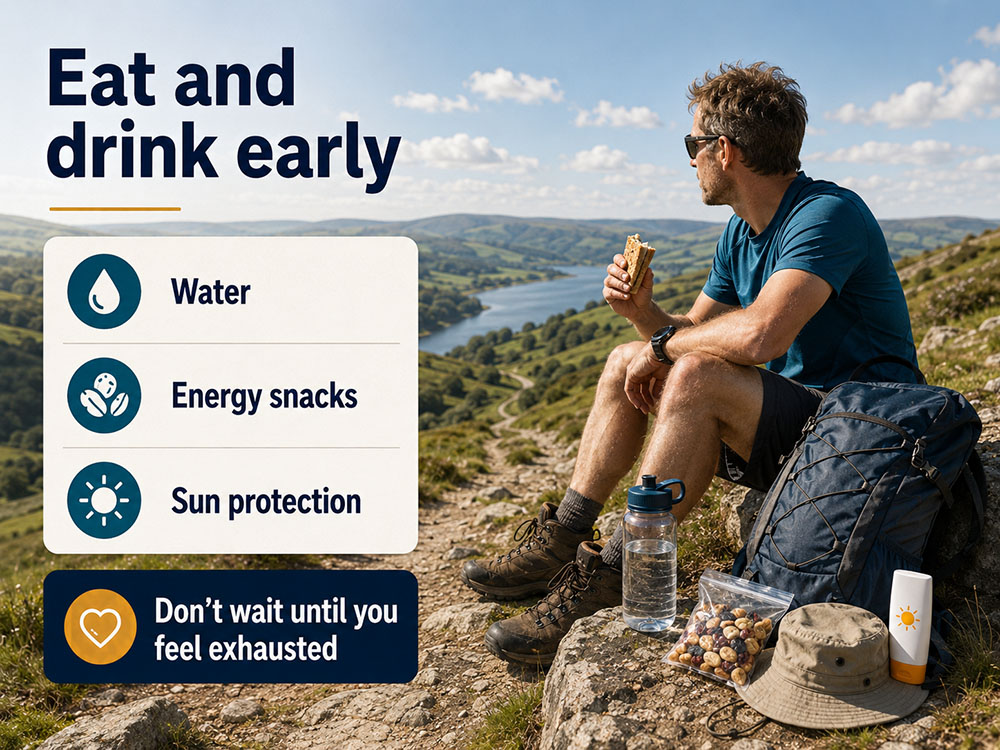
Eating and drinking regularly helps maintain energy, balance, concentration, and decision-making during longer walks.
Eating and drinking well before you set off also helps. Do not start a long walk already hungry, thirsty or low on energy.
Your phone can act as a safety tool, not just a camera. Fully charge it, download offline maps, save the route, carry a power bank on longer walks, keep it dry and warm in cold weather, and avoid wasting battery life on unnecessary photos, video or scrolling.
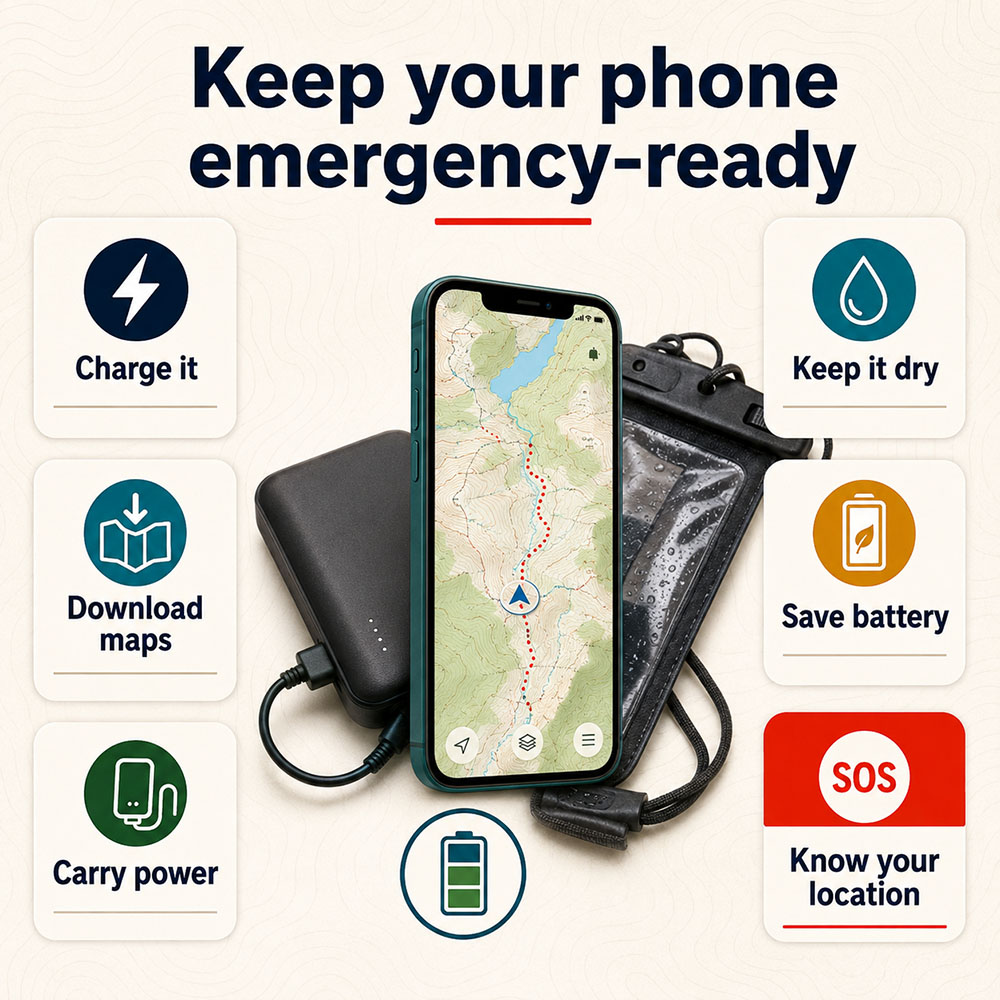
Keep your phone charged, dry and ready to help you navigate, share your location or call for help.
If more than one phone is available in an emergency, use the phone with the strongest signal and the most battery life. Keep other phones warm, dry and ready as backups, as rescue teams may need to call you back.
If you regularly walk in areas with poor signal, consider registering for the UK emergency SMS service before you need it. If you walk alone in remote areas with no reliable mobile signal, consider whether a personal locator beacon or satellite communicator is appropriate.
On day walks, any extra kit should match the route, season, and group. The right extras can make a delay safer and more comfortable, but only if you can still carry your rucksack safely.
| Extra item | When it is useful |
| 20-35 litre day rucksack | A good size for carrying normal day-hike clothing, food, water and a safety kit. |
| Dry bag or rucksack liner | Useful if your pack is not waterproof or you need to keep spare clothing and an emergency kit dry. |
| Hydration bladder | Helpful if you prefer to sip water regularly while walking. |
| Hand warmers | Useful for cold days, winter walks and long stops. |
| Watch | Useful for timing when your phone is off, packed away, or low on battery. |
| Cash | Helpful for car parks, cafes, buses, emergency transport or places with no card signal. |
| Sit mat | Useful for cold, wet, or windy rest stops. |
| Guidebook or route notes | Helpful alongside a full map, especially on unfamiliar routes. |
| Walking poles | Useful for some walkers on climbs, descents, river approaches, and rough ground. |
| Gaiters | Useful in mud, wet grass, bog, snow or heather. |
| Camera | Useful if you prefer not to drain your phone battery taking photos. |
| Survival bag or bivvy bag | Important if you are delayed, injured, or waiting in cold or wet conditions. |
| Water purification tablets or filter | Useful on longer routes where safe refill points are uncertain. |
| Multi-tool and duct tape | Useful for small kit repairs and practical problems. |
If the walk is in very cold or wet weather, or involves snow and ice, specialist equipment may be needed, such as crampons, an ice axe, a bivvy bag and a larger backpack. Only carry and use specialist winter equipment if you know how to use it safely.
Use this as a practical day-hike safety kit list. Adjust it for the route, weather, season and group.
| Item | Why it matters |
| Map | Helps you understand the wider area and escape routes. |
| Compass | Works without battery or signal. |
| Phone with offline maps | Useful for GPS, grid reference, calls, and route checking. |
| Power bank | Extends phone life on longer walks. |
| Waterproof jacket | Protects from rain and wind chill. |
| Waterproof trousers | Useful in sustained rain, wind or boggy conditions. |
| Warm spare layer | Important for stops, delays, and emergencies. |
| Hat and gloves | Useful even in summer on windy summits. |
| Food | Maintains energy and morale. |
| Water | Helps prevent dehydration and poor concentration. |
| First-aid kit | Covers blisters, cuts, grazes and minor injuries. |
| Personal medication | Essential if you rely on inhalers, allergy medication or prescriptions. |
| Head torch | Safer than a phone torch if delayed after dark. |
| Whistle | Emergency signal if shouting is not enough. |
| Survival bag or emergency shelter | Helps protect against cold, wind and rain while waiting. |
| Sun protection | Useful in exposed terrain and hot weather. |
| Tick remover | Useful in grass, bracken, moorland and woodland. |
| Dry bag or rucksack liner | Keeps spare clothes and emergency kit dry. |
| ID and emergency contact details | Helps others assist you if needed. |
Do not carry so much that your rucksack becomes unsafe or uncomfortable. The aim is to maintain the appropriate safety margin for the route, season, and group.
Many walking problems stem from starting too fast. If you push hard in the first hour, you may pay for it later on climbs, descents or the final miles. A steady pace keeps the group together and consersaves energy for the parts of the walk that matter most.
Start gently if the route is longer than usual, the weather is hot, you are carrying extra weight, there is significant ascent, you are walking with beginners, or you have a long descent near the end.
A safe walking group stays together. If the fastest person keeps pushing ahead, the group can become stretched out, people may miss turns, and slower walkers may feel pressured to rush.
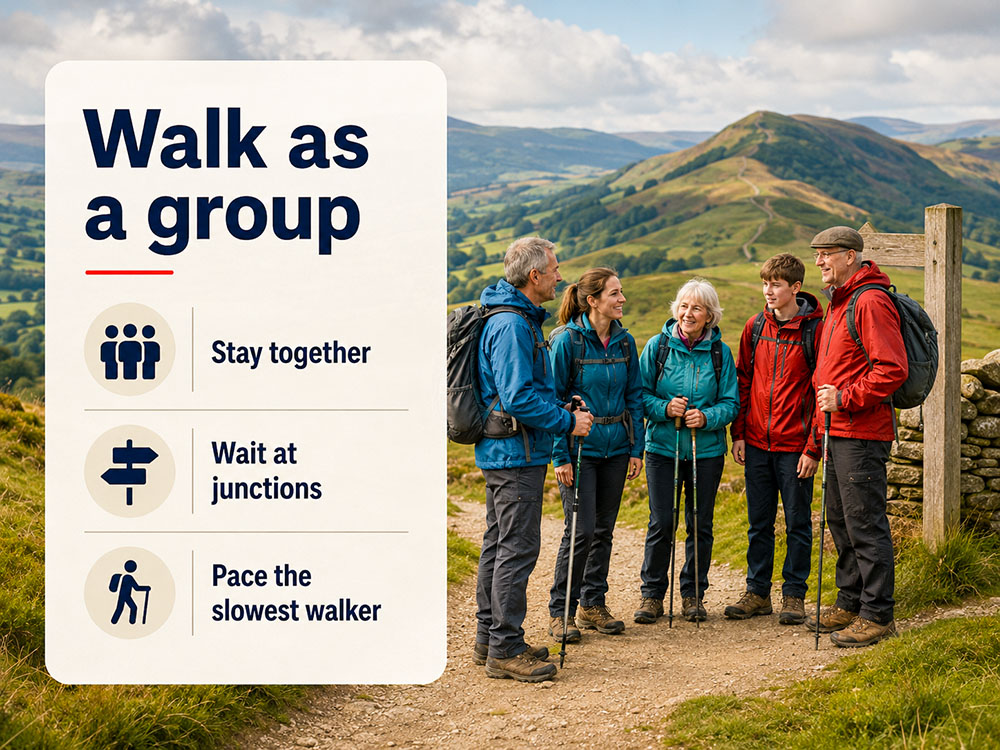
A safe group stays together, waits at junctions and plans the pace around the slowest walker.
Use simple group habits: wait at path junctions, maintain visual contact in poor weather, place a steady walker at the back, check in with quieter group members, do not let anyone walk alone at the rear, and agree on clear regrouping points.
People often say they are fine when they are not. Watch how they walk, not just what they say.
Recognised paths are usually safer than shortcuts. Leaving the path can lead to steep ground, bog, loose rock, river crossings, private land, cliff edges, or difficult navigation.
Stay on the route unless there is a good reason to divert, such as flooding, livestock, erosion, fallen trees, or a closed path. If you do need to divert, stop first, consult the map, assess the terrain, choose a clear alternative, and ensure everyone understands the new plan.
A random shortcut is not a safety plan.
Descents are where many walkers relax too soon. After reaching a summit, viewpoint or halfway point, it is easy to assume the hard part is over. In reality, descending can be harder on tired legs, knees and concentration.
Be especially careful on wet rock, mud, tree roots, loose gravel, scree, steep grass, frozen paths, boardwalks, stepping stones, slab rock and long downhill paths, particularly at the end of the day.
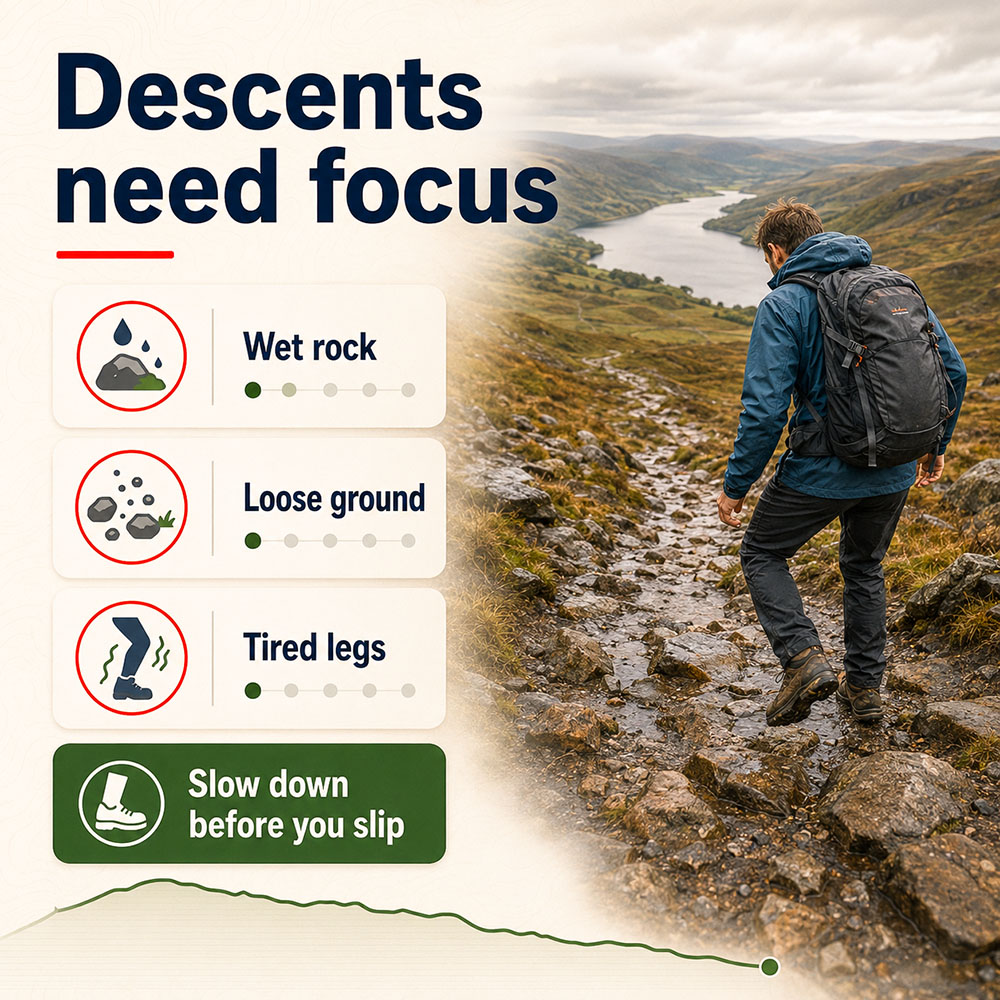
Many walking accidents happen when people are descending, tired or rushing near the end of a route.
Slow down before you feel tired. Most people do not injure themselves by walking too slowly.
The forecast is only a forecast. During the walk, keep checking whether the cloud is lowering, the wind is strengthening, rain is arriving earlier than expected, visibility is worsening, rivers are rising, the ground is becoming slippery, people are getting cold, and whether you are still on schedule.
Small changes matter. A little mist, a slower pace, and a missed junction can combine to create a much bigger problem.
Hunger, thirst, overheating and cold all affect judgement. Eat and drink little and often. Add or remove layers before you become too hot or too cold. Put on a warm layer as soon as you stop for a break in cold or windy conditions.
Watch for signs of hypothermia, especially among older walkers, children and anyone who has become wet, tired or quiet. Warning signs include shivering, confusion, disorientation, clumsiness, unusual tiredness, pale skin and cold hands or feet. Act early: add layers, seek shelter from wind and rain, eat and drink, and shorten the walk if needed.
If someone is becoming cold, wet, exhausted, or confused, address the problem early rather than hoping it will improve on its own.
Water is one of the most underestimated hazards on walks. A shallow stream can become dangerous after heavy rain. Wet stepping stones can be slippery. Waterfall edges can be unstable. Cold water can quickly reduce strength and coordination.
Be especially careful around rivers in spate, fast-flowing streams, flooded paths, wet stepping stones, waterfalls, slippery banks, tidal causeways, estuaries, rocky shorelines, and incoming tides.
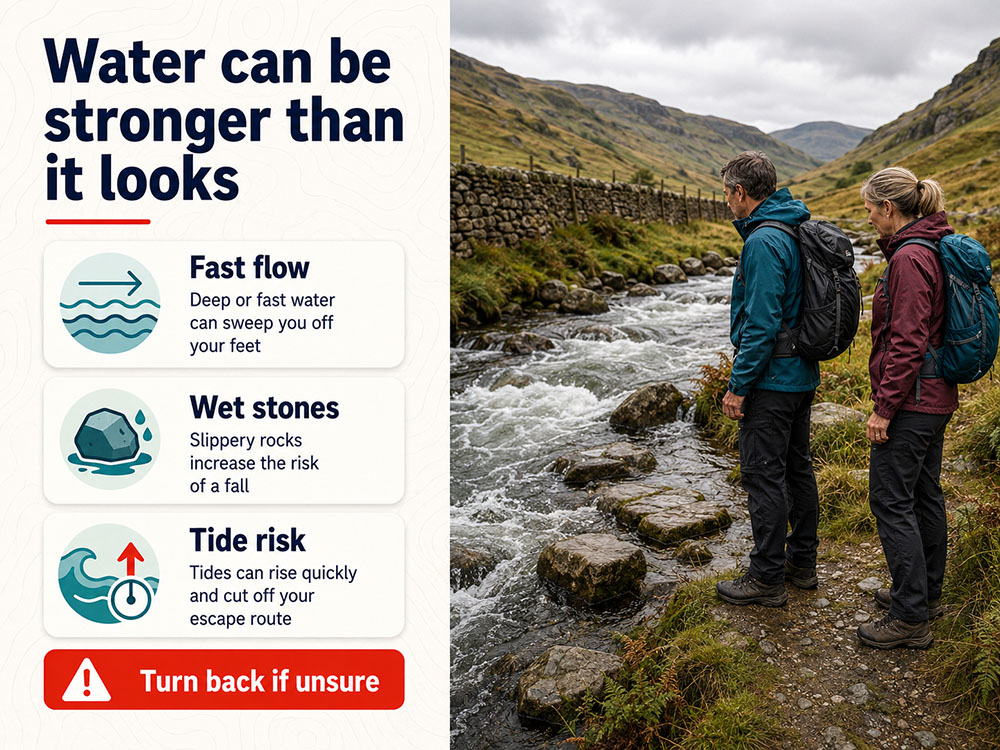
If a river crossing, waterfall edge, stepping-stone route or tidal section looks unsafe, turn back or choose another route.
If a crossing appears unsafe, do not force it. Turn back or choose a safer route.
Some terrain can become dangerous very quickly in adverse conditions. Take extra care around cliff edges, quarries, ridges, steep grassy slopes, loose rock, scree, snow slopes, cornices, ice, wet grass and exposed viewpoints.
Steep grass can be particularly dangerous when wet, frozen or covered in snow. It may look harmless from above, but it becomes very difficult to stop on if you slip.
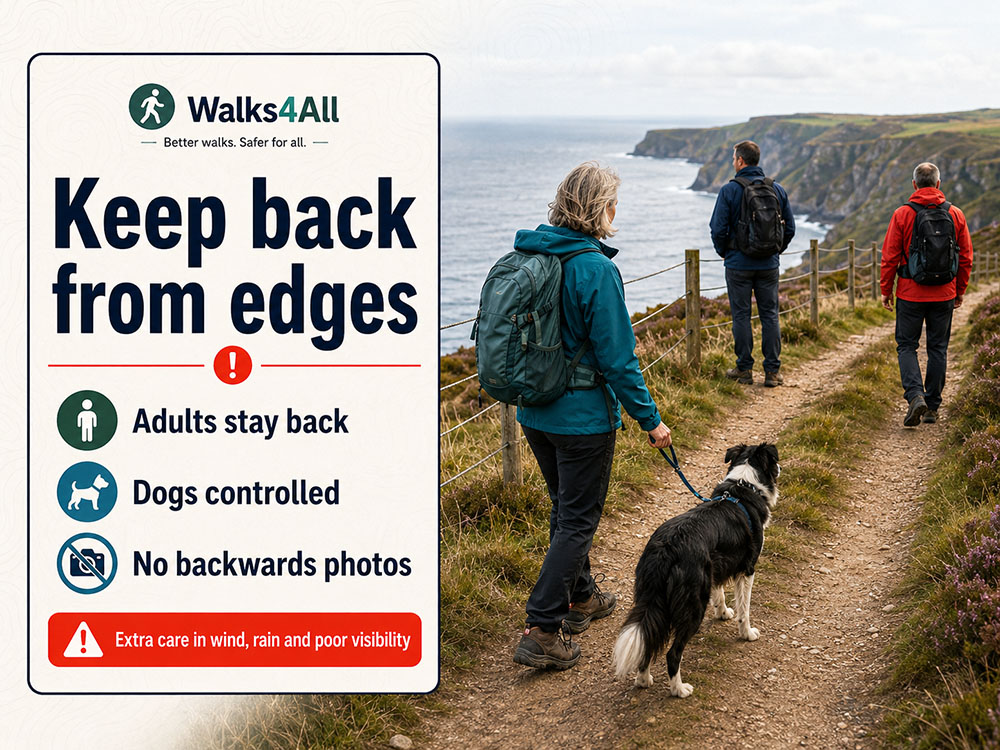
Take extra care near cliffs, steep grass, ridges, quarries and exposed viewpoints, especially in wind, rain or poor visibility.
Do not step backwards for photographs near edges. Keep dogs and children close. Avoid walking near eroded cliff edges, even if the path appears well used.
Most encounters in the countryside are harmless, but animals and insects can pose genuine safety risks.
When around cattle, give them plenty of space, avoid walking between cows and calves, move calmly, do not run unless absolutely necessary, keep dogs under close control, and leave the field by the safest route if you feel threatened.
If cattle or horses threaten you and you have a dog, let go of the lead rather than risk injury while trying to protect the dog. The dog is more likely to get clear if it is not attached to you.
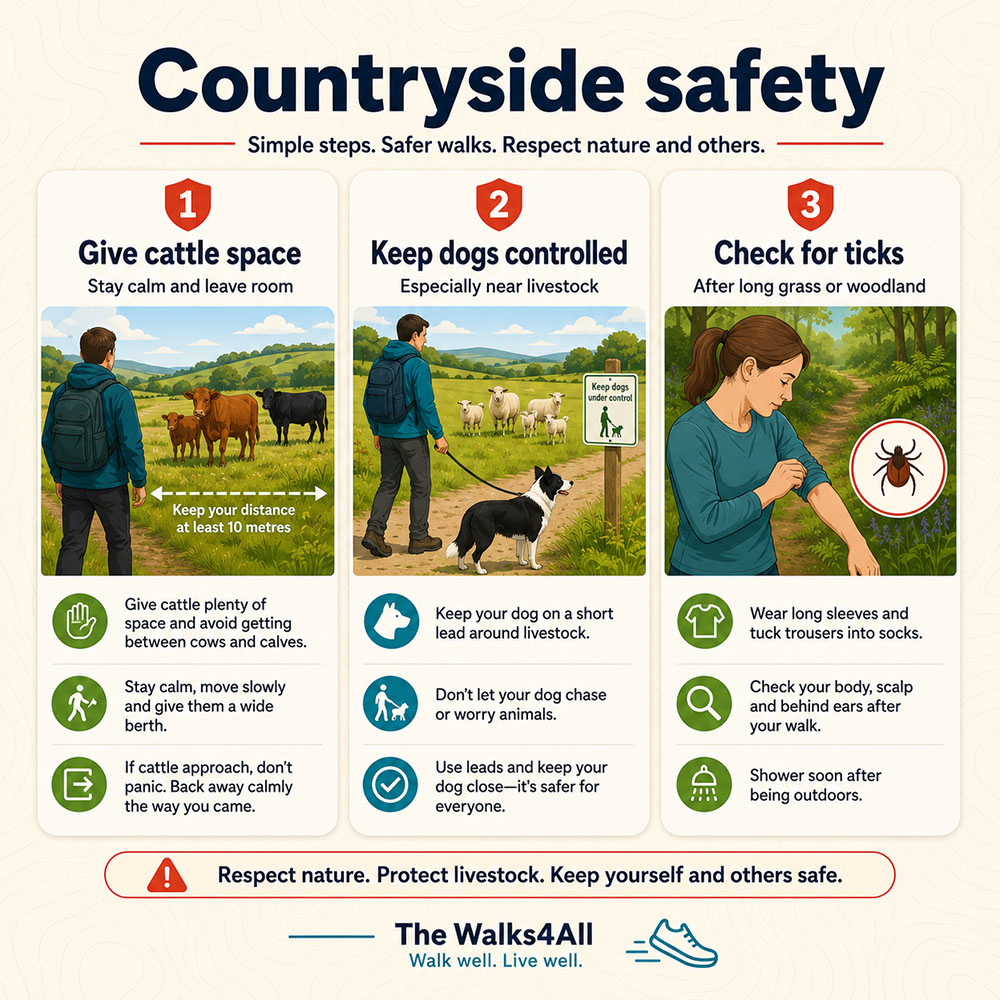
Give livestock space, keep dogs under control and check yourself for ticks after walking through long grass, bracken, heather or woodland.
Ticks are another common walking hazard, particularly in long grass, bracken, heather, woodlands, moorlands, and areas with deer or sheep. Stick to clear paths where possible, avoid brushing against vegetation, cover exposed skin, use insect repellent if appropriate, and check yourself and your dog after the walk.
If you find a tick attached to your skin, remove it as soon as possible using a tick-removal tool or fine-tipped tweezers. Grip it close to the skin and pull steadily upwards without squeezing or crushing it. Then clean the bite area.
Many walking routes include short road sections. Do not switch off just because you are near the end of the walk. Narrow lanes, blind bends, poor visibility and tired walkers can be a risky combination.
Ideally, plan routes to avoid roads. Where that is not possible, use pavements where available, walk in single file on narrow lanes, face oncoming traffic where there is no pavement unless a bend or limited visibility makes the other side safer, and wear bright or reflective clothing in poor light.
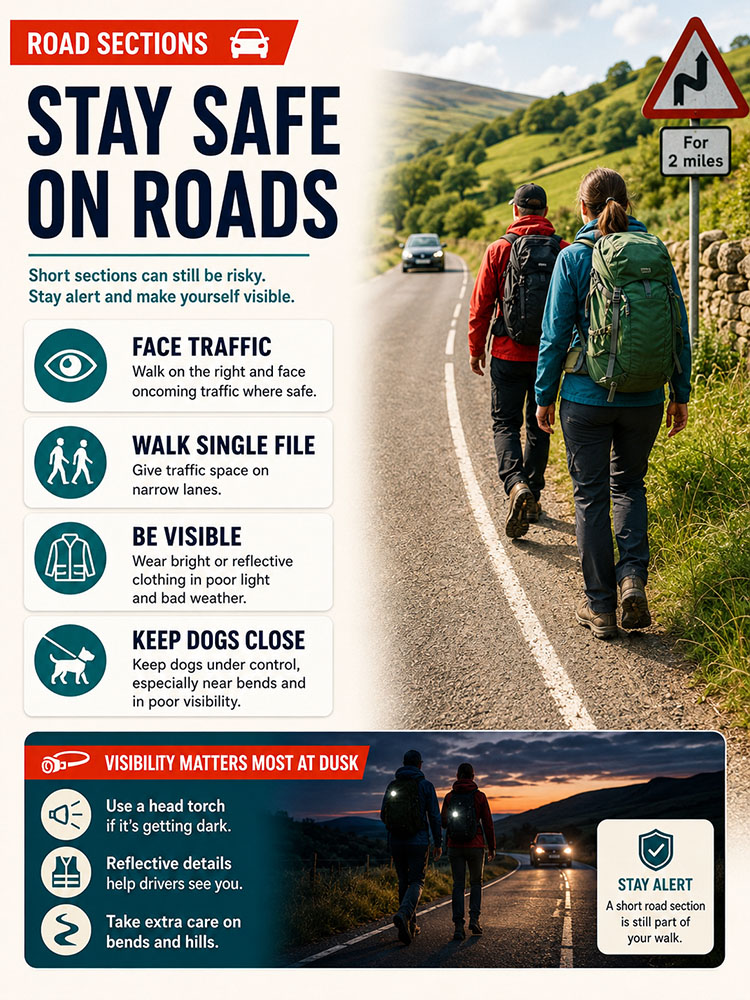
Short road sections can still be risky. Stay alert, make yourself visible, and take extra care near bends, in rain and at dusk.
Use a head torch after dark, keep dogs close, take extra care near car parks, villages and road crossings, and never assume drivers have seen you.
If you think you are lost, stop early. Do not keep walking aimlessly in the hope that the route will become clear.
| STOP step | What to do |
| Stop | Pause, breathe, keep the group together and put on warm layers if needed. |
| Think | When were you last certain of your location? Did you miss a junction, descend the wrong path or cross the wrong stream? |
| Observe | Look for paths, walls, streams, ridges, buildings, woodland edges, summits, roads, pylons or coastlines. Match them to your map. |
| Plan | Relocate carefully if safe. If you are unsure, cold, injured, benighted or unable to continue, call for help. If there are any other walkers around ask them where you are. |
Do not descend unknown steep ground just because going down feels easier. Do not split the group. Do not keep walking until everyone is exhausted.
A group of 3 lads in their early twenties stopped and asked us last June where they were on their map. I pointed out their position on the Snowdon Ranger path, which was on the complete opposite side of Snowdon from where they were aiming - they had come up the Miner's path. As we were not far from the road and I could see how tired they all looked, I advised them to continue down and take a taxi back to their car. All this was in good visibility, so do not be afraid to ask someone where you are. That said, if you have a map and compass, you do need to know how to use them! It also pays to double-check that you are on the right path before descending.
If something goes wrong, keep the plan simple: stop, keep the group together, move away from immediate danger if necessary, put on warm, waterproof layers, shelter from wind, rain or cold ground, treat injuries as best you can, work out your location, and call for help if needed.
To signal for help, use six long blasts on a whistle, or six torch flashes, within one minute. Stop for one minute, then repeat. Continue until help reaches you. Do not stop just because you hear a reply, as your signals may help rescuers determine your direction.
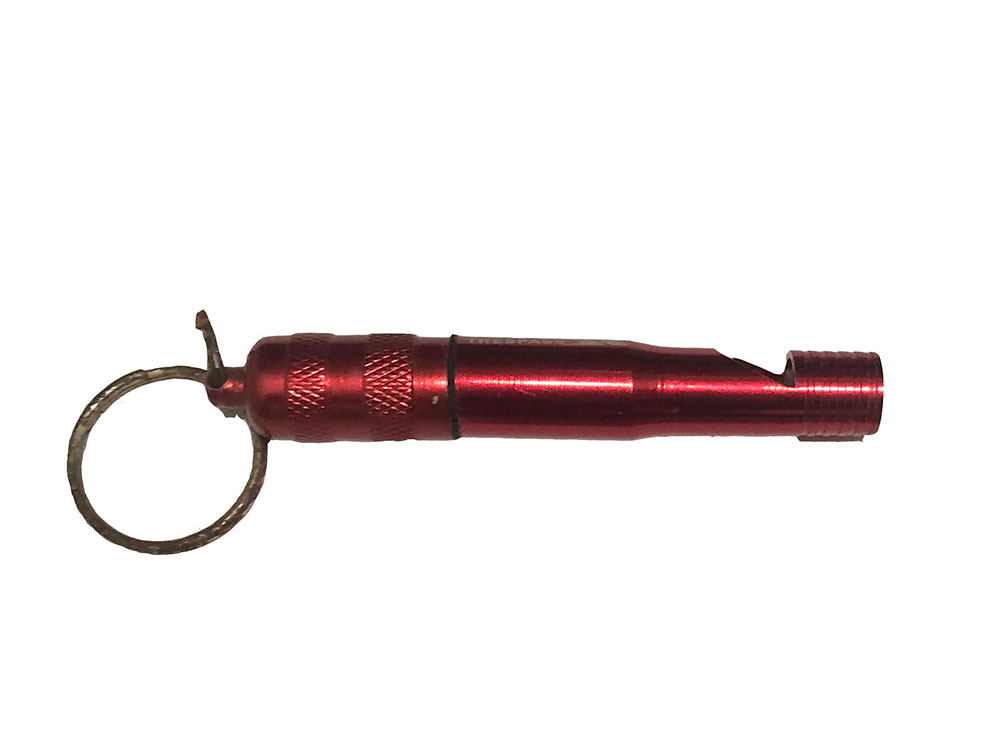
A whistle is small, light and useful for signalling if shouting is not enough or visibility is poor.
For a UK hill or mountain emergency, dial 999 or 112, then ask for Police and request Mountain Rescue. Give your location as clearly as possible, explain what happened, state how many people are in the group, describe any injuries, weather and terrain, and provide your phone number. Conserve your phone battery and stay where you are unless it is unsafe.
For coastal emergencies, contact the Coastguard. If you are waiting for help from Mountain Rescue or the Coastguard, remember that assistance may take time to reach you. Keep everyone warm, dry and calm.
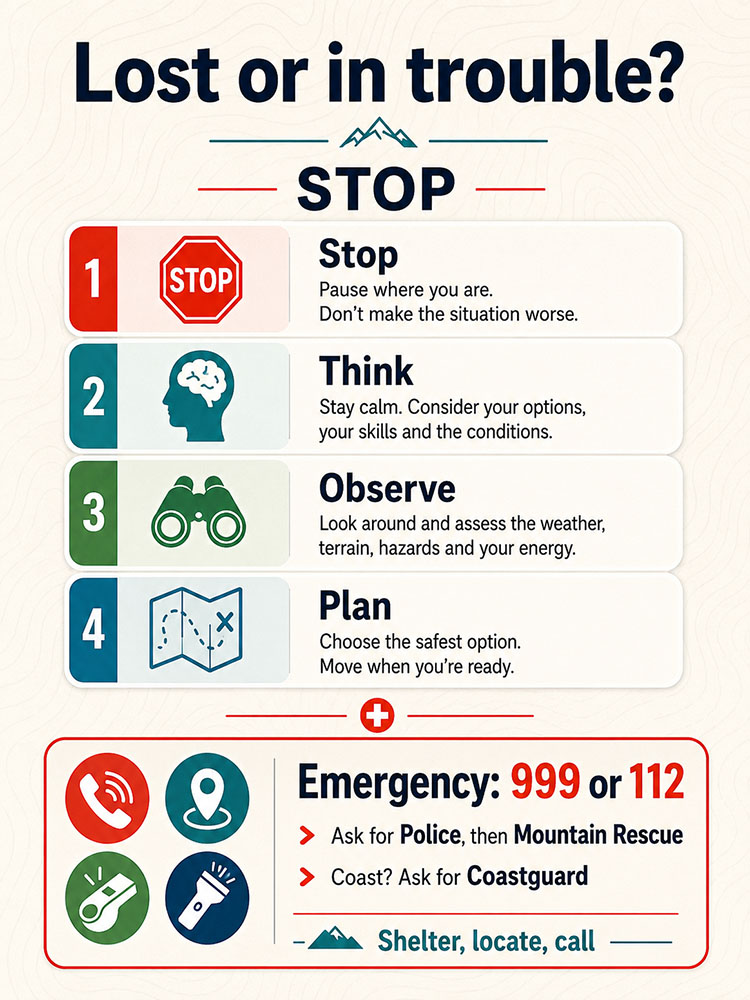
If you are lost, injured, benighted or unable to continue safely, stop, shelter, locate yourself and call 999 or 112 for the appropriate rescue service.
If more than one phone is available, use the phone with the strongest signal and the most battery life. Keep other phones warm, dry and available as backups.
The Countryside Code helps walkers enjoy the outdoors responsibly while respecting land, livestock, wildlife and other people. Before walking in unfamiliar countryside, check local signs and follow access rules, especially near farmland, livestock, dogs, nature reserves and protected habitats.
The Countryside Code reminds walkers to respect other people, protect the natural environment and enjoy the outdoors responsibly.
In simple terms: respect others, protect the natural environment, enjoy the outdoors responsibly, leave gates and property as you find them, keep dogs under effective control, follow local signs and route diversions, take litter home, and give livestock and wildlife plenty of space.
Beginners often run into difficulty because several small mistakes add up. Avoid choosing a route that is too long or too steep, starting too late, ignoring the weather forecast, focusing only on mileage, wearing unsuitable footwear, not carrying waterproofs, relying solely on phone navigation, forgetting food or water, not telling anyone the route, splitting the group, pushing on because you are nearly there, leaving a head torch at home, underestimating the descent, and not turning back early enough.
The most important hiking safety tips are to choose a suitable route, check the weather and ground conditions, carry a navigation and emergency kit, tell someone your plan, start early enough to finish in daylight, keep eating and drinking, and turn back if conditions worsen.
For a day hike, take a map, a compass, a charged phone, an offline route, a power bank, a waterproof jacket, waterproof trousers, a warm layer, food, water, a first-aid kit, a head torch, a whistle, an emergency shelter or survival bag, personal medication, and suitable footwear.
Solo hiking can be safe if you choose a suitable route, tell someone your plan, carry a proper kit, know how to navigate, and avoid unnecessary risks. However, walking alone leaves less margin for error if you are injured, lost, delayed, or unable to call for help.
No. A phone is a useful navigation tool, but it should not be your only method. Phones can lose signal, run out of battery, break or get wet. Carry a paper map and a compass, and know how to use them.
Stop walking, stay calm, keep the group together, put on warm clothing, and try to identify your last known location. Use your map, compass and GPS to reorient. If you are unsure, cold, injured, benighted, or unable to continue safely, call 999 or 112 and ask for Police, then Mountain Rescue.
Dial 999 or 112, ask for Police, then for Mountain Rescue. Be ready to provide your location, route, group size, any injuries, weather conditions and phone number. For coastal emergencies, ask for the Coastguard.
Use six long whistle blasts or six torch flashes in one minute. Stop for one minute, then repeat until help reaches you. Do not stop just because you hear a reply, as your signals can help rescuers locate you.
The amount of water you need depends on distance, temperature, effort, route length and refill options. Carry more water in hot weather, on long climbs, on exposed routes and on walks where safe refill points are uncertain.
Turn back if you are behind schedule, visibility drops, the weather worsens, someone is struggling, daylight is running out, navigation becomes uncertain, a river crossing looks unsafe, or the route feels beyond the group's weakest member's capabilities.
Give cattle plenty of space. Avoid walking between cows and calves. Keep dogs under close control and move calmly. If cattle chase you while you have a dog, let go of the lead so the dog can escape on its own. If you feel threatened, leave the field by the safest route.
Remove the tick as soon as possible using a tick-removal tool or fine-tipped tweezers. Grip it close to the skin and pull it slowly upwards without squeezing or crushing it. Then clean the bite area. Seek medical advice if you develop a rash or become unwell after a tick bite.
Beginner hikers should avoid overambitious routes, poor weather, late starts, relying solely on phone navigation, wearing new boots on long walks, not carrying waterproofs, and pushing on when tired or unsure.
July 2026